Epoxy Resin for Wood – Everything You Need to Know
Wood and resin projects are becoming more and more popular within the world of DIY, as the use of wood with epoxy resin can create spectacular pieces of furniture and art. You can use epoxy resin for wood in a number of ways, such as a clear coating to enhance the appearance of a wooden surface, creating whole pieces of furniture from wood and resin, or using epoxy to fill holes and repair damaged wooden surfaces. This article will take you through the ins and outs of woodworking epoxy, providing you with step-by-step instructions on some great projects to try.
What You Need to Know About Epoxy Resin for Wood
Epoxy resin is a material that is made by combining an epoxy liquid with a suitable hardener. When these two components are combined, a chemical reaction ensues that results in the liquid solution hardening. These two components are known as thermosetting polymers, meaning that when mixed according to a specific ratio under the correct temperatures, they will change from a liquid into a solid.
The hardening process is known as curing, at the end of which the surface will have hardened completely. Cured surfaces are extremely durable, resistant to water, and are scratch-proof.
You will need to prepare the surface properly before applying the resin to ensure proper adherence. You will also need to take care when calculating the mixing ratio and determining your working environment, as epoxy resin is highly sensitive to changes in composition and temperature.
The chemical reaction caused by combining the resin and hardener occurs exothermically, which means that the curing process releases heat. As the resin mixture cures, it will go from a thin, liquid consistency to that of a gel-like state, after which it will harden into a solid. The entire curing process can take anywhere from a few days to more than a week; the exact curing time will depend on a number of factors:
- The surrounding temperature
- The product used
- The amount of heat produced
- The temperature of the epoxy itself
The factor of heat is vital in the curing process of epoxy resin. Thicker layers of epoxy will generate more heat, which in turn will adjust the temperature of the substrate itself. You will need to check the manufacturer’s instructions for the ideal layer thickness and optimal surrounding temperatures. You can also find an estimation of the curing time here.
One may think that a hotter temperature would be better as it would result in a faster curing time, but this is not the case. Temperatures that are too high can cause other parts of the resin to melt and may affect the hardness of the surface and the appearance of the finish.

What is the Best Epoxy Resin for Wood?
There are many different types of resin, each of which may be more suitable for a specific kind of woodworking project. The best epoxy for wood will depend on what you are wanting to achieve with your wood epoxy piece.
Casting Resin
Casting resin is a pourable type of resin with low viscosity, meaning that it has a thin consistency. This type of resin is ideal for pouring into molds and for use in creating jewelry and small figurines. This is the most popular type of resin for creating river tables out of wood and epoxy.
CRAFT RESIN Epoxy Resin Kit
This casting resin kit not only contains the resin and hardener and can be used for coating and casting projects. You can count on a beautiful, crystal-clear glass-like finish over your wooden piece when you use this product.

- Perfect for a wide range of uses making it a versatile choice for hobbyists and professionals alike
- The epoxy resin is crystal clear, UV resistant, and self-leveling, ensuring a smooth, high-gloss finish
- Designed to work seamlessly with mica powder, silicone molds, and alcohol ink, making it ideal for customized and intricate designs
Additionally, the resin is food safe, making it suitable for projects involving surfaces that may come into contact with food. Compatible with mica powder, silicone molds, and alcohol ink, this versatile resin kit opens up endless possibilities for personalized and intricate designs, making it an excellent choice for both hobbyists and professionals.
Pros
- Versatile Use
- High-Quality Finish
- Creative Compatibility
- Non-toxic and food safe
Cons
- Long curing time
- Cost
Laminating Resin
Laminating resin, in contrast to casting resin, has a much higher viscosity. This means that this type of resin is of a thicker consistency, similar to that of honey. This is the best epoxy for wood that needs a protective coating whilst enhancing the appearance of the natural wooden surface.
PRO MARINE SUPPLIES Clear Epoxy Resin Coating
This resin coating is the best choice for showing off any wooden surface. You can apply this clear coating to any of your wooden pieces, its UV-resistant formula making it ideal for use on both indoor and outdoor wooden surfaces.

- Self-leveling and high gloss UV resistant formula
- Produces a tough, water-resistant coating
- Specially designed for use with wood finishes
This resin will flatten and level itself, and once cured will leave behind a durable, glossy finish. This particular product is also resistant to developing amine blush, which is a waxy bi-product that can occur on the surface of some epoxy resins.
Pros
- Self-leveling
- Glossy finish
- UV-resistant
- Resistant to amine blush
Cons
- Coating is not crystal-clear
- Long curing time
Epoxy Paste
This type of epoxy is similar to putty and involves two components that need to be mixed together to form a paste. You can use this paste as an epoxy filler in damaged or broken woodwork, as it is ideal for filling in areas that are hard to replace or repair.
PC PRODUCTS Heavy-Duty Epoxy Adhesive Paste
This two-part epoxy adhesive paste can be used as a glue, a sealant, and a filler for all kinds of projects, such as wooden pieces that are in need of repair. This product can be used to seal cracks and leaks, to fill holes and casting molds, and as a bonding agent to attach two pieces of wood together.

- A multipurpose epoxy adhesive paste
- Strongly bonds with a wide range of materials
- Seals oil, gas, and water tank leaks
This paste must be applied at a temperature range of 35-115 degrees Fahrenheit. You will have approximately one hour of working time with the paste, after which it will require between 12 and 24 hours to cure.
Pros
- Long working time
- Resistant to chemicals, oils, salts, and water
- Can be painted
Cons
- Cannot be used on some plastic surfaces
- Difficult to mix
Important Considerations for Wood and Resin Projects
When working with wood and resin, you need to keep in mind that most woods will adjust in size as a reaction to the surrounding temperature and humidity. Thus, the volume of the wood will change slightly, which can pose an issue for pieces that are bound to epoxy resin. It is therefore imperative that you select an epoxy product that can be used with wood. When selecting the best epoxy for wood, you need to keep the following in mind:
- Choose a low-viscosity resin for wood repairs, as this fluid resin can fill even the smallest gaps and holes.
- Low-viscosity resins are also great for pouring into casting molds.
- Opt for a resin of a medium to high viscosity if you just want to add a clear coating to your wood for protection.
- Take note of whether your epoxy is suitable for indoor or outdoor use, as epoxies meant for outdoor use need to be UV-resistant so as to prevent fading and discoloration.

UV-Resistance
Epoxy resin comes as a clear liquid that can either be colored or used as a clear topcoat. When used as a coating, it is especially important that the epoxy cures as crystal-clear as possible. However, despite the durability of an epoxy resin surface, this material is prone to yellowing and fading when subjected to the sun’s harmful UV rays. Thus, it is important that you select a resin that is formulated with UV-resistance if it is going to be exposed to sunlight.
Shrinkage
Epoxy resin is less prone to shrinkage than polyester resin, although this will depend on the quality of the product used. Resins of a lower quality are more likely to shrink once they have cured, thus revealing empty spaces of exposed surface that had initially been covered. To prevent having to reapply additional layers of epoxy resin for wood, it is best to purchase a top-quality product from the start that is formulated for low shrinkage.
Layer Thickness
You should always pay attention to the product manufacturer’s recommendation when it comes to casting several layers of resin. This is particularly pertinent when casting molds, as the type of resin you choose will determine the thickness of each layer.
Resin layers that are too thick will result in the epoxy overheating, which will cause the epoxy to cure unevenly. Thicker layers also tend to produce more bubbles, as these pockets of air become trapped in the hardening resin before they can reach the surface.
Low-viscosity resins are ideal for casting molds as the thin consistency means that thicker layers can be cast. Most resins require a layer thickness of no more than 2cm, although this will vary according to the type of resin that you use. Before applying a new resin layer, always ensure that the previous layer has dried to the point that it feels tacky to the touch.
Temperature
The curing process is extremely important when working with resin, as it is during this period that the surface will harden. Any interruptions to the curing process will result in an uneven surface, with some areas being soft and permeable whereas others offer the durability and scratch-resistance for which epoxy is renowned.
The surrounding temperature of the resin as well as the resin itself will influence the curing process. Thus, you should always follow the manufacture’s guidelines for the optimum temperature at which to work and cure your resin. Always opt for a resin that is of premium quality if the surface is going to be taking a lot of stress, such as kitchen counters and tabletops.

Woodworking Epoxy Supplies
We have outlined step-by-step tutorials on completing four wood and resin projects, including the sealing of wood with epoxy, filling gaps, casting epoxy, and using resin for repairs.
You will require a number of tools and materials to complete these projects. Below, you will find a list of the most common materials that you will need for individual stages of woodworking epoxy.
Mixing and Pouring the Resin
- Resin and hardener
- Measuring cups or a scale
- Mixing cups and spatulas
- Torch or hot air dryer for removing bubbles
- Professional-grade masking tape
- Spirit level
- Wood of your choice

- Large capacity and accurate measurement
- Made from thick, high-quality materials
- The set includes 50 mixing cups and protective gloves
Making the Mold
- Medium-density fiberboards (MDF boards)
- Screws and screw clamps
- Silicone spray and sealant
- Caulking gun
- Cordless drill
- Power jigsaw

- A unique silicone aerosol spray can
- Offers a protective, lubricant, and low-friction coating
- Safe to use on many different surfaces without creating a mess
Sanding and Polishing
- Orbital sander and orbital sanding paper
- Wet sandpaper
- Polishing machine
- Polishing paste
- Wood oil

- Has a 3.0 AMP motor for smooth and fast sanding
- Variable speed control for various applications
- Easily adjustable front handle for versatility
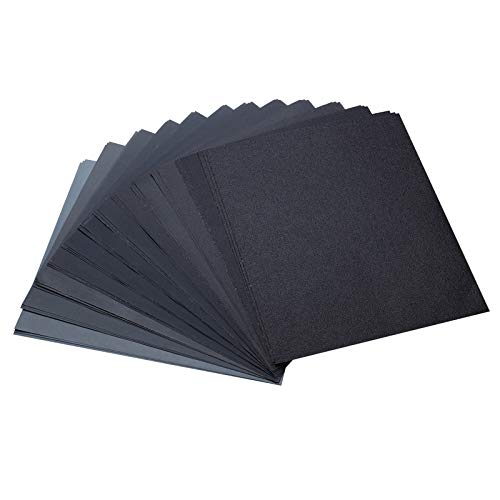
- A full set including 3 sheets each grit
- Made from waterproof silicon carbide
- Multifunctional - suitable for all sorts of arts, crafts, and DIY projects

- A professional-grade pure polish
- Nourishes surfaces with a rich, glossy wet look
- A safe and effective polish on all paint finishes
Tutorial 1: How to Seal Wood with Wood Epoxy
Crystal-clear epoxy resin is a great way of drawing attention to the natural appearance and beauty of the wood. You can use resin to seal the surface or fill gaps so as to protect the wood from moisture as well as to increase its resistance to scratches, abrasions, and other types of damage. You can use resin as a wood sealant for the following types of projects:
- Coating kitchen countertops
- Coatings for wooden tabletops
- Wooden floor coatings
- Cutting boards
- Creating furniture that is a mixture of wood and resin
Using top-quality materials will only get you halfway to a successful end result, as your surrounding working environment plays a large role in the final outcome of your epoxy project. You should aim for an area that is well-ventilated, spacious, and dry. It is best to choose a space indoors to prevent dust or other natural debris from settling on the epoxy surface. We suggest that you store all of the materials you will need (including the wood and epoxy components) at your workspace, as this will allow the materials the opportunity to acclimate to the same temperature.
Tip: Use laminating resins of a medium to high viscosity for sealing your wooden surfaces. These provide a particularly hard and durable surface once cured!

Step-by-Step Instructions on Using Wood Resin as a Coating
Here, you will find detailed directions on how to apply an epoxy resin coating to a wooden surface.
Preparing the Surface
- You will need to prepare the wood surface sufficiently before applying the epoxy to ensure maximum adhesion. To do this, you must sand the surface until it is more or less even but still retains a rough texture. The roughness will encourage adhesion between the wood and resin.
- Clean the surface thoroughly and ensure that it is free of any residues, oils, or waxes. Oily woods such as teak or olive wood can benefit by degreasing their surfaces with acetone.
- Now that the surface is clean, you need to ensure that it is completely dry. This can be done with relative ease by going over the surface slowly and gently with a heat gun or torch.
- Once dry, you can sand the surface again. You can use a random orbital sander for larger surfaces, otherwise, you can sand the wood by hand with a standard piece of sandpaper.
- Remove any dust caused by sanding with a vacuum cleaner or a hand-held brush. You can then use a lint-free cotton cloth that has been dipped in an appropriate solvent to gently wipe the wooden surface. Do not touch the surface with your bare hands after this, as you could leave behind small traces of oily residues that could affect the adhesion of the epoxy to the wood.
Preparing the Resin
- Before you can mix your resin, you will need to create a border around the casting area so that no resin can escape and run down the sides. Thus, you will need to fashion a barrier around the surface of the wood that is to be coated. We recommend using a professional-grade adhesive tape, as if applied properly, it will work to withstand the volume of liquid resin. It is also relatively ease to remove afterward.
- You will also need to level the surface with wooden blocks or similar. You can use a spirit level for this, which is a tool that will tell you how parallel or level a surface is in relation to the earth. You should use the level after the application of each layer to ensure that it remains flat and level at all times. Choosing a self-leveling resin will also help to achieve this.
- You should calculate the exact amount of epoxy resin that you need so as to avoid wastage. It is best to round up your calculation so as to mix a little bit more, as you will not have time to mix more resin once you have begun the casting process. Pay close attention to the manufacturer’s recommended mixing ratio so that you are able to calculate the correct amount.
- Mix the resin liquid and hardener together thoroughly for 3-5 minutes. While it is important to mix the two components together as scrupulously as possible, you should be careful not to create too many bubbles in the process. This is the step during which you can add any desired colored pigments or dyes.
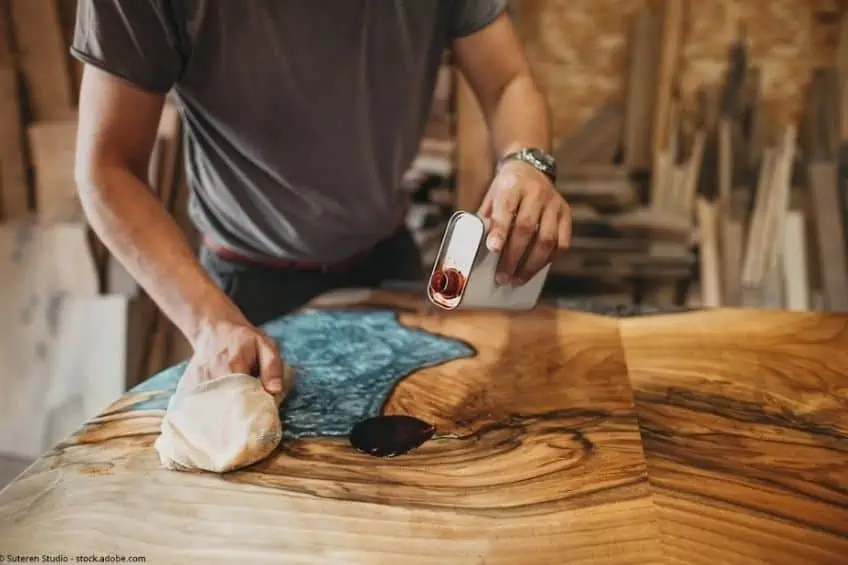
Casting the Resin
- Begin by pouring the first batch of mixture onto the center of the surface in a spiral or zigzag pattern, as this will allow for the epoxy to spread more evenly. You will need to perform a few pours across the piece in order for the epoxy to cover the most surface area. At the end of the pour, level the surface and allow it to sit for a few minutes so that any air bubbles can rise to the surface and escape.
- You will only have a short window of time with which to pour and work with the epoxy before it begins to harden. This period of time will differ according to the type and brand of resin used. The resin mixture will begin hardening the moment the resin and hardener are combined, after which time you can have anywhere from 20 minutes to an hour before the solution enters into an unworkable gel-like state.
Tip: It is best to prepare all of your materials beforehand and to keep them nearby when working with your resin so as not to waste any time.
- Once the epoxy has been cast, the air bubbles should begin to rise to the surface as a result of the exothermic reaction. You can remove the remaining air bubbles yourself by going over the surface with a heat gun or torch. You must take care not to linger on a specific spot for too long and to avoid holding the hot air too close to the surface, as this could cause the epoxy to overheat.
- You should apply subsequent layers once the previous layer has semi-hardened. This will be the case when the surface feels gummy or tacky to the touch. Applying a new layer at this stage will ensure the best adhesion between the two resin layers. If you miss this stage and the resin has hardened entirely before applying the new layer, you will have to sand it down first.
Curing the Resin
- You will need to allow the epoxy coating to cure for a period of 24 to 72 hours. This time frame is contingent on a number of factors, where some resin pieces may take as long as a week to cure properly. You can refer to the product manufacturer’s instructions for an estimate as to the curing time of your resin.
- We suggest covering the surface with a board of a suitable size so as to prevent external contaminants from landing on the curing surface. You can use a board made out of either cardboard or plastic, provided that it covers the epoxy surface entirely without being in direct contact.
Stained Wood and Resin Coatings
You should not have any issues applying a resin coating to a stained wood surface. You can even use epoxy to repair stained wooden pieces. However, it is always best to test the compatibility of the epoxy resin with your stained wood surface before proceeding.
If you have newly stained the wooden surface, you must ensure that the stain has dried completely before applying the resin. After the effort of staining your wood and then applying a layer of epoxy resin as a protective coating, it is likely that you will not want to have to paint the wood again. In addition to selecting a UV-resistant wood stain, we suggest opting for a resin that has been formulated to resist UV damage like fading and yellowing over time.
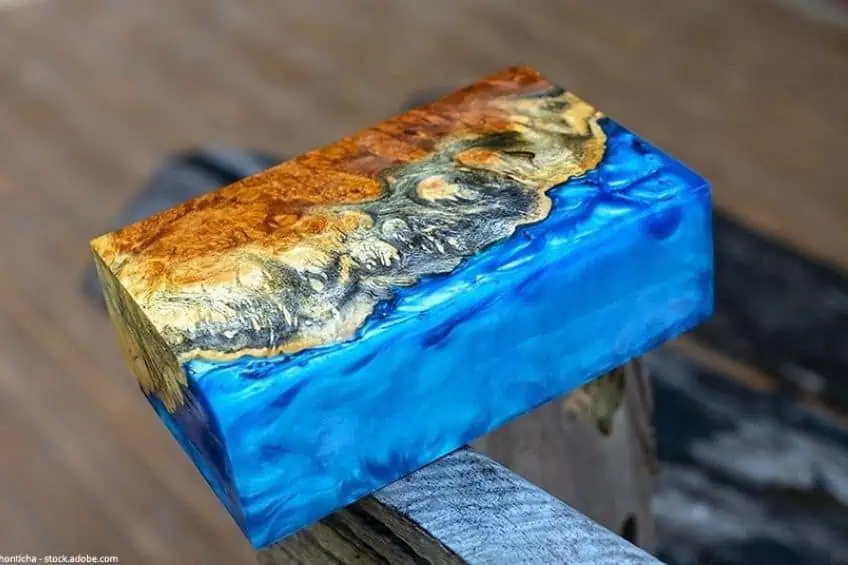
Tutorial 2: How to Cast Wood and Resin
You can perform several different woodworking projects by binding a piece of wood together with epoxy resin, the possibilities for which are almost endless. You can create anything from a decorative piece of art to something more functional.
Casting Mold
- When casting resin, you will require a special kind of mold made out of silicone, of which there are many different shapes and sizes to choose from. These molds are easy to work with, as you will simply need to place your chosen piece of wood inside the mold, after which you will pour in the resin.
- You can also create your own molds out of silicone or by using special boards that have been bound together with screws and sealed with silicone. However, this will require a significant amount of skill and experience.
Pouring the Resin
- Pour your low-viscosity resin evenly into the mold, taking care to adhere to the manufacturer’s instructions for the total thickness of each individual resin layer.
- Ensure that the previous layer has hardened slightly – it should feel somewhat sticky to the touch – before pouring in the next resin layer.
- You may want to include a color pigment, which can be done immediately after you have mixed your two resin components. Ensure that you mix the color thoroughly so as to achieve an even shade.
- For embedding objects, you may find it useful to apply a thin base coating of resin beforehand, as this will prevent heavier items from sinking to the bottom.
- We suggest sealing the wooden parts of your piece with a clear coating of resin. This will protect the wood from becoming damaged later on.
You must allow your resin to cure completely before sanding or polishing it. This usually takes a period of 48 to 72 hours, although this will depend on the resin and its surrounding environment.
Sanding Your Wood Resin
- You may find that once cured, your resin casting has a dull appearance. You can make this surface smooth and glossy by sanding the surface once it has completely cured and hardened.
- Sanding can be a tough process due to the hard surface of the resin. We suggest sanding smaller pieces by hand, whereas larger pieces should be sanded with an electric sander.
- Begin sanding with a coarser grain such as 80 grit, and work your way up slowly to a finer grain, such as 2000 grit. By doing this, the coarse grit will remove the main uneven areas whilst the fine grit removes the marks left behind by the rougher sandpaper.
- Wet sanding will produce especially good results. Using wet sandpaper, you can achieve a smoother finish. Wet sanding also produces less dust, as it gets caught by the water being used instead.
- Ensure that you wear suitable protective gear when sanding. A lot of dust gets released into the air when sanding, which means that you will be likely to inhale these harmful particles if not protected. You should wear a pair of goggles and a respiratory mask to protect yourself from the dust produced from sanding.
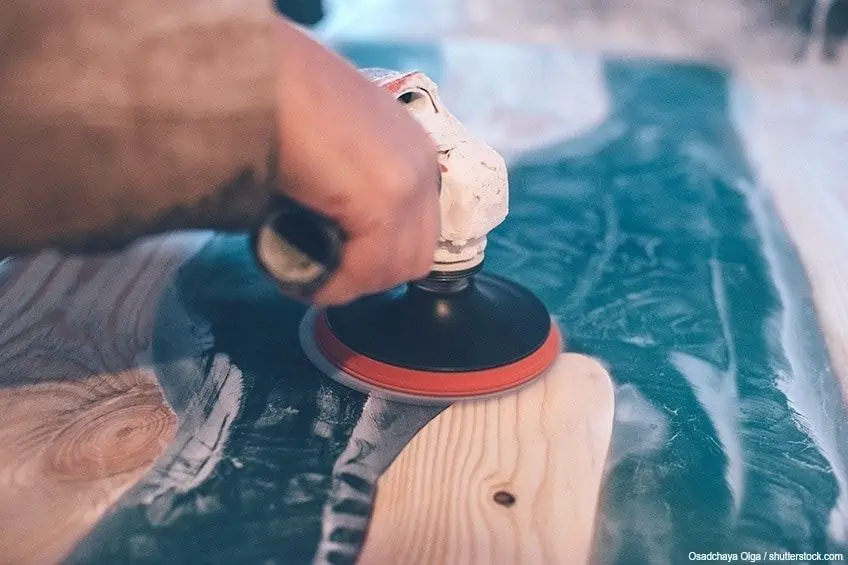
Perfecting Your Finish
- Those looking for a particularly glossy finish should finish off their piece by giving the surface a good polish. You need to be careful when working with wood and resin, as any uncovered or untreated wood should not get exposed to any moisture.
- You can polish most types of wooden surfaces. You will need to do your research as to whether or not your type of wood can withstand polishing.
- You can polish any smaller pieces by hand with a cloth and polishing paste. You simply need to go over the surface with circular movements until you are satisfied.
- We suggest using a polishing machine for larger surfaces. Surfaces such as tabletops or even floors can be polished that much more quickly when using a professional polishing machine. These machines will also produce a much glossier finish than if done by hand.
- Once the surface has been polished, finish it off by applying a good polyurethane lacquer as a coating. You can also use hard wax oil to go over both the wooden and epoxy parts of your finished piece, allowing a few days for the oil to soak into the wood. After this, you can apply more oil as needed to achieve the perfect shine.
- As a final step, you can also apply a carnauba wax (also called Brazil or palm wax) to the piece’s surface, both wood and resin. This wax is one of the hardest natural waxes and will protect the whole piece from becoming damaged. You can apply this wax with a polishing machine or a lambskin pad that has been attached to a drill.
Tutorial 3: Filling Gaps with Wood Resin
Pieces of wood that have a rough grain, are oddly shaped, have lots of knots, or are cracked are ideal candidates for being combined with epoxy resin. You can create a work of art with a lot of character and style by using abnormal pieces of wood and resin. Adding epoxy resin to these wooden pieces will allow you to create an even surface out of the wood for functional purposes, such as with a table or counter.
Incorporating particularly old, weathered pieces of wood such as driftwood into your design can also create a striking aesthetic, as the resin can be used to fill in the wood’s many cracks and gaps. You can follow these instructions to create an interesting piece out of imperfect wood and epoxy resin:
- Remove any dust and loose pieces of bark from the wood. You may want to sand down some areas whilst leaving bark behind in others for a rustic look.
- This kind of wood and resin project requires a lot of preparation. Working with epoxy resin means that you are running on a timer the moment the two components are mixed together. Thus, you should always aim to have everything prepared and within reach by the time you combine the epoxy ingredients.
- You will need a low-viscosity resin for filling in the cracks and holes. The fluid nature of this resin means that it will reach all available cracks and gaps in the wood. Use a good adhesive tape to cover the areas and cracks that you do not want coming into contact with the resin.
- Now you can mix your epoxy resin and hardener. We recommend adding a colored pigment, dye, or ink here to create a particularly striking piece. You must ensure that after mixing your resin and hardener together for a sufficient amount of time, you thoroughly stir in the pigment so as to achieve an even color.
- Mix a bit more resin than necessary to account for shrinkage. After filling in all of the holes, cracks, and cavities of the wood with your resin, you may find upon later inspection that the resin level has shrunk and no longer completely covers the wood. Some epoxy resins may shrink as they harden, which means that you will need to top these areas up with more resin. We suggest mixing extra resin at the beginning to fill in these gaps easily to avoid having to calculate for mixing a small batch of resin later on.
- You should take note of the processing or working time you have with your resin before it begins to harden. The time during which you can work with your resin will vary from product to product. However, this type of project in particular is advantageous in that you can work with many smaller resin quantities in a row as opposed to mixing a bulk amount.
- It is better to have too much resin on your workpiece than too little. As you will have sealed the edges with adhesive tape, you do not have to worry about excess resin running off over the edges. The volume of resin should remain contained within the confines of the tape. You can remove unwanted resin with ease after it has cured by going over the surface with an electric sander.

Tutorial 4: Using Epoxy for Wood Repairs
There are a number of different ways in which a piece of wood can be damaged. This porous material is susceptible to several external factors, which is why it is so important to apply a protective coating to your wooden pieces. Wood can suffer from water damage, mold, and mildew, or simple weathering and general wear-and-tear.
For wood that has become rotten as a result of water damage, you will need to replace the rotten piece with a material that is more water-resistant, such as redwood. A sheet of metal can also be useful to keep moisture-ridden parts separate from the rest of the wood.
In other case, an old coat of paint on wood will begin to peel and age over time, thus no longer preventing moisture from entering the wood. You can fix this simply by stripping the previous coat and applying a fresh coat of paint.
However, some cases may not be as easy to rectify, which is when it is a good idea to introduce epoxy resin to your piece of wood. We have prepared a list of directions to which you can refer when creating an epoxy and wood masterpiece:
Step 1: Remove the Damaged Bits
- Determine the level of damage by using a screwdriver poke and prod at affected areas that appear rotten or damaged. You will need to decide if you want to remove these parts, as otherwise, they will need to be covered with an epoxy consolidant.
- You will need a screwdriver, paint scraper, and chisel to remove any affected parts. It is best to begin by removing any old layers of paint on the wooden surface. As some older paints contain lead, which is toxic, it is advised that you familiarize yourself with safe removal methods.
- If a piece of wood is damaged by has the potential of being saved, allow it to dry sufficiently. You can now take a drill and create a few ¼-inch holes that have been placed 1 inch away from each other over the surface of the wood.
- You can then apply the epoxy consolidant into these holes, which should absorb into the wood and seal it from spreading or receiving further damage. Vertical or upright surfaces would require deeper holes so that the consolidant can reach as much space as possible. If you drilled through the wood by mistake, simply apply putty or clay so as to fasten the end and stop the consolidant from leaking out.
When working with wood and resin, it is important to ensure that your piece of wood is completely dry before applying any resin.

Step 2: Add a Liquid-Based Consolidating Epoxy for Wood
- Using an epoxy consolidant prepares the surface for the application of the epoxy filler. You will need to work in a well-ventilated space and to wear a respirator mask and goggles, as this product tends to produce many fumes.
- We strongly recommend reading through the manufacturer’s instructions a few times so as to have a good understanding of what it is you are doing. It can be quite difficult when working with wood and resin.
- Prepare your mixture as instructed and then squeeze it into the holes you drilled in the previous step. You can use a small brush to help spread the consolidant evenly and easily. Keep doing this until the entire piece has become completely saturated with this liquid.
- Allow the wood to dry completely for a minimum of a week. It is best to keep the wooden surface underneath a plastic or protective sheet so as to prevent it from being affected by weather or contaminants such as dust.
Step 3: Prepare the Epoxy Filler
- The consolidant does not have to have dried completely before applying the epoxy filler. Read the following directions with care, as this process can be complicated.
- Your epoxy filler should come as two separate components, usually labeled “A” and “B”. You will need to take equal parts of both A and B by scooping them out with a wooden stick into a mixing dish.
- Use a putty knife to mix the two components together thoroughly. We suggest that you label both containers as well as the wooden sticks so as to avoid future confusion. Also make sure that your utensils are clean, as any leftover residue from past projects will have an effect on the resin.
- Temperature is vital at this point, as this is what will determine when the filler begins to harden. You will have approximately 30 minutes to work with your resin filler at a temperature of 21 degrees Celsius.
- The warmer it is, the more quickly your resin filler will harden. Thus, we recommend that you work in a shaded area so as to ensure that all of your tools are at a cooled temperature before being used. Once the filler has been applied, you can leave the piece in the sun to allow for faster hardening and curing.
Step 4: Fill in the Gaps
- Use the putty knife to squeeze the epoxy filler into the required areas. You should use a bit of force here to ensure proper bondage between the resin and the wood.
- It can be useful to carve out certain pieces of wood that can then be reaffixed once the filler has been applied. By doing this, you can ensure that the epoxy fills whole areas and is being used effectively. You can apply more paste over these for better results, although you should ensure that the wood pieces being used match the original wood and that the wood grains are aligned when you reattached them.
Step 5: Shape the Filler
- Put on gloves and shape the filler with your fingers. It can be easier to mold the filler if you overfill the holes. This initial shape does not need to be perfect, but must simply adhere to the surface. Allow these filler shapes to harden.
- Once hardened, you can use sandpaper and other tools to sand and file down the surface. You can check the hardness of your epoxy filler by testing to see if you are able to leave a dent.
- You should begin with a rougher sanding down, which can be done by using a surform plane or a rasp file. It is best to follow the natural shape and grain of the wood.
- Add more detail with a piece of sandpaper. You can sand with more precision by folding the sandpaper over a stick or block. Work slowly and carefully to ensure that you only sand the necessary areas.
- Begin with a rougher sandpaper of 80 grit, and then move up to the finer 120–grit piece of sandpaper when you are ready to add details and refine the piece.
- Sanding may remove more epoxy than wanted. If this is the case, you can apply another layer of epoxy filler. However, before you can do this, you will need to ensure that the initial layer is clean of any dust and debris. Mix your filler according to exact proportions.
- For a thinner layer of filler, you can mix some consolidant into the epoxy filler until you have achieved the desired consistency. You can use a heat gun to dry this new layer, after which you can continue sanding.
Tip: Remember to wear protective goggles and a respiratory mask when sanding to protect yourself from any dust or particles that are produced as a result.
Step 6: Prime and Paint
- Before you can apply a coating of paint, you will need to prime the surface of your piece. When the layer of primer has dried, you can add a couple of coats of acrylic paint so as to further seal the surface of your epoxy and wood piece.
- Apply a final protective coating of polyurethane to ensure that your piece is durable and long-lasting. Check the repaired areas annually to see if they require any further work.

Difficulties When Working with Wood and Resin
Although the end-product is highly rewarding, a lot of work is required when working with epoxy resin and wood. There are a number of difficulties that you can encounter when embarking on such a project, so we have highlighted the main problems that you are likely to experience and how to resolve them.
Adhesion to Wood
Epoxy resin is a great material in that it can bind to almost all surfaces. Thinner, low-viscosity resins are more likely to penetrate wooden pieces in a way that the adherence is very strong. Thicker resins, on the other hand, do not saturate the wood as easily and are more suited to forming a coating or top layer instead.
Resin Shrinkage
There is a possibility that your resin will shrink during the curing phase. This tends to be the case with cheaper resins and will result in cracks on the surface and adhesion difficulties between the resin and the wood. We suggest testing how your resin will cure by adding some to a spare piece of wood and watching the reaction. Alternatively, you may need to purchase a more expensive resin of a higher quality.
Porous Wood
Wood is a highly porous material. This means that it has many gaps and fissures through which the resin will pour and sink into if not sealed first. Thus, you should apply a thin layer of your epoxy resin to the wood and allow it to cure and harden before adding any more resin.
Bubbles
Bubbles are a common occurrence and are usually produced when mixing together the resin liquid and hardener components. Some resins are more prone to bubbles than others, although these are easy enough to remove. Once cast, most bubbles should rise to the surface of the resin automatically, although thicker resins and more stubborn bubbles will require you to add heat.
You will need to take a torch or heat gun and go over the surface lightly so as to get the bubbles to rise up to the surface and burst. Do not leave the source of heat over one area for too long a time, as this can cause the resin to melt or become discolored.
Tip: You can also use a toothpick to pop more difficult bubbles. You can even remove stray hairs and dust in this way.
Working Temperature
Epoxy resin is sensitive to both internal and external temperatures. The optimum temperature at which you should work with epoxy resin is at 20 degrees Celsius (68 degrees Fahrenheit) with a low level of humidity. The exact temperature at which you should work with a particular resin will depend on the manufacturer, so ensure that you read all directions beforehand. Working at this temperature will result in the resin curing optimally, although you must ensure that this temperature remains constant throughout the curing process.
Curing Time
The curing time is directly affected by the temperature of the resin as well as its ambient temperature. Generally, a resin will cure more quickly if it is mixed into a greater quantity, which means that you can control the curing time by splitting the mixture and casting it at different intervals.
The thickness of your resin layers is also important, as thicker layers will result in the resin producing more heat, thus speeding up the curing process. It is best to pour thinner layers, as you can ensure that these will not overheat and will cure properly. Once each layer has hardened, you can apply the next until you have achieved your desired surface thickness.
Cloudy Finish
Sometimes, the resin can cure to produce a cloudy finish. This may be due to a low-quality resin, using the wrong mixing ratio, or a result of the resin being old and expired when it was used.
Yellowing
Resin is prone to fading and discoloration when exposed to sunlight, as the sun’s UV rays can cause the resin to develop a yellow hue. You will want your transparent resin to remain as crystal-clear as possible, so it is best to use a UV-protected resin, especially if it is going to come into contact with sunlight. Colored resin is less likely to yellow as it is more resistant to the sun’s UV rays, and any yellowing that does occur will not be visible through the resin color.
Storing Unused Epoxy Resin
Unmixed epoxy resin tends to have a shelf-life of approximately 12 months, which is quite short in relation to other products. Thus, it is important that you pay attention to the production and expiration dates of your product. Store your resin at a constant temperature range of 10 to 30 degrees Celsius (50 to 86 degrees Fahrenheit) for maintaining the quality of the product.
Food Safety
Epoxy resin becomes chemically neutralized once it has cured completely, thus making it suitable for use with food. Some resin manufacturers go to the trouble of becoming food-safe officially, but this certification is expensive and not many choose to do so.
Health Safety
Epoxy resin can be quite toxic in its liquid state. You should always work with this material in a room that is airy and well-ventilated. You must make sure that you wear a pair of unused nitrile gloves, protective goggles, and a suitable respiratory mask to protect yourself when working with resin.
We hope that after reading this article, you now have a good understanding of epoxy resin and the best ways in which you can work with it. Any epoxy resin project is within your grasp provided that you take the necessary steps. We wish you the best of luck in your epoxy endeavors!


