Best Casting Resin – All You Need to Know About Casting Resin
The best casting resin can be used for a wide variety of projects, as epoxy resin is an extremely versatile material. Indeed, creating a piece of art out of epoxy resin can be a highly rewarding experience. All you need to do to begin working on an epoxy resin project is to purchase the correct products and tools. We have outlined our top picks and have put together important information that will help to guide you in creating your epoxy piece of art.
What is Casting Resin?
There are two main types of epoxy resin: casting and laminating. Casting epoxy has a much lower viscosity than its laminate counterpart, meaning that its consistency is thinner and can therefore be poured with great ease. Thus, this type of resin is ideal for pouring into molds, as the fluidity of the liquid allows it to reach and fill small gaps and holes.
Epoxy resin is composed of two parts: a liquid resin and a suitable hardener, also in liquid form. Once these two liquids have been mixed together, a chemical reaction will begin to take place that results in the solution hardening into a solid over a designated period of time. This reaction begins the moment the two liquids have been mixed and will produce a certain amount of heat as a result.
The low viscosity of this resin means that it takes much longer to harden. You will have more time to process and work with the resin in its liquid state, but it will take several hours before the surface is dry to the touch, and a few days for the resin to cure into a completely hardened substance.

You Can Use Epoxy Casting Resin for the Following Projects:
- Creating decorative tabletops and countertops
- Making resin jewelry
- Casting resin figures and shapes in molds made out of silicone
- Filling hard-to-reach gaps and cracks
Buying the Best Casting Resin
The huge variety of resin products can make selecting the right brand an overwhelming experience. We have selected the leading product on the market that will work best for your particular project and needs!
FGCI Deep Pour Epoxy Resin Kit
This epoxy resin casting kit offers a premium-quality product that produces a resin finish so clear that it can be described as “liquid glass”. You can cover up to 2-4 inches with just one pour of this product. Your resin is unlikely to develop too many bubbles due to this product’s bubble-releasing properties.

- High-quality, crystal clear Castin Resin from FGCI
- Pour 2 – 4 inches thick forms
- Perfect for Epoxy Tables and deep Resin molds
This resin is more resistant to UV light and yellowing than others, meaning that the finish will remain as clear as crystal for longer. You will be able to add colorants such as powdered pigments, liquid paints, and alcohol inks to this resin with ease.
Pros
- Bubble-releasing attributes
- UV-resistant
- More durable and heat-resistant
- Long-lasting crystal-clear finish
- Deep pours
Cons
- Slow to cure
- Expensive
Casting Resin vs Laminating Resin
There are some key differences between casting or low-viscosity resin and laminating or high-viscosity resin. Understanding these differences will help you to decide on which type of epoxy is best for your project.

Casting Resin
- Low viscosity (thin consistency)
- Longer processing and curing times
- Can cast thicker layers
- Colors can be mixed in easily
- Easy to pour
Laminating Resin
- Medium to high viscosity (thicker, honey-like consistency)
- Much shorter curing time and relatively short processing time
- Individual layers cannot be thicker than 2cm
- Greater distinction between color layers due to thicker consistency
- Best for sealing surfaces as a protective layer
Factors to Consider When Casting Epoxy
Before you can decide on a resin product, you need to take a number of factors into account. The maximum thickness of each layer, curing time, transparency, and durability of the resin will influence the final look and outcome of your piece.
Layer Thickness
During the curing process of epoxy resin, the chemical reaction that takes place releases a certain amount of heat. Casting resins have a thinner consistency than laminating resins, meaning that they take longer to cure. However, the long curing process allows for the radiation of heat to take place over a longer period of time. As a result, you can cast much thicker resin layers of up to 10cm at a time.
In general, you should be able to process up to approximately 10kg of epoxy resin per casting cycle. It is important to consult your product’s manual to find specific values with regard to layer thicknesses and curing times.
Epoxy resin is highly sensitive to temperature, and the heat it gives off during the curing process can cause a lot of trouble if not at a suitable temperature. Layers that are too thick are more likely to overheat, which can result in curing issues and a decrease in the quality of the resin. You are also more likely to burn yourself and may become exposed to harmful fumes. Thus, you should always make sure that you are wearing the right protective gear when working with resin.
Curing Time
The curing time of epoxy resin refers to the duration of time needed for the resin to completely harden. This period can take anywhere from 72 hours to as long as a week. However, a longer curing time also means that you will have more time to process and work with the resin while it is still in its liquid state.
There are many advantages to having a longer processing time. Firstly, you will not have to stress about applying the resin in time and will be able to work more carefully. You will be able to add many different colors to larger resin quantities without feeling pressed for time. The longer processing time also allows for more air bubbles to escape from the surface.
While you may require a little more patience when working with casting resin, you will find the longer processing time allows you to get more work done whilst operating at a more relaxed pace.

Transparency
Both components required to make resin are sold as clear liquids, and once combined will cure into a crystal-clear solid. While some people like to add colorants to their clear casting resin, others like to use transparent resin as a clear coating to emphasize and protect the surface underneath. Resin can be prone to developing a yellowish hue over time, however. You can try to prevent this discoloration and maintain a crystal-clear finish in the following ways:
- Use high-quality products from well-known brands
- Choose resins with built-in UV filters
- Ensure a correct mixing ratio
- Apply a UV-protected external varnish
- Briefly polish the resin surface to increase transparency
Durability
Epoxy resin surfaces are renowned for their durability and resistance to wear and tear. While laminating resins have been found to be stronger than casting resins in this regard, this does not mean that epoxy resin casting surfaces are not durable. In fact, this softer surface allows for more adaptation in terms of the material onto which it has been cast.
For example, casting resins may be more suitable for materials like wood, as it expands and shrinks in response to temperature and humidity. Thus, this resin will adapt to the changes in the wood. On the other hand, laminating resins may be more appropriate for tables and other surfaces frequently exposed to mechanical stress, as this kind of resin is harder and more resistant to scratches and marks. You can also apply a coating of laminating resin over a fully cured casting resin surface to improve its durability.

How to Use Epoxy Casting Resin
Epoxy resin can be a finicky substance to work with, especially if you are new to casting epoxy resin. We have laid out the steps you need to follow in order to succeed in creating your epoxy resin casting project.
Safety Measures
- Epoxy resin tends to produce toxic fumes while you work with it. In order to protect yourself, you must ensure that you take the appropriate safety measures.
- Ensure that your workspace is properly ventilated and that you are wearing the following protective gear: unused nitrile gloves, protective goggles, and a filtered breathing mask.
Preparation
- Gather together all of the tools and materials you will need so that they are all within easy reach. This will be particularly useful as you only have a limited amount of time to work with your resin mixture.
- Protect your surrounding environment. Lay out sheets of cardboard or plastic to protect nearby floors and surfaces.
- Ensure that you cover all holes and hollow spaces in materials such as wood before applying the resin. If you do not mask off these areas, the fluid resin will likely flow to unwanted spots and can even leak out of the wood.
- Thoroughly clean and lightly sand the surface if necessary. You want a clean surface that will adhere to the resin without any issues.
- We recommend that you first seal your piece with a thin layer of laminating resin. This is especially useful for porous surfaces such as wood, as it will stop the resin from reaching any unwanted areas.
Mixing
- Carefully measure the correct quantities of liquid resin to hardener according to the mixing ratio specified by the manufacturer. It is vital that the mixing ratio is precise so that your epoxy resin is able to cure properly.
- Stir together the two resin components in a container for 3-5 minutes. The resin liquid and hardener should be stirred thoroughly and carefully, as this process can cause bubbles to develop.
- If you want to add color to your transparent resin, you can now add in the appropriate pigments. Ensure that you stir your pigment into the resin mixture thoroughly. Only some types of color are suitable for resin, so make sure that you are using the right kind of colorant.
- Leave the mixture to stand for a short while to allow the air bubbles to escape. The low viscosity of casting resin means that air bubbles can rise and escape from the surface with ease.
- Pour your resin into the desired mold or structure. Ensure that you pour the liquid evenly and carefully. You can pour thicker layers using this type of resin, but a single layer should never exceed a thickness of 10cm.
- You can remove the remaining air bubbles with a torch or hairdryer. Do not hold the device too close to the resin, however, as the hot air can cause the resin to warp or may create problems in the curing process.
Casting Objects
- When embedding objects into your resin casting, you will first need to pour a thin layer of resin into the mold as a coating. This will also stop objects from sinking to the bottom. Ensure that this first layer has dried sufficiently before adding heavier items.
- You can now place any desired objects onto this initial layer. You can embed almost anything in epoxy resin, from small stones and shells to feathers, flowers, and many others.
- Fill the rest of your mold with the casting resin. Pour a generous amount into the mold so as to make up for the shrinkage that can occur in some products during the curing phase.
Curing
- Low-viscosity resin takes a long time to cure. You can find exact curing times in the manufacturer’s information on your particular product, although you can expect to wait for a minimum of 72 hours for your resin to cure and harden properly.
- Once your piece has cured, you can sand and polish it to give it a smooth, glossy finish. You may also find it useful to add a final coating of resin or even varnish to protect your resin masterpiece.

Adding Color to Clear Casting Resin
You can add color to both casting and laminating resin by adding a colorant to the mixture. These coloring agents include colorants such as powdered pigments, liquid paints, pigmented pastes, alcohol-based inks, and specialized resin dyes.
Casting resin is ideal for mixing in a colorant due to its low viscosity, meaning that the consistency of the fluid is much thinner than that of laminating resin. Thus, different colored resin layers may mix together more easily if not dried. This can cause a problem when creating resin art but can be remedied simply by keeping the individual colors separate.
You will need to do your research before selecting a colorant for your transparent resin, as some pigment types can disturb the curing process of the resin and may leave behind unsightly marks. You should avoid water-based pigments so as not to upset the sensitive mixing ratio of the liquid resin and hardener. It is best to select pigments with highly-concentrated colors, as you will only need a small amount to achieve a rich color, which will have less of an effect on the mixture’s ratio.
We recommend the following high-quality colorant products to add color to your resin. We have included both a premium and budget-friendly option for each type of colorant, although all of the following products are of a high quality.
Resin Dyes
These pigmented dyes have been specially formulated with a prepolymer component so as to be highly compatible with polymer-based epoxy resins. Resin dyes can be mixed into your epoxy mixture with the greatest ease, ensuring a rich and even color.
Premium Choice: DECOROM Epoxy Resin UV Resin Dye
This top-quality brand offers a set of highly-concentrated translucent pigmented dyes, each of which can be blended together to create your own unique colors.
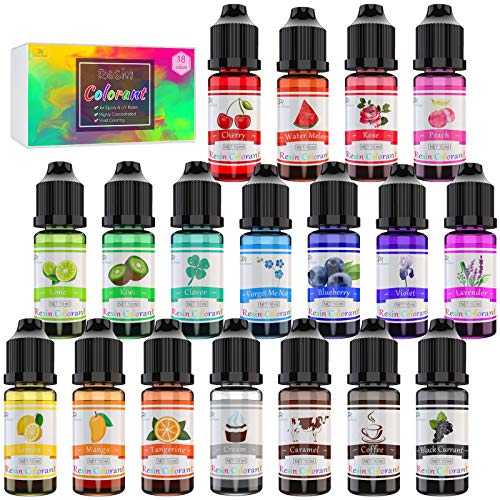
- An 18 assorted color pigment set
- High concentration of UV resin color pigment
- Ready and easy to use (no preparation required)
This set of UV resin pigments is easy to use and doesn’t require any preparation. A great choice for anyone that wants to just get started.
Pros
- Selection of 18 colors
- A small amount goes very far
- Non-toxic and cruelty-free
- Easy to use
Cons
- White color is more creamy than translucent
- More dye is required for darker colors
Alcohol-Based Inks
You should always opt for inks with an alcohol base as opposed to a water base when choosing a color for your epoxy. These inks contain a high concentration of pigment, meaning that you will need just a small amount to create a beautiful, wide-spreading color. These inks are not ideal for use on outdoor pieces, as exposure to the sun’s UV rays will cause the color to change or fade.
Budget-Friendly: LET’S RESIN Alcohol Ink Set
This is a popular brand of alcohol-based ink, particularly as this particular product is formulated to allow for more precise coloring. Where many other alcohol inks will spread once added to the resin, this highly-concentrated ink is thicker than others, meaning that it does not spread as easily.
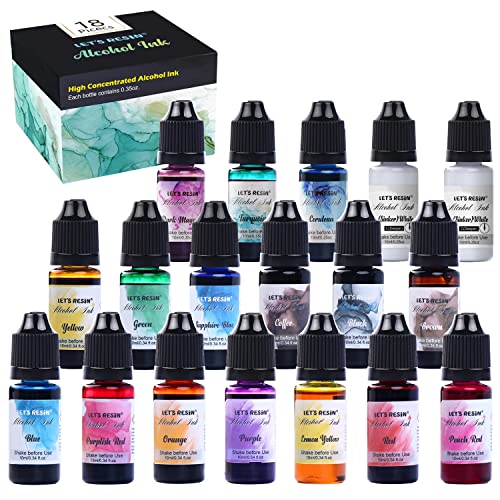
- Intense Alcohol Inks from Let's Resin
- High concentrated, very vibrant colors
- Suitable for Resin and for all Alcohol Ink Techniques
These vibrant colors are suitable for a variety of projects, although they cannot be used with UV resin.
Pros
- Precise coloring
- Highly concentrated colors
- Easy to use
Cons
- Not suitable for UV resin
Premium Choice: RANGER Tim Holtz Adirondack Alcohol Inks
These premium, top-quality alcohol inks come in a set of 24 themed colors. You will find eight individual themed color sets, each of which contains three vibrant colors.
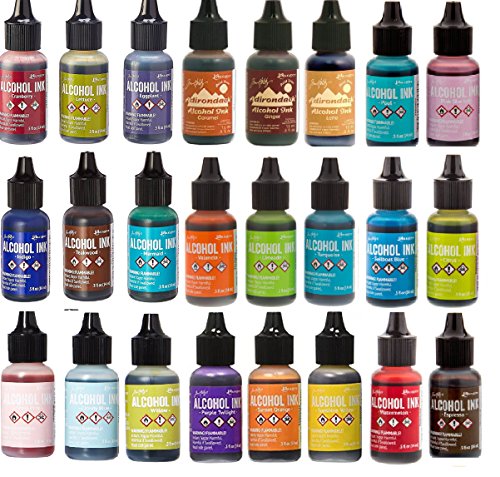
- A popular set of 24 different alcohol ink colors
- Alcohol ink from Tim Holtz is well known for its very high quality
- Suitable for resin and alcohol ink painting techniques
Your resin surface will dry to reveal a vibrant and polished stone-like finish.
Pros
- Wide variety of colors
- Acid-free
- Polished, stone-like finish
Cons
- Not ideal for use on wood or other porous surfaces
- Some similar colors
Airbrush Paint
Airbrush paints may not be one’s first choice when selecting a colorant for epoxy resin, as this type of paint is used primarily on art and design pieces. However, these paints tend to be of a low-viscosity, meaning that they will mix well with the resin. We suggest that you choose a product with a high color concentration so as to get the best results.
Budget-Friendly: U.S. ART SUPPLY Acrylic Airbrush Paint Set
This airbrush paint set comes with a selection of 12 opaque colors in addition to an airbrush cleaner and a reducer and extender base. You can also find pearlescent and fluorescent airbrush colors from this brand.

- A set of 12 opaque primary colors
- The paints are ready to spray for airbrushes
- Designed for permanent results on most surface types
The colors are made from an acrylic resin of high quality and possess lightfast properties.
Pros
- Lightfast
- Set comes with a necessary equipment
- Non-toxic
Cons
- Paint may need to be thinned before use
Premium Choice: VALLEJO Metallic Air Paint Set
This premium product offers a select range of metallic air paint colors. This low-viscosity airbrush paint is easy to use and mix into your resin solution.

- Finely ground pigments for airbrushing
- can be easily mixed and diluted with water
- A multicolor set in 17ml bottles
These premium paints offer a wide range of colors – making them the ideal solution for all kinds of projects.
Pros
- Colors can be mixed or diluted
- Long shelf-life
- Pre-thinned
Cons
- Small bottle size
Pigmented Powders
Pigmented powders are a popular choice for coloring epoxy due to the wide range of colors and effects that can be achieved. You can purchase powders in colors that are matte and basic, metallic, pearlescent, glittery, or even glow-in-the-dark! Opt for products of high quality to ensure that the color will not fade when exposed to sunlight. Powders do not dissolve entirely when mixed into a resin solution, resulting in a grainy finish that many find to be quite stylish and attractive.
Budget-Friendly: LET’S RESIN Mica Powder
The LET’S RESIN 50 Color Mica Powder set offers vibrant powdered pigments perfect for enhancing resin crafts, soaps, candles, slime, and bath bombs.

- Includes 50 vibrant and shimmering colors
- The powdered dye pigments are made from high-quality mica, ensuring rich, saturated colors
- Ideal for a variety of applications
This product provides a versatile and high-quality selection of pearl pigments, ideal for adding a stunning, colorful finish to your creative projects.
Pros
- Wide selection of vibrant colors
- High-Quality Pigments
- Versatile Use
Cons
- Messy to open due to the small packet sizes
Premium Choice: LET’S RESIN Chameleon Color Shift Mica Powder
You will have the widest variety of colors when using this premium-quality set of 10 vibrant color changing colors. This powder is made from vegan, cosmetic-grade mica powder and changes color depending on the angle it is viewed from. So your resin objects will have a dynamic color display that is ideal for epoxy jewelry.
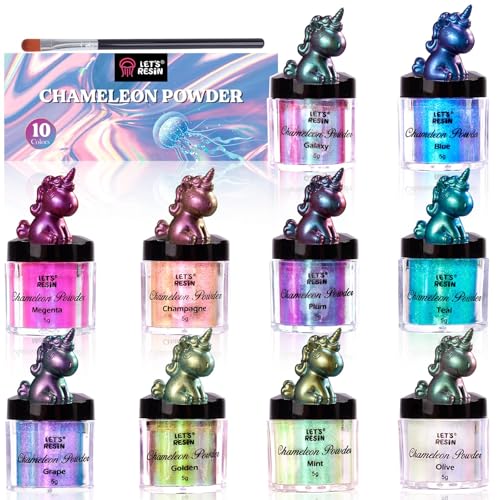
- A 10 color set of highly color saturated mica pigment powder
- Pigment changes color depending on the angle it is viewed
- Cosmetic-grade, non-toxic, vegan, and washable if used on fabrics
These powders are packaged in easy to use clear jars that allow you to see the color change effect before you use the powder in your project.
Pros
- Natural, vegan, non-toxic mica powder
- Shifting colors show depth and dynamism in motion
- A small amount goes a long way
- Easy to use with clear resealable jars
Cons
- A thicker consistency of powder
- The amount of pigment needed for each color may vary
Preventing Bubbles in Your Epoxy Casting Resin
Both casting and laminating resins are prone to developing small pockets of air that becomes trapped beneath the resin surface. These bubbles tend to rise and escape relatively easily in casting resin due to its thin consistency, although this type of resin tends to be poured into thicker layers, making it harder for the bubbles to escape. However, as this kind of resin has a much longer processing and curing time, there will be plenty of time for these bubbles to rise up through the layers and in time reach the surface.
In order to prevent these bubbles from forming in your resin mixture, it is best to seal porous materials like wood with a thin coating of resin. This is because air is able to move through these materials with ease, and may penetrate through the wood into the resin mixture, causing bubbles to form. Sealing the surface will block any air from entering the resin once it has been cast.

Frequently Asked Questions
How Can I Accurately Measure and Weigh My Epoxy Resin?
The two components that make up epoxy resin have to be mixed according a very specific mixing ratio in order for it to cure and harden correctly. You can find the suggested mixing ratio in the manufacturer’s directions for your particular product. We suggest using a digital scale for measuring out your resin and hardener quantities. In cases where the liquids need to be measured out according to volume, you can use a measuring cup.
What is the Best Casting Resin Mold?
The best kind of mold to use for your casting resin is one made out of polished silicon. Using these molds will make the process of removing your resin piece that much easier, as the surface of the mold is smooth and not sticky.
How Long Does Casting Epoxy Take to Harden?
The curing process involves a number of stages that will result in your resin item being completely hard. An incorrect mixing ratio or the addition of too much color can affect the curing time. The resin will begin to cure the moment its two individual components have been mixed together. After this, the resin will go from a liquid consistency to that of a soft gel within 15-20 minutes, after which this gel will firm up further within the next half an hour. The surface of the resin should be hard to the touch within approximately 24 hours, although it can take between 72 hours to a week for it to cure completely.
Is Resin Safe to Work With?
All kinds of epoxy resin, both transparent and colored, are completely safe for use once having been completely cured. Whilst in its liquid state, however, this material can produce toxic fumes and may damage the skin. Thus, you should always make sure that you are wearing protective goggles, brand new nitrile gloves, and a suitable breathing mask when working with this material. You should also ensure that you choose a workspace that is well-ventilated.
Using casting resin allows you to achieve all kinds of different results. The casting technique is perfect for a wide range of applications, and it is a great skill for any avid crafter to know. We hope that the guide above has inspired you to get out and start doing some resin casting!