How to Etch Glass – Best Glass Etching Equipment
Make your own high-end-looking presents at a fraction of the price! For their birthday, try etching your friend’s initials onto a wine glass, or an encouraging phrase onto a serving bowl or maybe even a mirror. Glass etching is a fun DIY activity that also serves as a permanent method to customize glasses. Etched glass is both safe for use in a dishwasher and long-lasting, and the technique of etching glass is now simpler than before thanks to modern vinyl etching equipment. This guide will demonstrate how to etch glass and expose you to the best glass etching stencils and supplies. Etched Glasses DIY projects have never been more fun or simple!
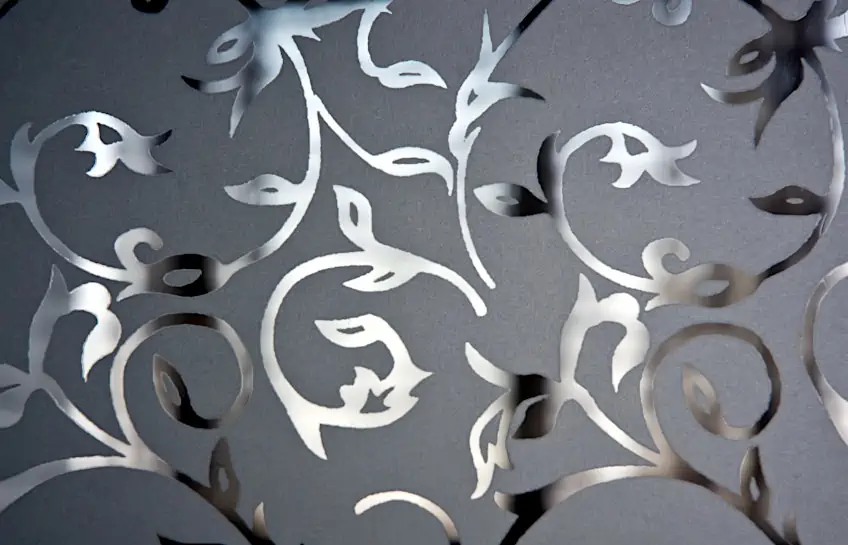
How Does Glass Etching Work?
Glass etching, also known as French embossing, has been around since the 18th century. The procedure entails chemically removing a thin layer of glass from the top of the glass. The sections of the glass that you don’t want to be damaged by the chemical are protected with a mask. The design etched on the surface will be determined by the form or style of the mask. These are known as glass etching stencils. Other techniques for etching glass include chemical etching and sandblasting, although they may be difficult to master, particularly if you have no prior expertise.

A glass etching cream is used in the process of glass etching that you will be examining. Sodium fluoride and Hydrogen fluoride are substances found in glass etching creams. When working with these chemicals, it’s crucial to put on the proper protective gear because they can be hazardous to your body. There are several advantages to using glass etching stencils rather than utilizing other techniques such as markers or stickers. Below is a summary of benefits and drawbacks to help you determine if glass etching is the best option for your specific project.
- Robust
- Withstands abrasive wear, high temperatures, chemicals, and dish soap
- A simple approach to make high-end items
- Customizable
- It is irreversible and cannot be removed
- It has the potential to weaken glassware to some extent
- Glass etching creams include a lot of strong chemicals in them
Essentials for Etching Glass
Before we get started on how to etch glass, there are a handful of things you should contemplate getting. You might be able to do without costly vinyl cutting equipment, but you’ll need glass etching cream to finish the task. You can learn more about the finest glass etching cream, as well as some additional goods that will help you get started etching glass, in the sections below. We’ll also check out how to etch glass with a Cricut later!

Learning How to Etch Glass With Cricut
The steps below will walk you through the procedure of etching glass, whether you wish to learn wine glass etching, or etching mirrors or windows. It is crucial to remember, however, that certain pyrex glass will not etch adequately since it has been strained at a high temperature, which can make it more resistant to glass etching cream. If it is your very first time etching glass, you should probably start with a tiny, flattened section of glass. For beginners, etching curved things such as wine glasses might be challenging.

In this section, we’ll look into etching glass with a vinyl glass etching stencil and a Cricut plotter. If you don’t have one of these stencils, you can still etch glass with a homemade stencil. This will necessitate the use of a hobby blade to carve out your image. If this sounds like too much labor, art supply stores sell pre-cut vinyl stencils that are as easy to apply as peel and stick. All of the examples above are suitable glass etching stencils. Let’s examine some of the materials you’ll require for etching glass.
Materials
- Scissors
- Glass Etching Cream
- Gloves (Nitrile)
- Paintbrushes
- Scraper
- Weeding tool
- Alcohol (Isopropyl)
- Paper Towels
- Artist’s Tape
- Glass Object
- Cricut Plotter or Hobby Blade
- Transfer Tape
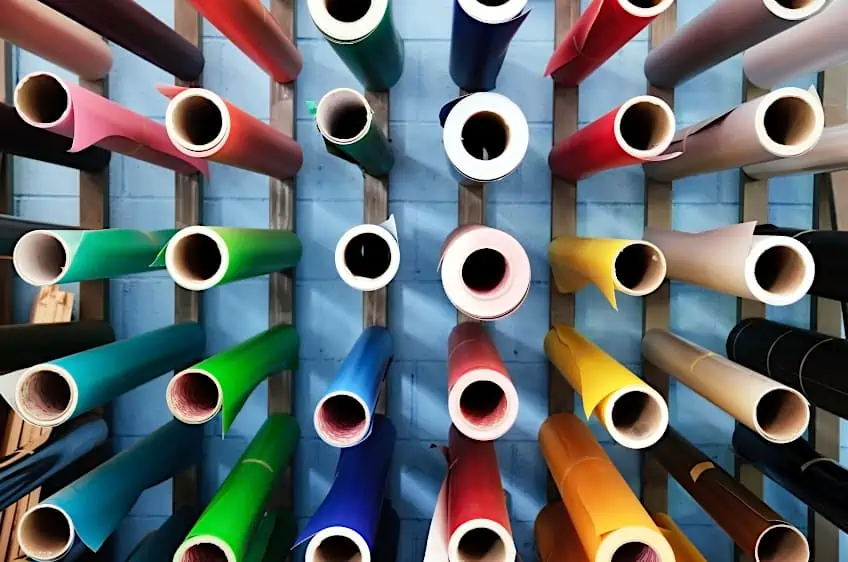
- Stencil Vinyl
Creating a Stencil
Before we begin etching glass, we must first make a stencil. This stencil will be utilized to create a mask. The glass etching cream will be kept away from the regions under the stencil. The glass that has been exposed will be engraved.

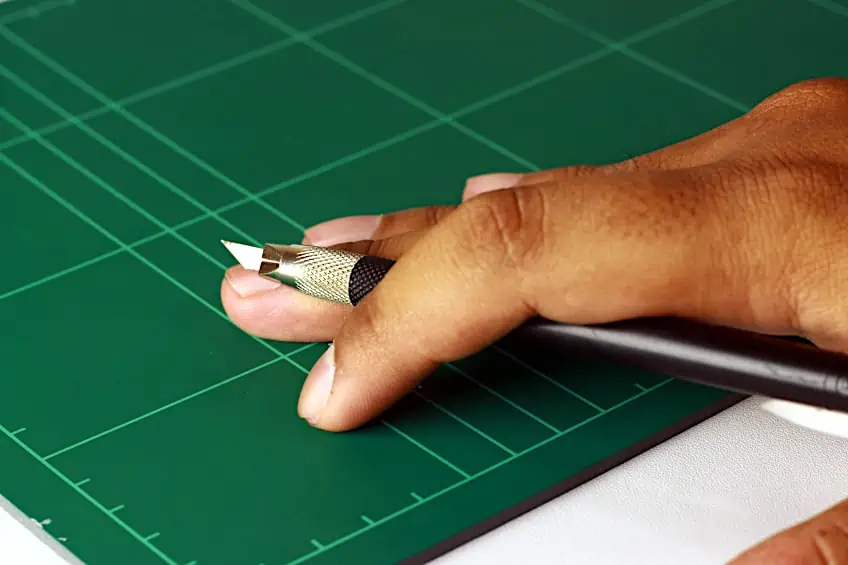
Your stencil must be cut into the design or picture you desire etched onto the glass. This may be accomplished by hand using a craft knife. Simply trace the required design onto the stencil vinyl and cut off the portions you wish to remove with a hobby blade. To keep the vinyl from rolling around, hold it down and cut it on a cutting board. Remember that the negative space will be engraved.
A Cricut plotter is a simple alternative to the laborious method. Construct your stencil with the Cricut Design Space program or choose a pattern from the Cricut Access collection. Be sure to leave enough room around the image. The excess vinyl will shield the remaining glass from the etching cream. Always remember that the negative space will be engraved onto the glass. Once you’ve settled on a layout, place the stencil vinyl into the Cricut cutter and press the “create it” button. If your design appears to be accurate on the Prepare Screen, hit Continue. Make sure you pick “explore all materials” and then choose “stencil vinyl” in the following box. When you are prepared, make sure the fine point blade is placed in your Cricut machine and press the “Go” button. Employ the weeding tool to remove any negative gaps if required.
Cleaning the Glass
It is critical to clean the glass. This will improve the vinyl’s adherence and keep the glass etching cream from slipping below the stencil. If there is any oil or filth on the glass, it may function as an invisible mask, preventing the etching cream from working and ruining your picture. Using an isopropyl alcohol-soaked paper towel, wipe the glass. Mop up any residual alcohol with a dry paper towel. This should get rid of any oil, filth, or fingerprints on the surfaces. If you’re working with an old, soiled piece of glassware, you should wash it with water and soap before proceeding with the isopropyl wash.

How to Apply the Glass Etching Stencil
Remove the backing from the stencil vinyl and adhere it to the glass. This procedure can be sped up by using transfer tape. Make sure the stencil is flat and there are no wrinkles or blisters. If the vinyl has any folds, the etching cream might leak behind the stencil and damage your pattern. Make sure there are no wrinkles by using a plastic card or scraper as a wiper. Keep in mind that your etched picture will only be as excellent as your stencils.
Once you’ve placed the glass etching stencil, check it to ensure there are no fractures or undesirable exposed sections of glass. Bring the glass up to the light to check for any cracks, dust, or fuzz that might allow the glass etching cream to crawl below the stencil. Mask the remainder of the surrounding glass with artist’s tape. Any glass etching cream that gets on the glass will leave a lasting imprint.
Applying the Glass Etching Cream
Once your stencil securely adheres to the glass, you are prepared to start etching glass! Wear a respirator, safety goggles, and nitrile gloves, and operate in a well-ventilated location. Apply a thick application of glass etching cream to the stencil with a brush. immediately as the etching cream comes into contact with the glass, it begins to work. Move the glass etching cream around the pattern with your brush to ensure that all of the nooks and crannies are touched with the etchant. Allow around five minutes for the glass etching cream to rest on the design. If you leave it too prolonged, the glass etching cream will leak under the stencil, resulting in indistinct lines. The goal is to produce sharp lines, which will accentuate the contrast between unetched and etched glass sections.

If Necessary, Repeat the Process
Allow ample time for the etching cream to perform its wonders before rinsing the glass under flowing water. You might use a pitcher and a pail to catch the water as you pour it over the glass. This is especially true if you have a ceramic or porcelain sink since the etching cream can cause harm to these surfaces. After properly rinsing the glass, you will be able to check if you have archived a good etch. If you believe the etching procedure has to be repeated, apply another application of etching cream to the glass.

But be cautious not to destroy the picture by keeping the etching cream on for too long and allowing it to seep beneath the stencil. If you believe the design has been adequately etched, detach the stencil and clean the glass with a sponge and water. Only at this point will you be able to completely evaluate the outcomes. Nothing further is required at this point. Your etched glassware may be washed in the dishwasher and will endure as long as you don’t drop it!

The procedure detailed above will work for any of your glass etching applications, from etched glasses DIY projects to etching mirrors. This method, however, is not suitable for huge graphics on windows or shower doors.

Top Tips For Etching Glass
Because it is such a delicate and challenging technique, we have compiled all of our finest glass etching tips and tricks to assist you.
- Check that both the vinyl stencil and glass are at room temperature. If the vinyl and glass are both cold, the vinyl may not adhere correctly to the glass. Heat the vinyl stencil between your palms to soften it.
- Armour Etch suggests leaving the etching cream on the glass surface for one minute. However, if you want a more distinct etch, extend the duration to five minutes. If you leave it on for too long, the etching cream will start to seep beneath the stencil and damage your pattern.
- If your stencil isn’t resting flat and has folds or wrinkles, it’s better to remove it and cut a new one. Bubbles that develop under the stencil are OK, but folds might enable etching cream to leak behind the stencil.
- If you’re feeling very inventive, you may always add a splash of paint to your etched glass.
- When etching designs into bowls and plates, be sure you etch the design on the bottom of the glass. This will keep food stains away from the etched sections, which can be hard to clean owing to the structure of etched glass.
- Before cutting the stencil for etching bottom plates or bowls, make sure to reflect the picture. By doing so, the picture will display appropriately when seen from the opposite side of the glass.
- You can use some paper grid sheets behind the glass to properly position your stencil on the glass. It will be much easier to match your glass etching stencil this way rather than just spotting it.
- If you have expertise with a rotary cutter and a firm hand, you might want to attempt mechanically etching glass. When trying this, use safety goggles, a respirator, and gloves. Use silicon carbide or diamond tips and sketch the pattern with a marker before shifting your rotary blade from one side of the pattern to the other.
Etching glass is a highly efficient technique to beautify glass, whether it is wine glass etching or window icing. You can make high-end-looking presents at a portion of the price! For her birthday, carve your friend’s initials into a wine glass etching, or an encouraging phrase onto a serving bowl or maybe even a mirror. This procedure is not hard if you have the necessary materials. When using glass etching cream, be cautious since the chemicals it includes might be harmful to your body. Always cleanse the glass before placing the vinyl stencil, check for wrinkles, and ensure that the vinyl is firmly stuck to the glass before adding the etching cream. Most importantly, have fun with the experience!
Frequently Asked Questions
Which Types of Glass Can be Etched?
Etching may be done on almost any form of glass. Certain varieties of Pyrex glass, on the other hand, will not etch well, if at all. Pyrex has been tempered with high heat, making it more resistant to glass etching cream.
Can Colored Glass be Etched?
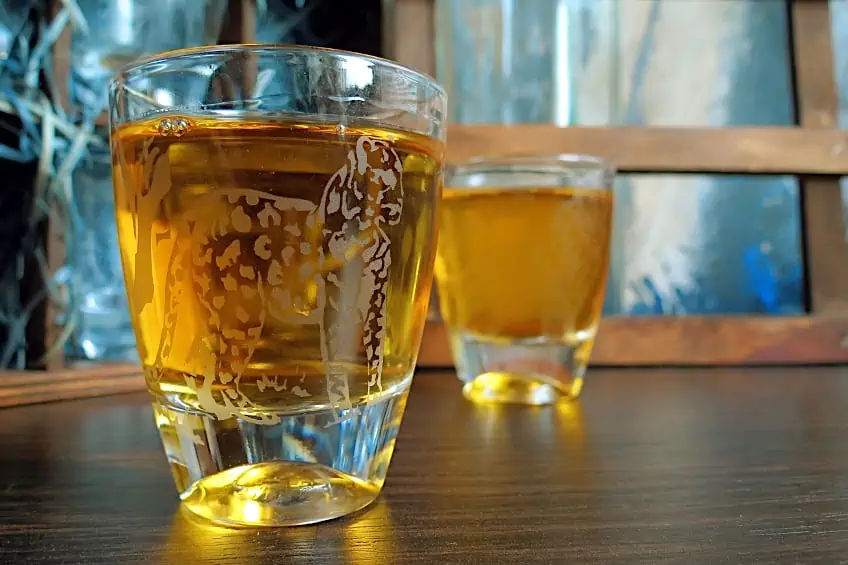
Etching may be done on glass that has a color pigment in it. Etching colored glass may be quite effective because it produces a sharp contrast between unetched and etched parts. Glass with a colorful coating will not etch because it will reject the etching cream.
Can Etching Mistakes be Fixed?
Etching glass is irreversible. Etching over the etched portions is the sole option to remedy etching errors. Etching cannot be reversed. A modest amount of transparent polish for nails may be able to cover over a small area of undesirable etch, but this will only make it somewhat less visible.
Does One Need to Seal Etched Glass?
Etch glass does not require sealing. The etched glass does not require any further treatment because it is permanent. When etching glass, always etch the pattern on the surface that will not come into contact with food or beverage, as etch areas can be hard to clean owing to their porous structure.
Can a Glass Mirror be Etched?
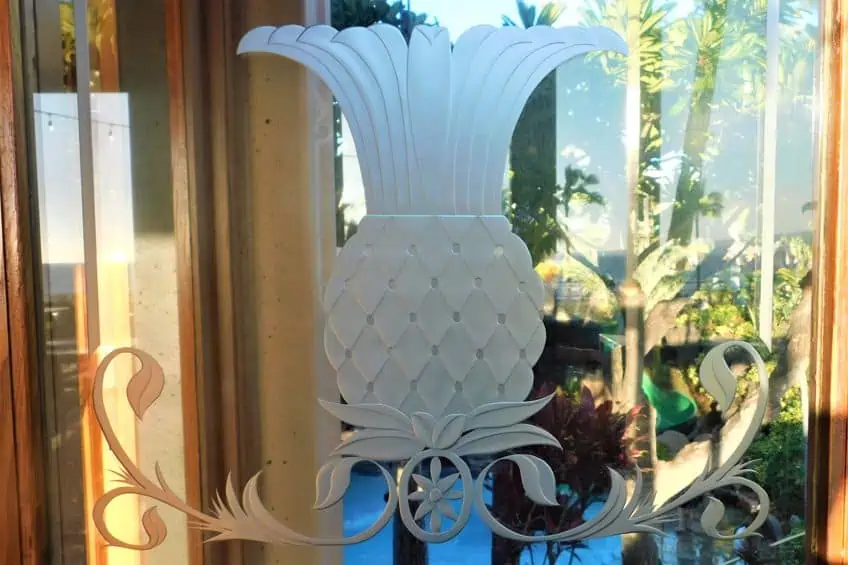
Etching a mirror is achievable if it is made of glass or is not coated. The job may be completed by using glass etching cream and adhesive vinyl. Due to the reflecting background, etching glass generates a dynamic contrasting effect than etching glass.
Are Glass Etchings Removeable?
No, glass etching is permanent. Etching glass is a permanent method of glass decoration, and the etched artwork will not wash away. If you want a temporary decorative solution, you may buy frosted adhesive tape, which has a similar effect to etched glass but is much easier to remove.
Can Etching Weaken and Thin Out the Glass?
Yes, it has the potential to weaken the glass. When you etch glass, you are removing a little portion of glass from the surface. This can degrade the glass slightly, but glass etched with etching cream is safe for use in the dishwasher.


