
Polymer Clay Ideas – Cute Oven-Bake Modelling Clay Projects
If you love creating art with your hands, you have found the right place to do just that! Since polymer clay was created, it has grabbed the hearts of artists. Crafters have forged thriving businesses by creating polymer clay ideas. As we navigate through this article, when starting on polymer clay projects, you soon notice its durability and versatility as a product. There are just so many things to make with polymer clay! Polymer clay ideas are shared very easily on social media, and the easy-to-use clay has become almost a household name. There are so many lovely, useful, and practical items to be made with this versatile clay, as well as fun and silly projects. We will introduce you to easy polymer clay ideas, and a few cute polymer clay ideas! Are you ready to explore the fun and colorful world of polymer clay? Let us get started and learn more about this awesome material.
Let’s Talk About Polymer Clay
Now, before leaping headfirst into the wonderful world of polymer clay, we need to understand a little more about clay, how clay is used, and what clay actually is. Polymer clay is a substance used in the art world and is loved because of its versatility. This clay is known for how easy it is to work with. It has pliability and is easy to mold with the fingers. Polymer clay is a modeling material that is baked in an oven and it is composed of polymers, coloring agents, resins, as well as fillers. When thinking of polymer clay ideas, it should be noted that this is not a natural clay, it is instead a clay that has been manufactured from plastic, polyvinyl chloride (PVC).

Thousands of modeling clay or polymer clay items are created by artists, hobbyists, and crafters. You may also see polymer clay projects being created by moviemakers. The clay remains soft and is so versatile it can be baked in an oven at home without losing its size or color. Ready-made polymer clay is available in many colors, almost any color imaginable.

This wide variety of color also includes metallic colors and more importantly, the ever-popular glow-in-the-dark colors. The is not only heaps of fun to work with, but it is also used to simulate other materials, such as porcelain and glass. Children will have even more fun working with clay with so many awesome options.
Working With Clay
Fear not, you do not need to attend a fancy clay molding and baking course or own a fancy art studio when working with polymer clay. The home oven can safely be used to bake the clay once you have created some cute clay art. You will also want to ensure that the area or the space being used is well-ventilated. Many crafters who need to bake frequently, use a toaster oven! So, there is absolutely no excuse as to why you cannot start working with clay too!

If using your kitchen when undertaking DIY polymer clay ideas, remember to keep food away from the area that you are working on. Baking trays should be lined with foil before placing your polymer clay projects into the oven.
While polymer clay is deemed safe to use by small children, they should be properly supervised when using the clay to form their polymer clay crafts, and even though it is known that the product is non-toxic, it should not be eaten or digested. Sometimes fumes can arise from the clay when baking and if this does occur, the clay should be sealed in an oven bake bag to prevent unwanted smells around the kitchen.
Storing Polymer Clay
In between creating polymer clay ideas and polymer clay projects, the clay should be stored away from sunlight. It definitely should not be left in a car on a hot day as this may cause the clay to start baking. It is suggested that the clay is wrapped up in wax paper in an airtight container with a locking lid. The container that you use should be set aside for other clay projects and not be put back into the kitchen where food is to be stored in it. The best place to store the clay would be the fridge or freezer.

Conditioning Clay
Conditioning is a word that is used in the clay world and is the process of warming and kneading the clay to prepare it for use. By conditioning the clay, you are adding to the pliability and this also reduces the risk of the clay breaking or crumbling. Sculpey clay ideas will be covered further along in this article and this particular clay can be conditioned very quickly by stretching the clay and kneading it. Almost the same process that you would use to bake bread.

By using a pasta-making machine, you are able to roll out many of the stiffer clays. Yes, you read correct, a pasta machine can be used to help the kneading process but because many do not have this versatile machine in the kitchen, the good old-fashioned kneading with the hands will have to be done so that you can achieve all the polymer clay ideas that you have forming in your head.
Mixing Clays
Yes, you read that correctly! Did you know that by mixing clays, you can add a lot more depth to your finished product? Polymer clay is normally used as a backing, Ultra-light clay has lesshttps://www.youtube.com/watch?v=S9cboDDu1Tg weight and the glow-in-the-dark clays can easily be combined with lighter-colored clay or Sculpey clay to get almost a ghostly glow in your polymer clay projects.
Creating Polymer Clay Art Pieces
If you are new to polymer clay or are looking for things to make with polymer clay, you have come to the right place to learn more about polymer clay ideas and how to get started on what can become a very fun hobby or even a lucrative business from home! Polymer clay is used to create a wide variety of art pieces, such as jewelry, home pottery, scrapbooking, and even sculptures.

Adding some colors into polymer clay when starting on a fun clay project is easy. The clay can be mixed with paint and it can even be formulated and colored by using chalk powders, ink, and sparkly glitter. Less conventional and slightly unusual methods exist too – colored pencils and paint mixed with the clay, as well as powdered makeup can be used to change your clay’s color. Once the clay has finished its stint in the oven, the clay can be sanded down and glazed. When creating your polymer clay ideas, your imagination is the only thing that may hinder you.

There are many online sites to help inspire and get your mind filled with creative polymer clay ideas.
Baking Polymer Clay
The different clays will have different baking times so the instructions on the outside of the clay should always be read before preparing any easy polymer clay ideas. You can now preheat the oven and line a baking tray with foil. When finished with the baking process, place the tray on a surface and allow it to cool down. The clay should be fully cured before handling. Should you prefer your clay product to be shiny in appearance, allow the clay to cool down. Next, you can begin to sand it with wet-dry sandpaper. This is done under running water. Once this has been done then you buff it with a soft cloth. You can even paint a layer of glaze onto the clay after the baking process has been completed.
Painting Polymer Clay
All types of clays can be painted. Water-based acrylic paints that can be purchased from any arts and crafts shop can be applied to the clay. Several layers of paint should be used on the clay to give it a bright and professional finish. Wait in between each coat to ensure the paint is dry before applying another coat. If you want to use other paint and not just acrylic paint, it can be done but it will first have to be mixed with Sculpey glaze before painting the polymer clay projects.
Why to Use or Not Use Polymer Clay
- Using polymer clay means that you don’t have to worry about making a mess
- Polymer clay is available in a range of colors
- Keeps its shape, which allows you to create exact shapes and details
- Not ideal for larger projects due to baking time and the pieces could be too big for your oven
- If using a natural drying method instead of baking, the piece may take longer to dry
Easy Polymer Clay Ideas
Are you finding it difficult to come up with unique and creative polymer project ideas? Perhaps you had a wonderful idea, but just are not sure what it is missing – while the world is your oyster when it comes to creating art pieces from polymer clay, the imagination sometimes just needs a little tweak to put you on the right creative road, for this reason, we list a few of the cute polymer clay ideas and cute clay art ideas to start your journey.

DIY Easy Clay Bowls
To make your own bowl using polymer clay, start forming the shape by hand into a round shape and once you have an almost round shape, roll the clay out with a rolling pin or glass jar. The thickness of the clay is entirely dependent on your tastes. Place the cut-out clay shape onto the outside of a round bowl to get the correct round shape you are looking for. Once you have the desired shape and size, carefully move the clay inside the ovenproof bowl and put it into the oven. The clay will bake in the ovenproof bowl and it will retain its round shape. Follow the package instructions carefully. Once the bake time is complete you can remove the bowl from the oven and set it aside until cold. Turn the bowl upside down and give a few taps so that your clay bowl will detach itself. You now have a beautiful clay bowl that can be used in the kitchen for your used tea bags.
Jewelry Bowls
Choose the different colors of clay that you want to use and roll out each color into a snake shape, they should be about five inches long. If you like clean colors, then combine two white colors with your other colors. You should have enough clay so that you can roll out a six-inch circle. Now take all the colors you have chosen and make a big sausage roll out of them and then start twisting them together. The twist is then to be rolled out again into a snake shape.
There is no right or wrong way to twist the clay, the colors will all be visible once the clay has baked.

Once your twist is double its length, fold the twist and twist the two ends together, and repeat the rolling and folding method again at least three times to make sure your colors are nicely blended. Roll the clay into a ball and as you turn the ball around you should notice the colors on the ball. Manipulate the ball by pulling it apart and twisting again until you do see all the colors you have used.

A rolling pin or glass jar is needed to roll out the clay. The colors will blend with each other and you should end up with a nice marble effect. Roll the clay in different directions, always moving from the center to the edge and then back again. Once you have a nice size piece of marble clay, cut out a circle, you can use a round dish or glass to help get the perfect circle. Place the clay into a smaller oven-safe bowl. Placing your clay in a smaller bowl will allow it to take shape like a little dish.

Place the entire oven-proof bowl into the oven and bake according to the instructions on the clay package. Once the clay has baked, remove it from the oven and let it cool before you try and take it out of the oven-proof bowl. Turn the bowl over and your little dish will fall out easily.
Key Chain
These are great gifts for any friend that drives a car. Keychains are light and can be as colorful as you want. Let us try a round key chain with a white background and black shapes bent into white. Take the white which is going to be your foundation color and roll it out with a rolling pin or glass jar.
Once you have the thickness you want, cut out little black specs and place them on the white rolled-out clay. The specs can be different shapes and different sizes. Put as many or as few as you want on the white background.

Gently roll out the clay with the two colors. The black should not lose too much shape as you are rolling it but it will flatten the design a bit. A round object like a glass or cup can be pressed down on the clay to help you cut out the perfect circle. Once you are happy with the shape, make the hole for the jump ring. The hole should be big enough so that a jump ring can fit through it with a bit of space to move. Remember you are working with quite small pieces of clay so you can make a number of key chains for all your friends and family simultaneously.

Once your key chains are ready for the oven, place a tray that is lined with parchment paper, into a preheated oven, and baking time will be dependent on the instructions on the polymer clay package. After baking, you can remove the tray from the oven. Next, set the tray aside so that the clay can cool down. Once it is cold to the touch, use pliers to attach the jump rings.
Arm Bangles
Take a few pieces of clay using colors that complement each other, such as yellow and white, and black, and start rolling the three colors into long snakes. The thickness of the snake will depend on the thickness of the bangle that you are looking for. Once the snake is rolled out then for a different look, twist a few of the snakes and leave some that are straight. You can even roll two colors together. Simply join the two ends of the snake together and smooth out the joint so that it is not visible to the eye.

Once you have the desired shapes and sizes, pop them onto a baking tray that is covered with parchment paper and bake according to the instructions on the clay package. Once the bake is complete, put the tray aside and let it cool down. The arm bangles are now ready to be packaged and handed to your friends as beautiful gifts.
Soap Dish
If you know the color of a friend’s bathroom, then a clay soap dish would be a great gift to make. Take the colored clay that you want to use and stretch it out and roll it up. Because you are going to make a soap dish, you will need a good amount of clay. The clay needs to be softened enough so that it can be molded into a circle. Once the clay is a bit softer, place it on a flat surface and roll it out with a rolling pin or a glass jar. The clay should be a little thick after rolling it out. Once you have rolled the clay out, mold it onto the outside of a round bowl. This will help you get the shape of a round dish. Remember soap is fairly big so your dish needs to be able to hold the soap nicely without it protruding from the end of the dish.

Place the clay into an oven-safe bowl. Placing your clay in a bowl will allow it to take shape like a little dish. Next, place the entire oven-proof bowl into the oven and bake according to the instructions on the clay package. Remove from the heat source and allow to cool once the clay has baked fully before you try and take it out of the oven-proof bowl. Turn the bowl over and your soap dish is ready to be packaged and gifted to a friend.
Earrings
Take the polymer clay out of the package and warm it with your hands. The clay needs to be warm so that you can manipulate it easier. Cover a flat hard surface with parchment paper and roll some clay out on the surface with a rolling pin until you get the thickness that you want.
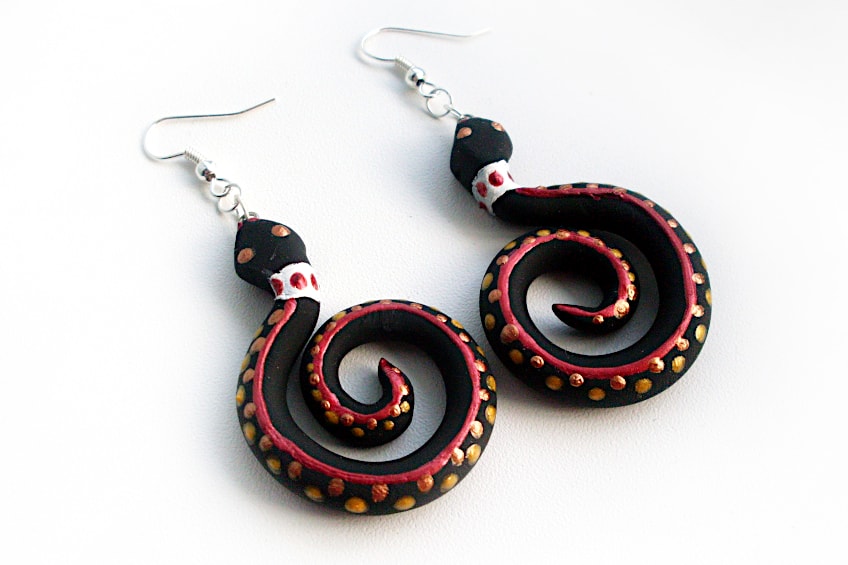
Once you have the desired thickness, then cut out the clay shape you are looking for. Cookie cutters are brilliant to use for making the cutest earrings. Try not to get any finger marks on the clay when pushing it out from the cookie cutter.

Make small holes on one side of the clay where your jump rings will be placed. Bake the clay as per the directions on the clay package. Different brands of clay required different baking times. After the clay has finished baking, let it cool down. Jump rings are the best to use. Simply use a pair of pliers to bend the rings open and closed after you have put them into the clay pieces.
Rainbow Magnets
you will need to buy different colors for the rainbow that you want to make. Once you remove the polymer clay from the package, work the clay with your hands to make it soft. Roll each color separately into thick ropes. They should not be too long. The ropes should be laid out next to each other which will create rainbow colors. Cut the strips into sections and bend them in a rainbow shape, using a knife to trim the edges. This process can be repeated as many times as you wish.

Once all your rainbows are formed, place them onto a baking sheet and place them into the preheated oven of 275 degrees Fahrenheit or 135 degrees Celsius. for no longer than 15 minutes. Allow the rainbows to cool and if you attach little magnets on the back with glue you will have the brightest magnets on your fridge.
If happy rainbows just aren’t your thing, then you can make magnets based on just about any topic or object you can imagine. Of course, one the favorite sources of inspiration for fridge magnets remains miniature food items.
Oh, what a wonderful world it is when we can use our imaginations to create art with easy polymer clay ideas. Modeling clay ideas and Sculpey clay ideas are only limited to how far the imagination can stretch. There are no ends to the possibilities of creating and no end to things to make with polymer clay. DIY polymer clay projects can be undertaken by anyone who wants to add color and a warm fuzzy feeling to a home or room. We hope that this article starts the wheels of your imagination turning so that it may even result in helping you start up your very own creative business right in the comfort of your own home.
Frequently Asked Questions
Is Polymer Clay Toxic?
Polymer clay is non-toxic and safe for children. Pets try to eat anything, so it is a good idea to make sure that the pets are left outside when working on any polymer clay projects in the kitchen. If a child places the clay in their mouths, they will quickly remove it, as the polymer clay is not tasty at all, so fear that children could eat the clay should be put to rest, for the most part.
Is Polymer Clay Eco-Friendly?
You may feel a little discouraged after learning the answer to this question because sadly, this wonderful and versatile clay cannot be listed as an eco-friendly product. Why? Because polymer clay is made from different types of plastic. As we know, plastic such as PVC is unfortunately not eco-friendly.
Can Water Be Mixed into Polymer Clay?
You may want to try to revive dry or old clay by using water, unfortunately, this will not work. Any water mixed into the clay will cause your polymer clay projects to crumble and become brittle when dry. No water should be used while working on your polymer clay ideas.
Can Polymer Clay Break Easily?
If you have not cured and baked the clay properly, then it will become brittle and can break. Some polymer clay brands are more susceptible to breaking than others. When looking at Sculpey clay ideas, more attention should be made when conditioning and curing the clay as these types of brands will break easier than others. The Sculpey Original and Sculpey III are brands to watch out for.


