Best UV Resin – Complete Guide to Using UV Resin
UV resin is a synthetic resin that is famous for its quick-curing abilities under UV light. These resins do not require any mixing prior to application and can be worked with for any length of time, as they will only harden when placed under a specialized UV lamp. This type of resin is ideal for smaller items, such as jewelry, small molds, and metallic bezels. This guide will take you through all that you need to know when it comes to using UV resin.
What is UV Resin?
UV epoxy differs from epoxy resin in a few ways. Where epoxy resin consists of two liquid components (a resin and hardener) that harden due to a chemical reaction once combined, UV resin does not require any mixing. Instead, the UV resin will remain in its liquid state until it has been exposed to UV light. This means that you no longer have to worry about processing your resin within a certain time frame, as it will not cure without UV light. Once your bond is as you like it, apply the UV light and the resin will cure in just a few minutes.
You should note that while the sun does produce UV rays, these are not nearly strong enough to cure the resin. Thus, you will require a special UV lamp light.
It is best to cast thin layers of this type of resin, as this will ensure that the UV resin is cured sufficiently. No layer should exceed 3 mm, and you must allow one layer to cure completely before applying the next.
While UV resin is great for smaller projects and offers quick results, the final product will not be as durable as epoxy resin. UV resin differs greatly from epoxy resin in that it is not heat- or scratch-resistant, and it will not last for as long.
Pros
- Cures quickly within a few minutes
- No mixing is required
- No processing time limit
Cons
- Only durable for half a year
- More expensive than epoxy resin
- Not heat or scratch resistant
- Requires a special UV lamp for curing
What is UV Resin Used for?
While UV resin certainly has many advantages in terms of its processing and application, it is important to take note of its disadvantages as well. There are instances where using UV resin is the ideal choice, such as for small pieces and applications. You can use UV resin to make pieces of resin jewelry with ease, and can even use this type of resin as an adhesive for epoxy resin due to its short curing time.

Required Materials for Using UV Resin
There are a number of materials that you will need in order to produce the best UV resin piece. You will require a good-quality UV resin, a suitable UV lamp, any desired pigments for adding color, silicone casting molds, mixing tools, and any other items and decorations that you would like to embed into the resin.
Best UV Resin
It can be difficult to choose the best UV resin for your project due to the wide variety of options available on the market. We have selected two of the best UV resin products for you to use. Each has achieved a high rating and received thousands of positive reviews on Amazon.
Overall Best: LIMINO Crystal-Clear UV Resin
This UV resin is convenient and easy to use, as it requires no mixing. Instead, this resin is ready to use and will cure within just a matter of minutes when exposed to 36 W UV light or even sunlight. The resin will cure within 1 to 2 minutes when placed under a UV torch, within 15 minutes in direct sunlight, and within one hour on a cloudy day.
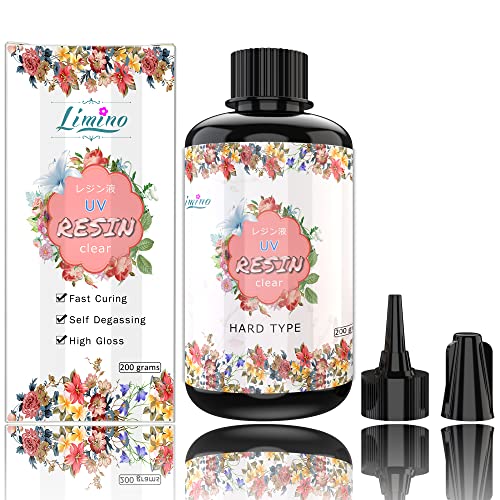
- Highest quality UV Resin from Japan
- Made with non-toxic materials
- Resistant to yellowing, very hard surface after curing
This UV resin will cure to be as clear as crystal, is self-levelling, and eliminates bubbles automatically. Limino’s UV resin is more durable than most, as it is resistant to scratches, heat, stains, and yellowing. This is a non-toxic product that is BPA- and VOC-free, despite producing a low odor, although this will disappear once the resin has cured.
Pros
- Easy to use
- Great value for money
- Highly durable
- Non-toxic
- Quick to cure
- Ideal for molds
Cons
- High shrinkage, making it unsuitable for frames or bezels
- May require longer curing time than stipulated
Best Value for Money: MIRACLEKOO Crystal UV Resin
This UV resin requires no mixing whatsoever, making it that much more efficient to use. With a UV lamp of 36 W, you can expect this UV resin to cure within just 2 to 4 minutes. The resin will cure to a crystal-clear, smooth, glassy finish that offers great resistance against scratches, stains, and yellowing.

- Easy to use - no mixing required
- Self-leveling, self-degassing, non-toxic
- Dries to a crystal clear UV epoxy finish
This resin is best cured under a strong UV lamp, although it can be cured in direct sunlight within approximately 15 minutes. This resin is not suitable for large items, and is ideal for small pieces such as jewelry, bezels, molds, and other small projects.
Pros
- Cures quickly
- Self-leveling
- Degasses automatically
- Resistant to scratches, stains, and yellowing
- Non-toxic
Cons
- Cannot be used for large items
- Small quantity
- Slight odor
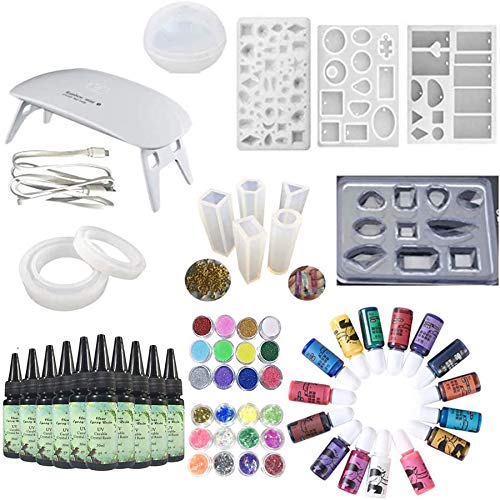
Best UV Resin Kit
If you are new to using UV resin, you may prefer to buy one large kit that includes everything you will need, including a UV resin curing light, pigments, and silicone molds. These kits may be pricey, but they include everything that you will require to get started on your UV resin projects.
Overall Best: JOLIGEL UV Epoxy Resin Kit
This UV resin kit offers a great deal for its price and includes several molds of varying shapes, open-backed bezels, a UV resin curing light with a USB cable and timer, a range of beautiful colors, tape, and much more. The resin itself cures to be completely transparent with a glass-like finish. The UV cure resin time is approximately 5 minutes under a 9 W or 36 W UV lamp. Alternatively, you can place the resin in strong, direct sunlight for about one hour.
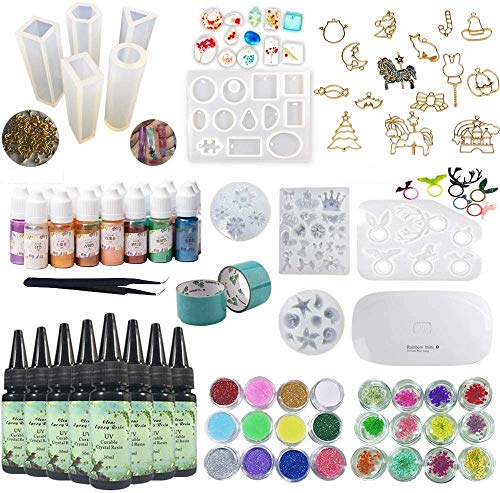
- Very good transparency and excellent hard glassy finish after curing.
- 15 colors,10 molds and 54 different shapes and back bezels
- UV lamp with USB cable included
The range of pearlescent colors and glitter powders will allow you to achieve all sorts of unique effects in your resin. You will have a great deal of choice in terms of what to make as a result of the wide range of molds and bezel frames. The UV lamp is particularly useful, as it includes a timer that allows you to countdown the curing time in 45- and 60-second increments.
Pros
- Kit includes wide variety of tools and materials
- Fast curing time
- Includes portable UV lamp with a timer
- Easy and convenient to use
- Resin is highly resistant to scratches, stains, and yellowing
Cons
- Expensive
- Items not of the best quality
Best for Beginners: FRENSHION DIY Crystal Resin Kit
This kit includes a wide variety of items, including holographic paper, glitter powder, liquid pigments for the UV resin, a mini UV lamp, and a range of silicone molds. The liquid colors are water-resistant, will not corrode when exposed to chemicals, and are translucent. The UV lamp includes long-lasting bulbs that have a lifetime of up to 50,000 hours. You can connect the lamp to any device with a USB port.
- A full resin kit, including molds, holographic paper, glitter
- The set contains efficient UV crystal resin
- Includes a portable mini lamp and 15 color pigments
Your UV resin will be cured within just 2 to 4 minutes under the UV lamp, although larger pieces may take as long as 30 minutes to cure fully. It is recommended that you cast several thin layers for the best results. Your end-product will be one of a high transparency and durability.
Pros
- Set includes many items
- Self-leveling resin
- Self-degassing resin
- Scratch- and stain-resistant
- Resin will not yellow
- Quick-curing
Cons
- May take longer to cure than stated
- UV lamp is very small
Other Materials Required for Using UV Resin
If you do not purchase a UV resin kit, you will require a number of tools and materials in addition to the UV resin of choice. You will need:
- A UV lamp or light for curing the resin,
- Suitable pigmented powders or inks for color,
- Silicone casting molds for creating jewelry and other items,
- Additives such as mica glitter or flakes for additional decoration,
- And mixing utensils for combining the two resin components, such as measuring cups and stirring sticks.
We recommend that you use the following products in addition to your UV epoxy resin:
MELODYSUSIE UV Nail Lamp Dryer
With a wavelength of 365 nm, this UV lamp is ideal for curing UV resin in addition to many other materials. The lamp includes three different timer settings to suit your various curing requirements. There is also a sliding tray to make it easy for you to place and remove your resin pieces. This 36 W UV lamp is 50% stronger than most other lamps, and offers a large space in which you can place resin items of various sizes.

- Includes 3 timer settings and a slider tray
- A fast-drying 36W salon lamp
- Lightweight, sturdy, and easy to use
LET’S RESIN Resin Earring Mold
The LET’S RESIN Resin Earring Mold kit is a comprehensive set designed for crafting exquisite resin jewelry. It includes 171 pieces, featuring 11 packs of silicone molds in a variety of shapes perfect for creating unique earrings, pendants, necklaces, and keychains. Ideal for epoxy resin projects, these high-quality molds are flexible and easy to use, ensuring detailed and professional results every time. Whether you’re a beginner or an experienced crafter, this versatile kit offers endless creative possibilities for making personalized and stylish accessories.

- Comprehensive Mold Making Kit
- Diverse Shape Options
- High-Quality Silicone Molds
ROLIO Mica Powder Set
This is a set of 24 pearlescent pigment mica powders for mixing with your UV epoxy. These professional-grade mica powders come in a range of vibrant colors, including Electric Blue, Tiger Orange, Pearl White, and Persian Green. These powders are cosmetic-grade, meaning that they can be used for much more than simply adding color to your UV resin.

- A set including 24 jars of fine particle mica powders
- A wide range of vibrant colors for resin art
- Safe pigments that can be used in a wide range of applications
LET’S RESIN Alcohol Inks Set
Alcohol inks are a great way of controlling the color you add to your UV epoxy. These inks in particular will not spread as much as other brands, allowing you to direct the color with precision and create all kinds of unique effects. You can also mix these inks with alcohol in order to lighten them and increase their translucency. This set includes 6 vibrant colors, providing a wide range of options to create dynamic and colorful resin art.

- Offers 26 vibrant colors, providing a wide range of options to create dynamic and colorful resin art
- Highly concentrated alcohol-based formula
- Versatile application
LET’S RESIN Mixing Cups Kit
If you are new to using resin, you will require a variety of basic tools with which to use your resin and accessories. This kit by LET’S RESIN Resin Mixing Cups provide a reliable and convenient solution for mixing paint and resin. This set includes 50 sturdy and thick 32oz (1000ml) disposable measuring cups with two accurate scales for precise measurements. Designed for ease of use, the kit also includes protective gloves to ensure safety. Ideal for various crafting needs, these mixing cups work seamlessly with the LET’S RESIN Auto Mixer, making them a perfect addition to any resin or paint project.

- Large capacity and accurate measurement
- Made from thick, high-quality materials
- The set includes 50 mixing cups and protective gloves
Choosing a UV Lamp
You can choose between a UV lamp and a UV flashlight for curing your UV resin, each of which comes with its own advantages and disadvantages. UV lamps are preferred, however, as UV flashlights require you to hold the light over the resin for several minutes while it cures. UV lamps, on the other hand, have a certain area where you will place your resin to cure.
The most important features to note are the light output and the size of the lamp’s interior. If you plan on using UV resin on a regular basis, we suggest investing in a UV lamp of a high quality. You can also get UV lamps of decent quality in some UV resin kits. UV flashlights tend to have a much lower output of light than UV lamps and also expose you to UV vapors.
UV lamps are usually encased in a special box that is typically used for curing gel nail polish. You will need to ensure that the lamp you choose is large enough for your resin items. Ideally, you will want a lamp that can house several molds to be cured at once. You should also be able to place slightly bigger silicone molds inside without much hassle.
Your UV device should indicate a power of at least 4 watts (W), which will ensure a fast curing time for all kinds of pieces.
To cure your UV resin, simply place the silicone mold casting under the lamp, trying to ensure that it is as close to the light as possible. Switch on the lamp for the stipulated period of time, after which your UV resin piece will be completely cured and hardened.

How to Cast a UV Resin Mold
Before you can begin working with your UV resin, you need to ensure that your workspace is properly prepared. Place a plastic sheet or large piece of cardboard over your working surface to protect it. Ensure that all of the materials and tools you need are readily accessible. Now, you can begin to cast your UV resin.
- If you wish to cast a transparent UV resin mold, you can pour the resin directly into the silicone mold from the packaging.
- To add color, you should first pour the resin into a mixing cup. Add your desired pigments and mix the solution together thoroughly with a wooden stick.
- Pour a 3 mm-thick layer of UV resin into your mold. You can then embed various items and small objects into the resin before curing. These can include small shells and stones, dried flowers, or even glitter and confetti.
- You will now cure the UV resin by placing it under the UV lamp light. Ensure that your resin piece is held as closely to the UV light as possible. The length of time that this will take varies, but it is usually no more than a few minutes. You can use a toothpick to test the hardness of the resin.
- You can repeat this step several times, ensuring that each individual layer is no thicker than 3 mm. This way, you can slowly achieve your desired thickness.
- Once the final layer of resin has cured, you can demold your casting from the silicone. Be careful when doing this, as the chemical reaction caused by the resin can cause the casting to become quite hot.
Helpful Tips and Tricks for Using UV Resin
- Ensure that each layer of UV resin is no thicker than 3 mm, as too thick a layer will result in air bubbles and prolonged curing.
- You can use a toothpick or hot air dryer to remove any unwanted bubbles. When using hot air, use rapid and even movements by blowing the device across the resin surface. Never allow the hot air to rest in one place for more than a couple of seconds.
- Whenever you work with resin, you must ensure that you work in a room that has good air circulation. You should also wear protective gear such as a respirator or face mask, goggles, and nitrile gloves.
- Temperature affects UV resin more than it does epoxy resin. This means that any overheating can result in an unpleasant bitter smell being produced. Thus, ensure that your hot air dryer is at its lowest setting when in use. Too much heat can also cause the UV resin to become yellow.
- Embed any objects flatly, pressing them into the liquid resin as well as possible in order to prevent bubbles. You can also avoid bubbles by sealing the objects with UV resin beforehand.

Frequently Asked Questions
How Long Does UV Resin Take to Cure?
To UV cure resin, you need to take a number of factors into account in order to ascertain the curing time. The thickness and size of the embedded items you use will influence the length of time the UV resin will take to cure. Small pieces such as jewelry tend to take 2 to 3 minutes for each layer to cure. Larger pieces and thicker layers, on the other hand, will require a curing time of 4 to 6 minutes. Humidity and room temperature will also influence the curing time.
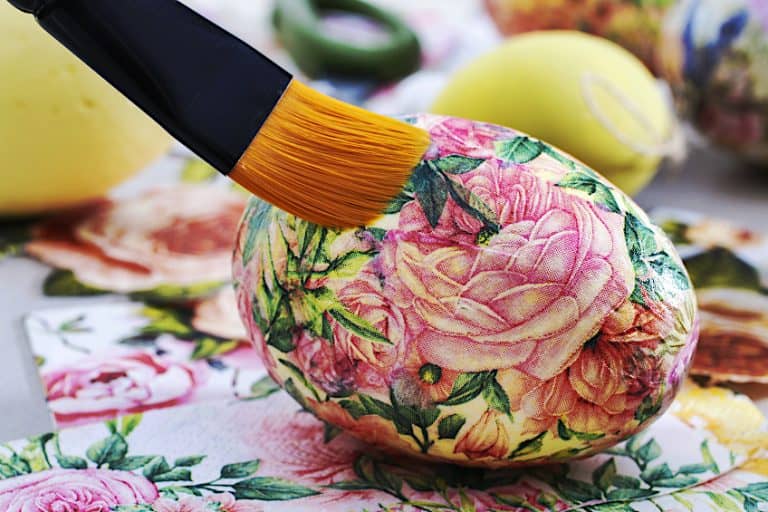
Can I Use UV Resin to Seal Surfaces?
You can use UV resin as a protective layer on smaller surfaces, ensuring that you apply a very thin layer. Too thick a layer will result in holes and bubbles that are nearly impossible to remove. We suggest using a fine brush to apply a thin layer of UV resin.
Which is Better: UV Resin or Epoxy Resin?
While UV resin will cure much more quickly, it is not nearly as durable as epoxy resin. You can expect UV resin to last for about half a year, whereas epoxy resin will last for many years. UV resin is also not resistant to heat or scratches.
Can I Use Any UV Light to Cure UV Resin?
You cannot use just any UV light to cure your UV resin, as it needs to be of a certain intensity in order to harden the resin. Most UV resins require a wavelength range of 356 to 400 nanometers (nm) to cure.
How Many Watts to Cure UV Resin?
You will need a UV lamp with at least 4 watts, so your smaller UV resin will cure completely within 5 minutes. For larger casting, you will need at least 8 watts.
UV resin gives you the opportunity to create all kinds of items. If you are casting small items, like jewelry, then this resin is particularly useful. We hope that this guide has inspired you to start experimenting with UV resin yourself!