How to Draw a Peony – Botanical Art Made Easy
The peony flower is known for its gorgeous heady fragrance and stunning variety of colors. This bush blossom is enriched in history and mythology, spanning across the globe from China, Greece, and even South America. This beautiful plant is the subject of today’s tutorial on how-to-draw-a-peony-flower. Now, grab your art goodies, and let’s get drawing!
A Step-by-Step Tutorial on How to Draw a Peony Flower
This easy-to-follow tutorial will be set in simple phases. First, you will create the foundation lines to begin the construction of your peony outline, and then you will be guided on the correct methods of adding color and texture. This simple peony flower drawing experience is ideal for artists of any level. If you are a beginner, use this opportunity to have fun and learn the basics, by the time you are finished with your peony sketch, you should have a picture you will be proud of!
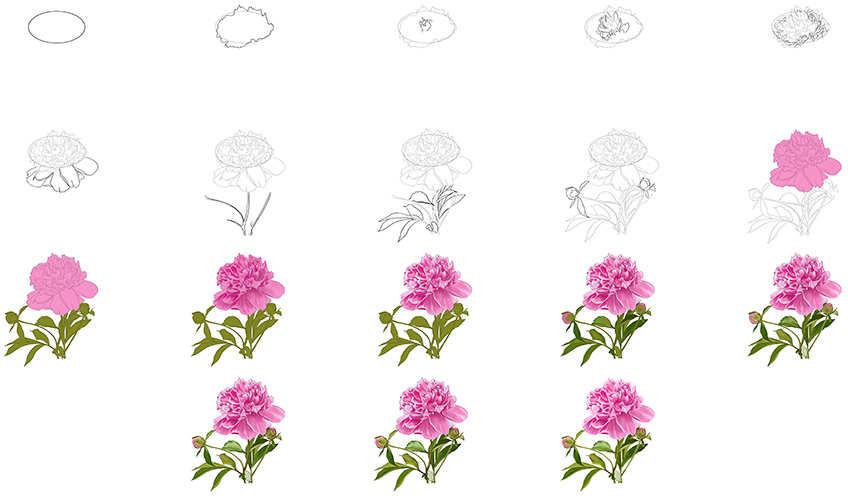
Analyze the diagram above to see how you will work through each step, and together we will create a lovely peony illustration! This tutorial is designed for painting and digital mediums, but you can adapt it to any medium you feel comfortable with.
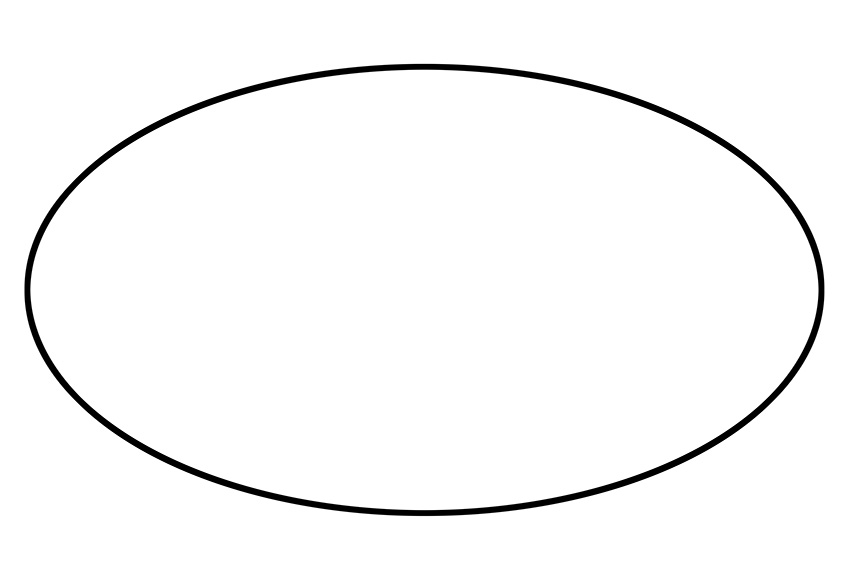
Step 1: Sketching the Outline for Your Peony
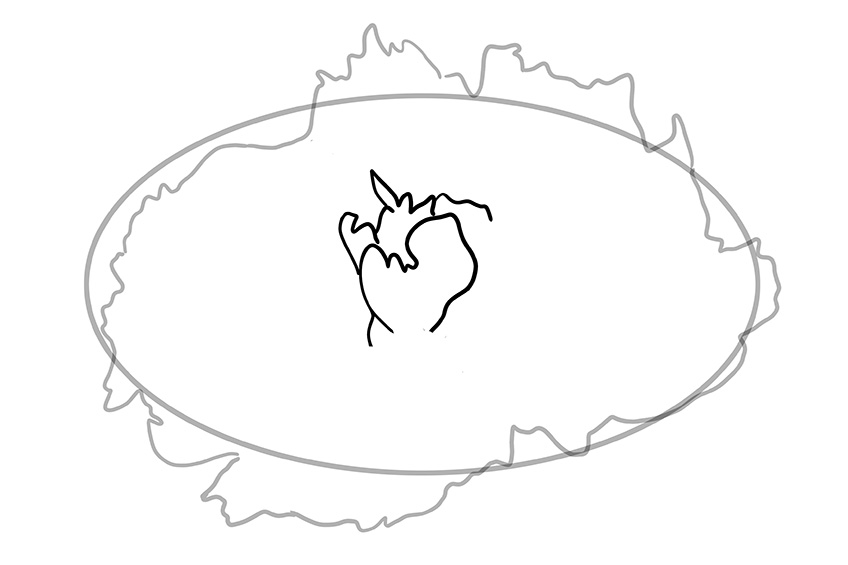
Putting a pencil to paper, you will begin this step by drawing a horizontal oval shape. The sides of your oval shape should be stretched out somewhat. This will be used as a guide, so make sure your lines are light and can be easily erased or covered at a later stage. For those of you who are using a digital design tablet, be sure to create separate layers for your steps.
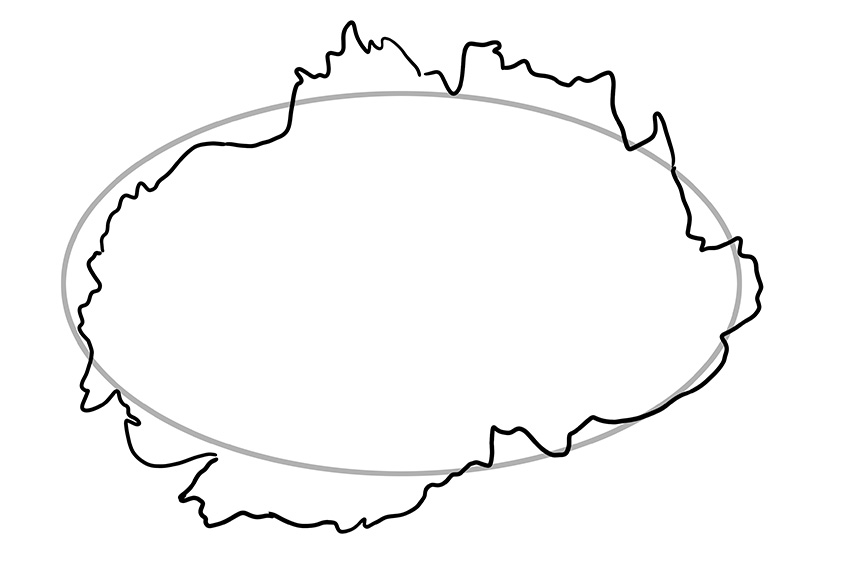
Step 2: Outlining Your Peony Illustration’s Petals
Using the oval-shaped foundation line drawn in step one as a guide, you can delineate the peony petals by creating a squiggly line to create a flower shape.
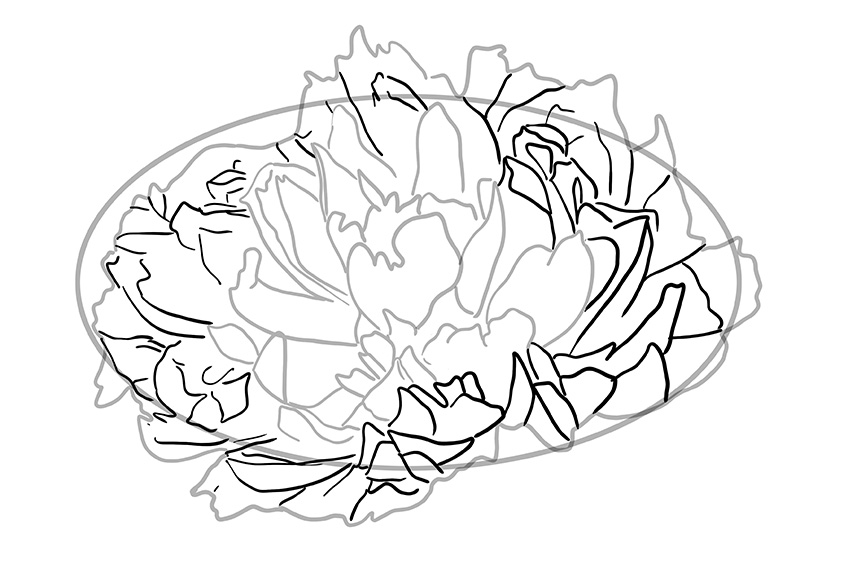
Step 3: Creating the Inner Petals of Your Peony Illustration
You will now add the center peony flower petals. The middle of the flower generally has a cluster of unopened petals, so imagine what that would look like while you are drawing. Sketch this in the center of the main oval foundation line
Step 4: Adding the Next Layer of Petals to Your Peony Outline
At this point in our how-to-draw-a-peony tutorial, you will continue adding petal layers to your peony illustration. Using the center petals as the base, continue adding petals all around the outer edge of the cluster.
Slowly make these larger and leaning outward.

Step 5: Finishing Your Peony Flower’s Body
By this stage, you must continue adding peony flower petals to the main body of the drawing. Be sure not to overlap the petals.
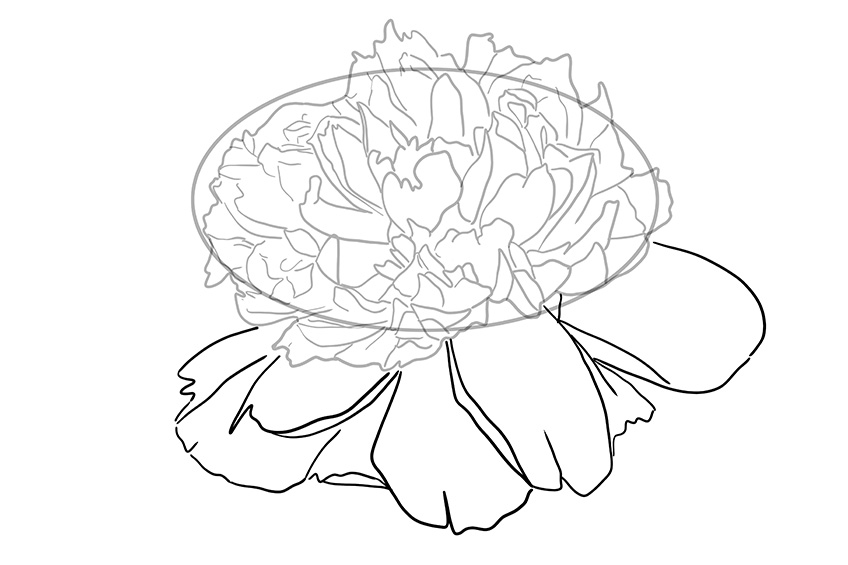
Step 6: Sketching the Sepals for Your Peony
The petals of your peony flower have been created, so now you will move on to the sepals! The peony flower’s sepals are what unfolds around it when it is a flower bud. As the flower opens towards the sunlight, the sepals will remain at the bottom of the flower. You must draw large petals protruding outward but facing downward.
These petals must be drawn individually.
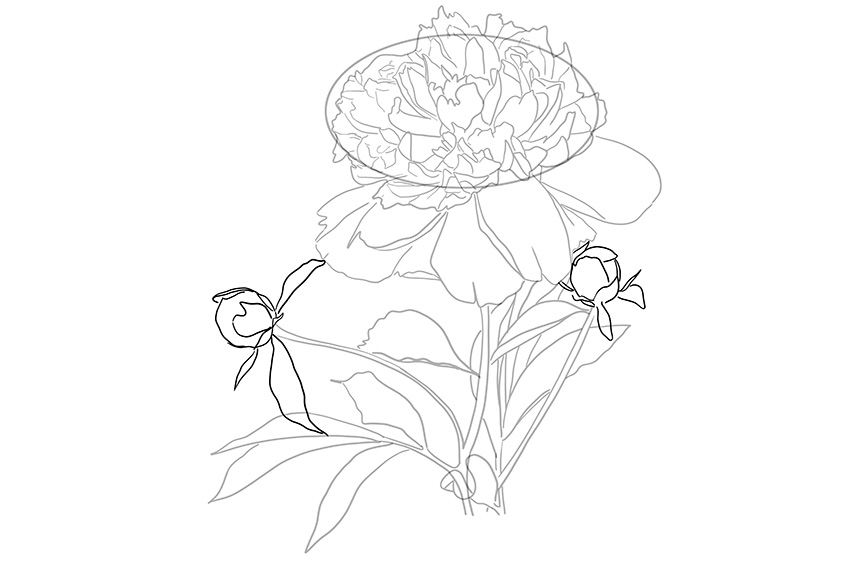
Step 7: Drawing Your Peony Illustration’s Stem
Continue creating the peony outline for your drawing by adding the flower stem. Sketch this from the middle and bottom of the sepals. Make the stem curvy, and then add branches. The peony flower has many leaves and buds, so keep that in mind!

Step 8: Adding the Leaves to Your Peony Outline
You can continue with your peony outline and add leaves to the stem you drew in the previous step. Sketch the leaves on both sides of the branches while you try to create depth by adding some leaves behind the stem.
Remember, the leaves of the peony plant are long, thin, and can overlap.

Step 9: Adding Unopened Flower Outlines to Your Peony Drawing
To complete the peony flower outline, you can go ahead and add unopened flowers on the tips of the two branches. The unopened flower will resemble a small ball and should have sepal petals wrapped around the base. Should there be any foundation lines from steps one and two still showing, you may erase them.
Step 10: Applying the First Coat of Color to Your Peony Illustration’s Petals
You have completed sketching the outline for your peony drawing, and now you will start adding the first color coat! There is a huge variety of colors when it comes to the peony flower, so, you can have a wide color palette to choose from.
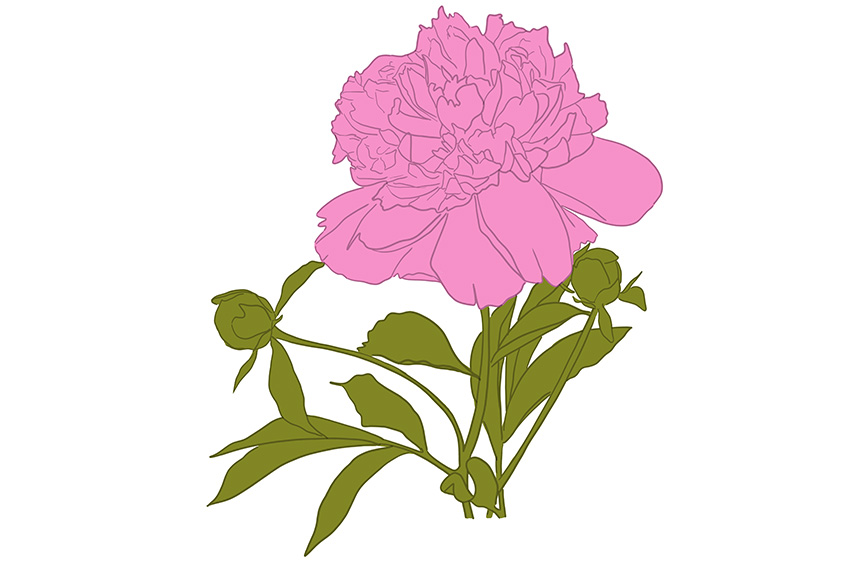
For today’s how-to-draw-a-peony tutorial, we will use a bright pink shade. Take a regular paintbrush to paint the whole flower. Keep the leaves and stem as is.

Step 11: Adding Color to the Stem of Your Peony Illustration
We will now begin to add some much-needed color to the stem of the peony flower. To fill the leaves and stems, select a soft-tipped paintbrush and apply a dark shade of green.
Step 12: Creating Detail in Your Peony Drawing
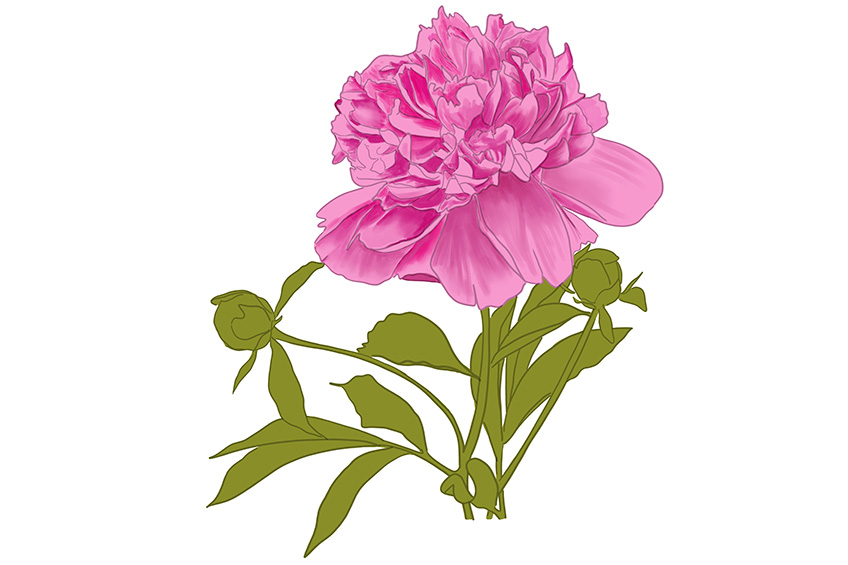
We have reached the fun part of the how-to-draw-a-peony tutorial! You will now be adding finer detail to your peonies’ artwork. Select a soft-tipped, small paintbrush and load it with a dark shade of pink and then purple paint, start by adding a few details and shading to the petals and sepals.
Step 13: Adding Highlights to Your Peony Illustration
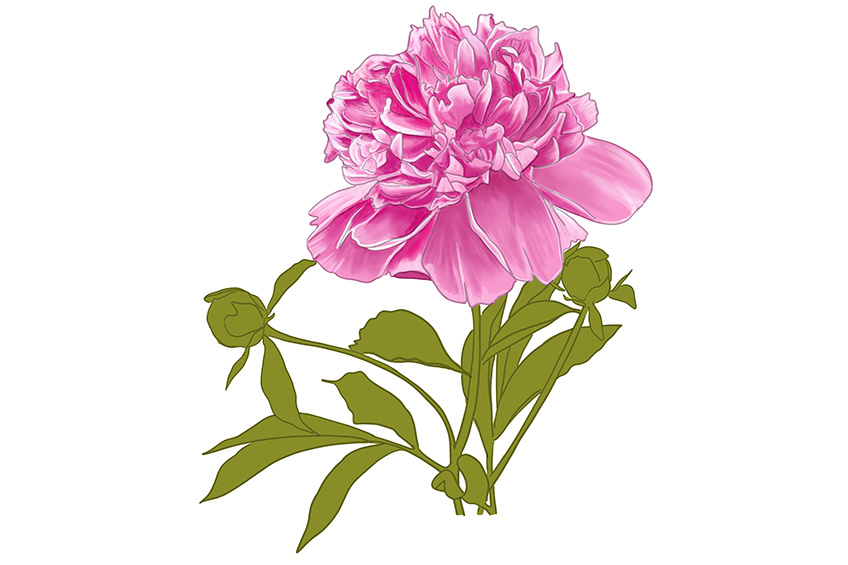
Smartly applied highlights are a great way to make your peony art pieces look realistic! Using a fine paintbrush and a touch of white paint, apply the highlights to the edges of the individual peony flower petals.
You can gently blend the white paint and the darker shade from the color coating from step 12.
Step 14: Adding Shading to the Leaves and Stem of Your Peony Drawing
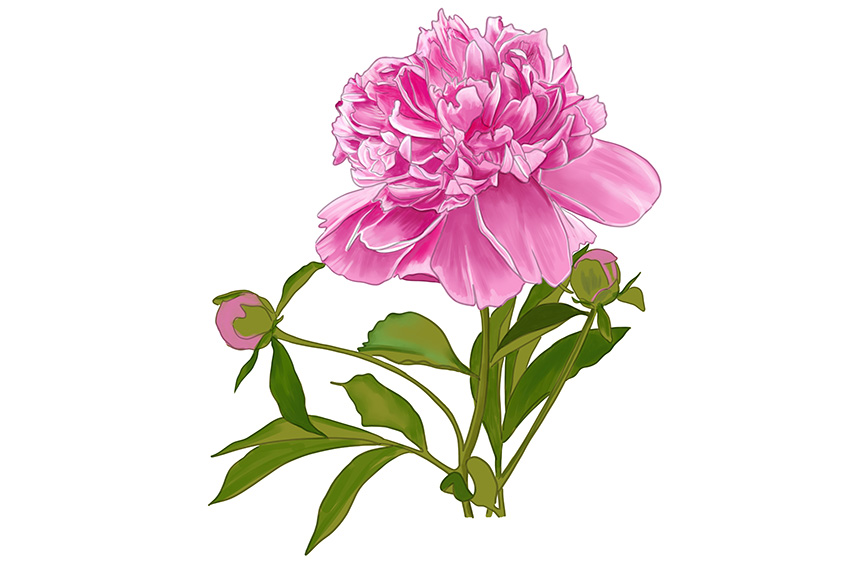
Using a small paintbrush, you will now add a layer of dark green paint to the edges of the flower’s stem and leaves. Choose a soft paintbrush to blend the colors, and finally, add some color to the unopened flower buds.
Step 15: Blending the Color on the Leaves of Your Peony Flower
Continue blending the colors of the leaves and stem by using a mixture of light green and white paint. Use a small paintbrush to blend your colors. Now you can trace over the edges of the leaves and darken the tips. You can now take a clean blending paintbrush and blend further.
Do the same to your unopened peony flowers.
Step 16: Adding Highlights to the Leaves and Stem of the Peony Flower
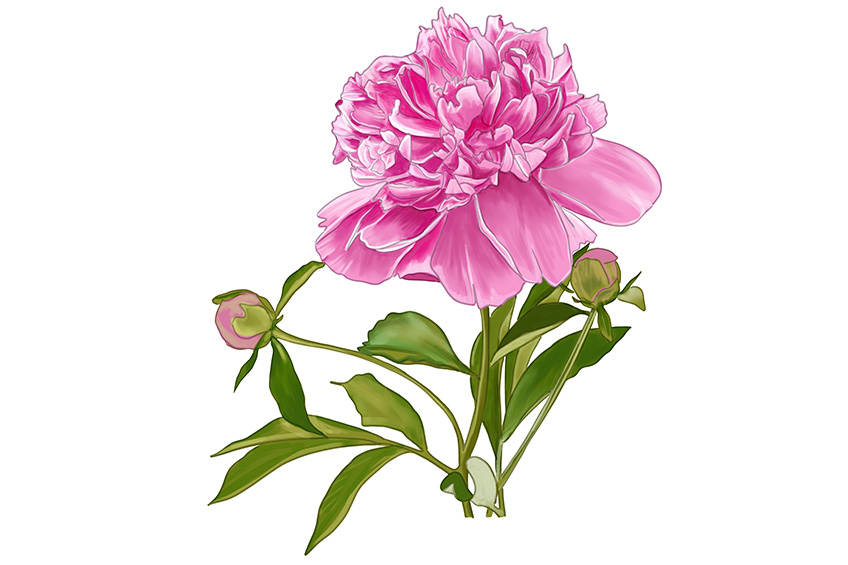
By this stage, your peony illustration should be looking great! Now you will add highlights to the stem and leaves. Take a fine paintbrush and white paint to touch up the edges of the stem and leaves, including the outer areas. Finish it off by adding brown paint, and begin filling the bottom area of the plant. Include the flower buds’ leaves.

Step 17: Shading Your Peony Drawing’s Leaves and Stem
Chose a small paintbrush and a smidge of black paint, slowly paint the bottom leaves and create the shadow of the peony stem.
This should make the drawing come to life!
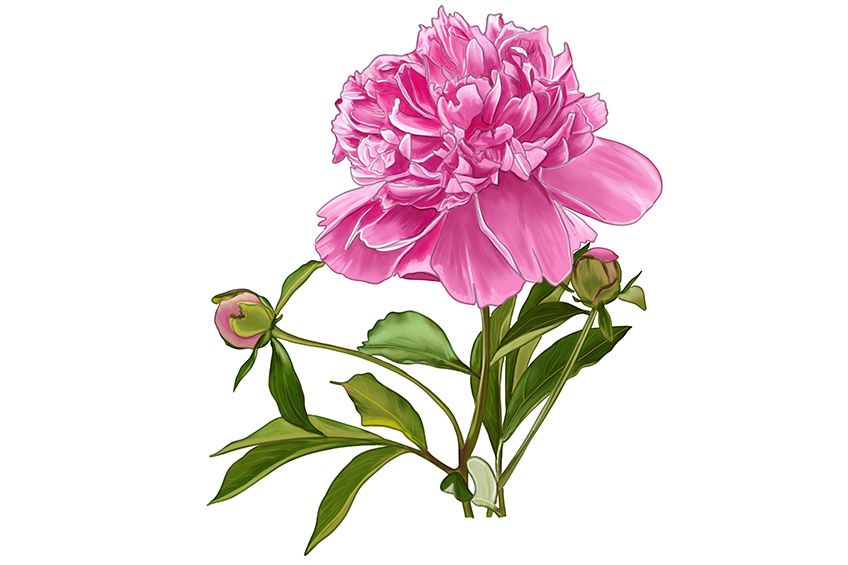
Step 18: Adding the Final Touches to Your Peony Flower Drawing
You have reached the final stage of our how-to-draw-a-peony tutorial. For the finishing touches, you need to tidy up the illustration by gently tracing the lines of flower petals, leaves, and stems of your peony flower and erase any pencil foundation lines that are still visible.

Good job! You have completed your very first peony flower drawing! This simple how-to-draw-a-peony tutorial will hopefully have left you with the knowledge to create more peonies artwork! You have covered the basics of creating foundation lines, color techniques such as shading, and learning about using highlights to create a realistic effect on your peony flower drawing. We hope that you had fun being creative and will join us for more drawing tutorials in the future!
Frequently Asked Questions
Is It Easy to Sketch a Peony Flower?
With our easy-to-follow 18-step guide on how to draw a peony, you will be surprised at how simple it is to create a peony drawing! Our lesson has been created to cater to any level of artistry, and is easily adaptable to any medium!
Can I Illustrate a Realistic Peony Flower?
This step-by-step guide will show you the coloring techniques to create a realistic peony drawing. The trick to drawing a realistic-looking peony is all in the color, shading, and highlights. So, if you follow this simple how-to-draw-a-peony guide, you should be a master in no time!

Learn more about Israel Benloulou and about us.


