How to Draw a Dragon – Fantastic Creatures from Mythical Worlds
This post may contain affiliate links. We may earn a small commission from purchases made through them, at no additional cost to you.
Two mighty wings, sharp teeth, a fiery breath, and shiny scales – when you think of a dragon, these are often the first characteristics that come to mind. There are no limits to what a dragon to draw can look like. After all, they are fictional creatures that are only brought to “life” in series, films, and books. The best-known examples are probably Drogon from the TV series Game of Thrones, Smaug from the Hobbit movies, the dragon into which Maleficent transforms in the Disney classic Sleeping Beauty or Falkor from The Neverending Story. However, if you look a little closer, you will soon notice that all these dragons are different from each other. But what exactly do these differences mean? And what steps to take to make learning how to draw a dragon easy and realistic? What is there to consider with a dragon to draw? In this tutorial, we will show you exactly how to draw a dragon step by step.
Table of Contents
The Different Types of Dragons
When someone talks about a dragon, they often think of a large, four-legged scaled beast with two wings, a long tail, and a neck, with countless spines and fins on its back. Besides this stereotype, there are some distinctions and even other terms for dragons for various “subspecies”. I will introduce you to six of these subspecies but don’t forget: Because dragons are fictitious creatures, a fixed subdivision is almost impossible. The possibilities to design a dragon are only limited by your imagination! They all can have as many colors, horns, spines, fins, or claws as you like, they can be as big as skyscrapers or as small as a mouse.
The Dragon
As just mentioned, a “real” dragon has four legs, a pair of large wings, a tail, and spines. Dragons easily glide through the air with their huge wings. The bigger the wings of the dragon, the higher and further it can fly. If the wings are rather small and have a smaller wingspan, the kite can usually only fly or glide short distances and depends on warm-up and down winds, just like a bird.
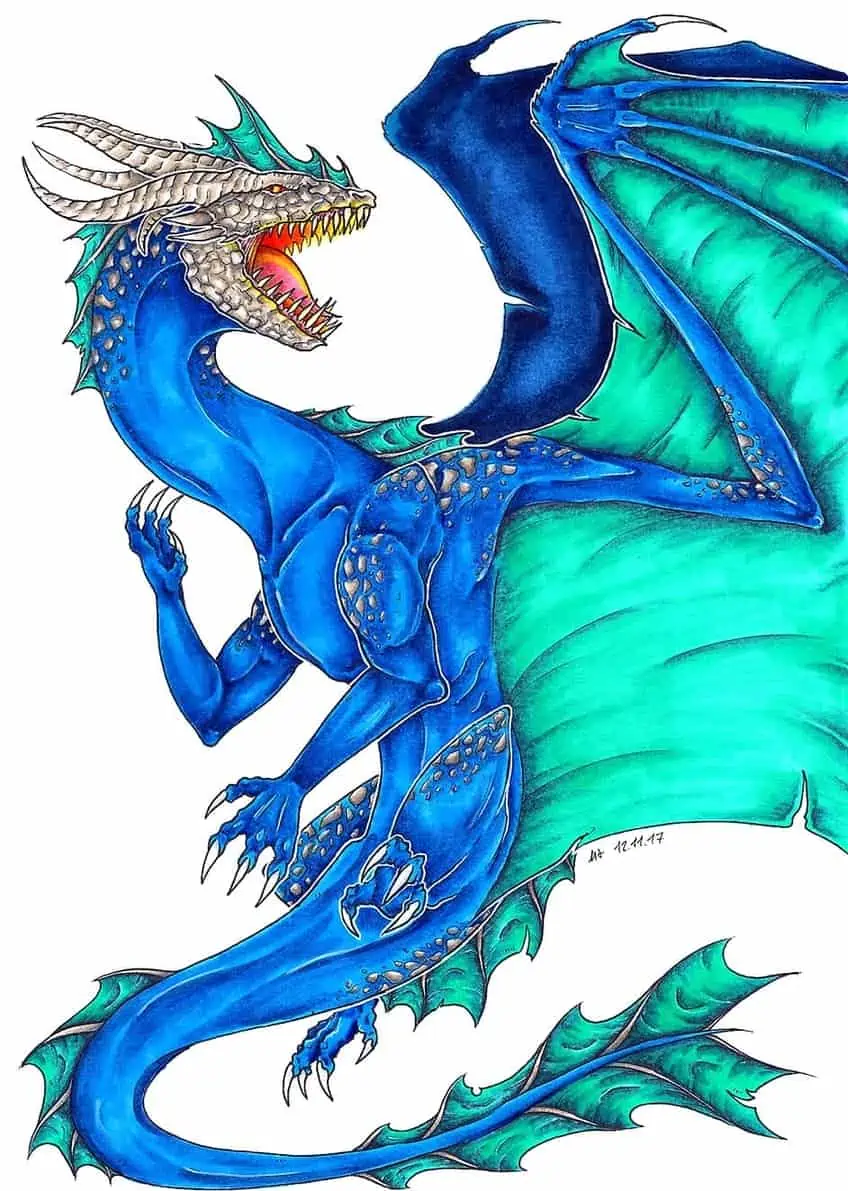
The Wyvern
Unlike the classic dragon, the Wyvern has no forearms. Instead, they have large claws or “thumbs” at the upper ends of their wings, with which they can support themselves on the ground. Some wyverns use them as front legs, others only walk on their strong hind legs. These are usually very muscular so that they can easily get into the air after a short sprint to take off.
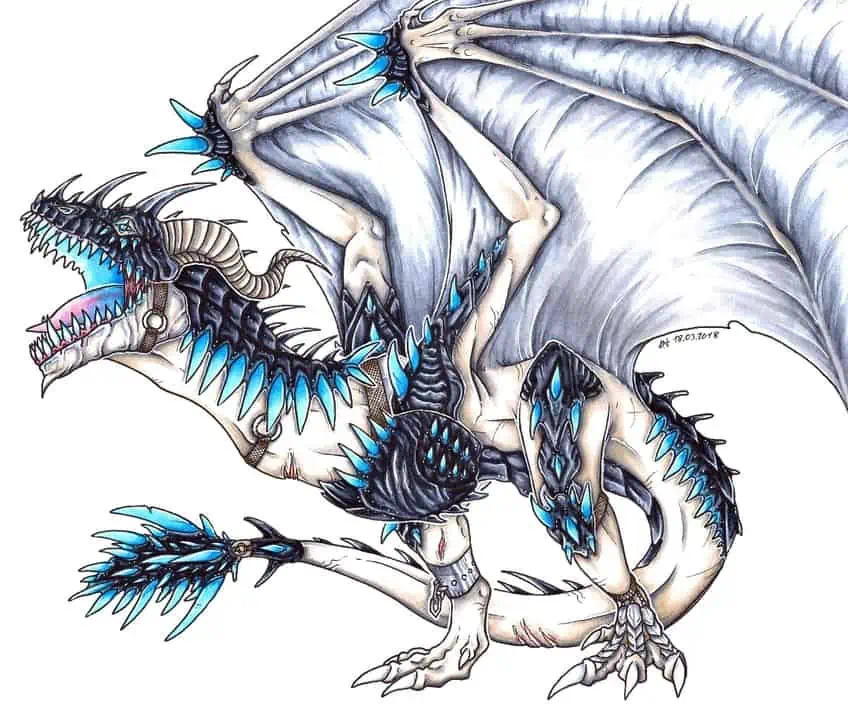
The Drake
This being has no wings at all. Their bodies are designed to cover long distances on foot. Sometimes they also live in water and have large fins on their backs and tails to glide quickly through the water. They are very strong and their scales are robust.

The Amphiptere
Amphipteres are basically the exact opposite of the Drake: They have a pair of wings, but no front or back legs. They are often depicted as a very small dragon, which makes its way over the ground like a snake if it does not glide silently through the air.
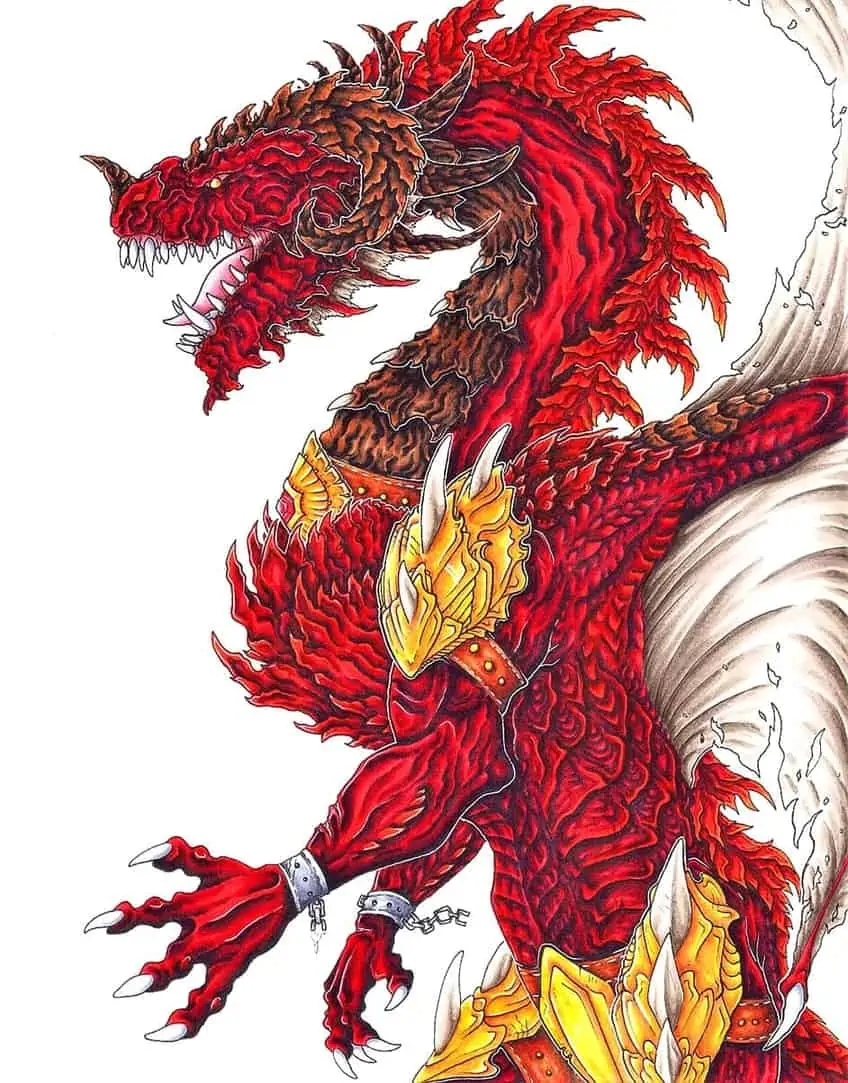
Oriental Dragon
Often seen on traditional Chinese drawings, the so-called oriental dragons have four, two, or even no legs and no wings, but can still – if you believe the legends – fly. This is what makes their magic possible. Gracefully these scaly creatures meander through the air, their mane, which extends from their head over their back, behind them. Their horns are often depicted as small antlers, two “antennas” grow from the sides of their nose, on their broad skull.
The Wyrm
The Wyrm has no limbs and in most cases, it cannot fly. They wiggle over the ground or through the sand and have wide jaws.
Materials Needed for Drawing Dragons
If we now want to learn how to draw a dragon, the right equipment is necessary. Good materials help to make dragon drawing easy. Basically, I try to carry a sketchbook with me at all times, in order to be able to capture suddenly appearing ideas, texts, or poses directly on paper and not to forget them later. To do this, any pencil or ballpoint pen is often enough, after all, the drawings in the sketchbook are rough sketches in 90 percent of cases. If you don’t want to carry a pencil sharpener like me, you’re probably better off with a mechanical pencil. When learning how to draw a dragon, it’s always a good idea to practice simple sketches often.
If you find it hard to come up with your own ideas, just google pictures of birds for example, or look for inspiration on Pinterest or other image collecting sites. Just remember not to copy or trace anything directly, if you want to upload your drawing somewhere! For private practice, this is of course okay – such as understanding the anatomy when learning how to draw a dragon. This helps to make dragon drawing easy for beginners. However, many artists are very sensitive when you reference their works.

Once I have an idea, which often comes out of nowhere at the most impossible times, I need the following materials for a larger drawing. Again, having the right materials makes dragon drawing easy and more enjoyable.
- Usually, I draw on drawing pads in A4 format, whereby one sheet should weigh between 135 or 190 grams. Then the Copic Markers do not press directly through and the ink will hardly run. On real Copic Paper, it does not run at all, but for me personally, the paper is too expensive and also a little too thin and/or smooth. But that is, of course, a matter of taste. Just find out what suits you best!
- For the first sketch, I use an HB pencil. With it, I determine how the dragon should be placed on the paper. With a 3b or 4b pencil, I then detail this first dragon drawing. When I am satisfied with this, I erase the first lines I drew with the HB-pencil. For this, I like to use basic erasers which you simply put on the tip of the pencil. For larger areas, I use erasers from Staedtler.
- Then the coloring begins, for which I like to use Sakura Pigma Micron Pens. When I am satisfied with this, I let the ink dry a bit and then erase the pencil lines completely. For drawing dragons, I use Copic Marker as mentioned before. A cheaper alternative would be Prismacolor Markers, but I prefer to use the Copics because they have an angular, hard tip and a fine, flexible tip.
- When I’m finished painting, I add more details to the picture with the Sakura Liners or a white Sakura Gelly Roll Pen.
How to Draw a Dragon Step by Step
I have created a simple guide below to teach you how to draw a dragon step by step. If you want to learn how to draw dragons, then this should be a fun and easy dragon drawing tutorial to follow. Above all, I will deal with aspects like anatomy and proportions.
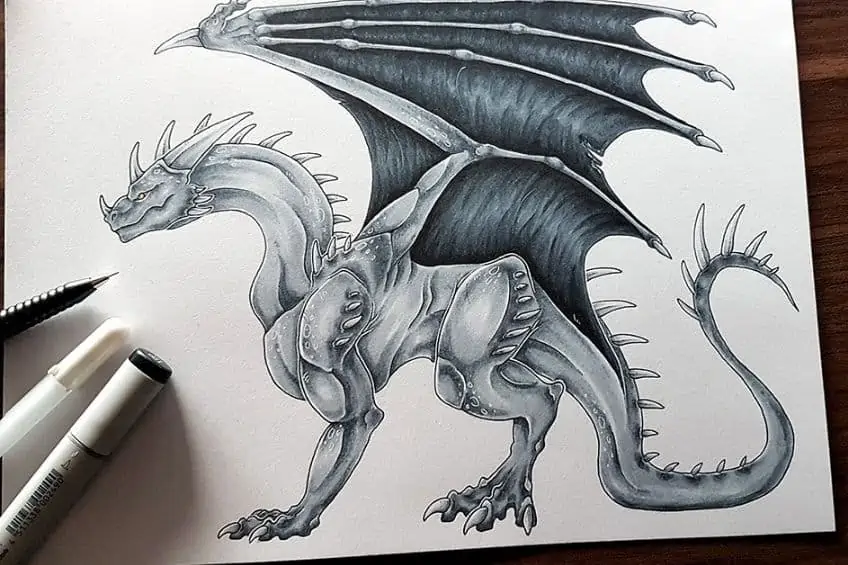
- First of all, I determine the relationship between the upper and lower body and the dragon’s head and how the dragon should be placed on the sheet. For the sake of clarity, I simply put it to the side.
- Then I connect the circles with outlines so that a kind of “dragon sausage” is created.

- Then I place the wings and legs and show the muscles first with rough circles so that I can simply divide the proportions. This is important for an easy dragon drawing.
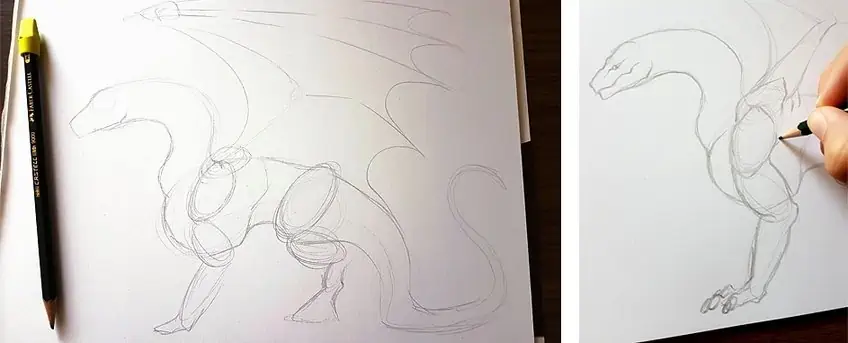
- Then I work out the proportions, still with my HB pencil, until I am satisfied with them.

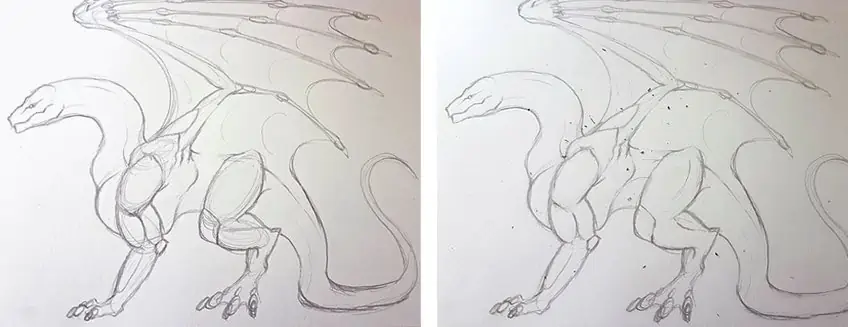
- Now I erase the first auxiliary lines to check that all limbs are also in harmony.
- If this is the case, I add details like spines, horns, and fins. For this dragon drawing, I decided to use a simple design, so that the drawing does not become too confusing.

- Then I trace everything with a 4B pencil to determine the lines of the dragon.

- Now it gets serious, now it’s time for lining. With a liner, I first draw the main lines of the dragon and let this become a bit thicker where two lines meet.

- Then I add the remaining finer lines and details like scars, scratches, or hinted scales with my 005 Liner.
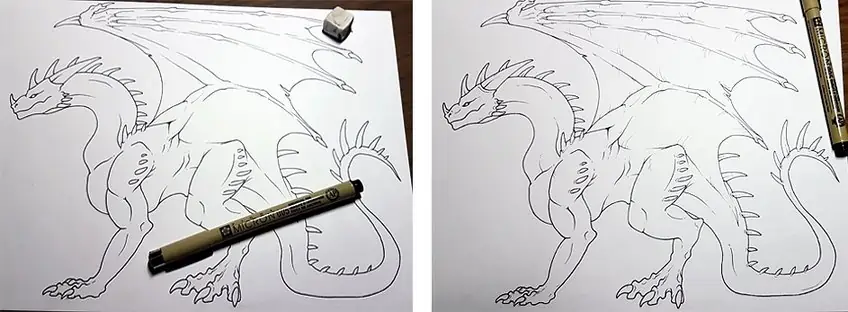
- Once that’s done, it’s time to color the dragon: This dragon will turn grey for simplicity. I always start with the darkest color, then work my way up to the lighter levels. Here I consider: Where do the individual parts of the dragon’s body cast shadows and where does the most light land accordingly?
- The horns and claws of the dragon turn white, so I shade them with the Copic colors C5, C3, and C1.

- Then we get to the body where I first shade with the Copic C7 as the darkest color.

- Then I go over these places with C5 and finally with C3 to create a gradation of colors.
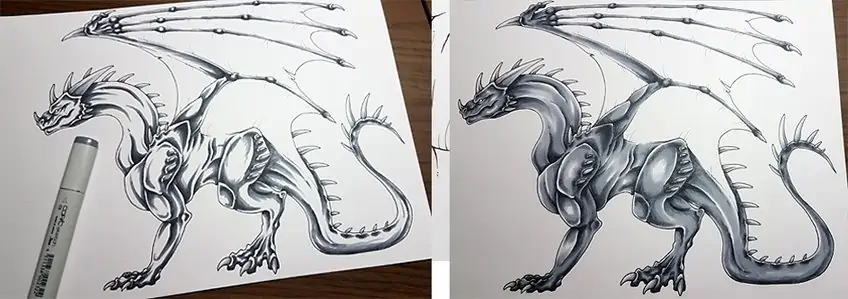
- Finally, I go over the whole dragon again with C3.
- With the white Sakura Gel Pen, I add the first details.

- Now comes the last part: the black wings. 100 is the first color (Yes, this is a color, black in the Copic spectrum, to be exact).
- With C8 I work my way to the middle of the membranes, taking care to draw many fine and curved lines to give the wing as much texture as possible.

- With C5 I then fill in the brightest areas.
- Last but not least I add more details with liner and gel pen until I am satisfied with the image.
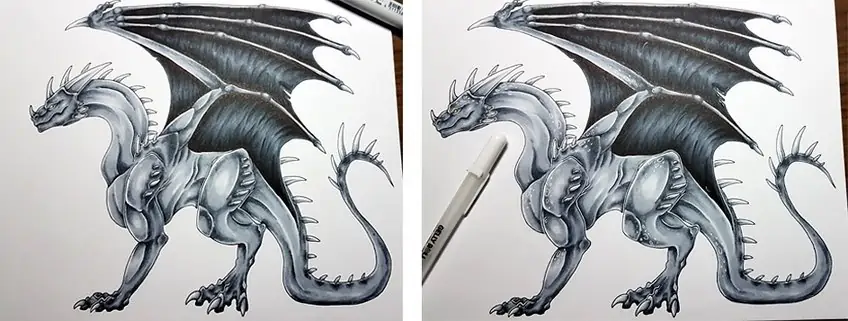
- Because I often create dragon drawings in the evening, I usually take a photo of the finished drawing in the morning or at noon, because it always looks much better in natural light.
How to Draw a Dragon: Dragon Scales
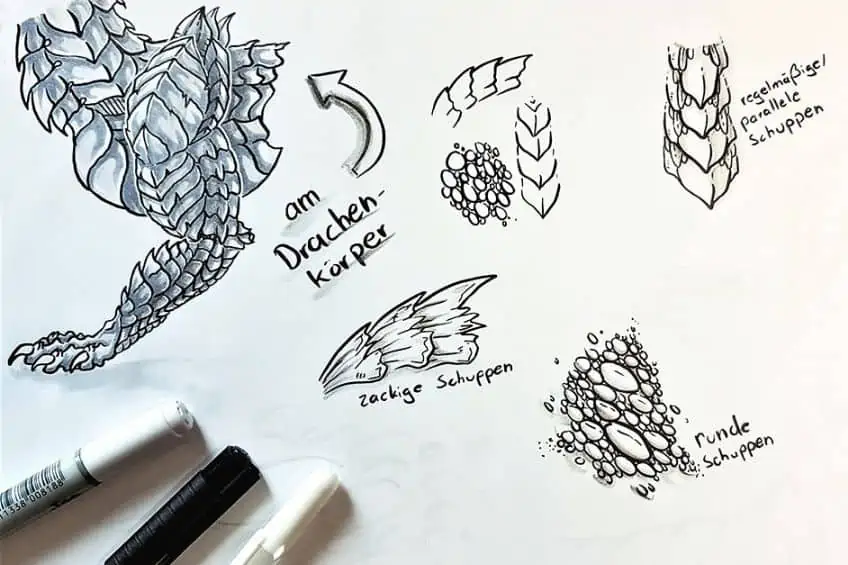
To make learning how to draw a dragon easy, you will need a good technique for the scales. Everyone has their preferences when it comes to drawing the dragon scales. Whether you only hint at the surface structure of the scaly dragon skin, as I did in the previous tutorial, or whether you paint every little scale is up to you. Anyway, there are enough possibilities.
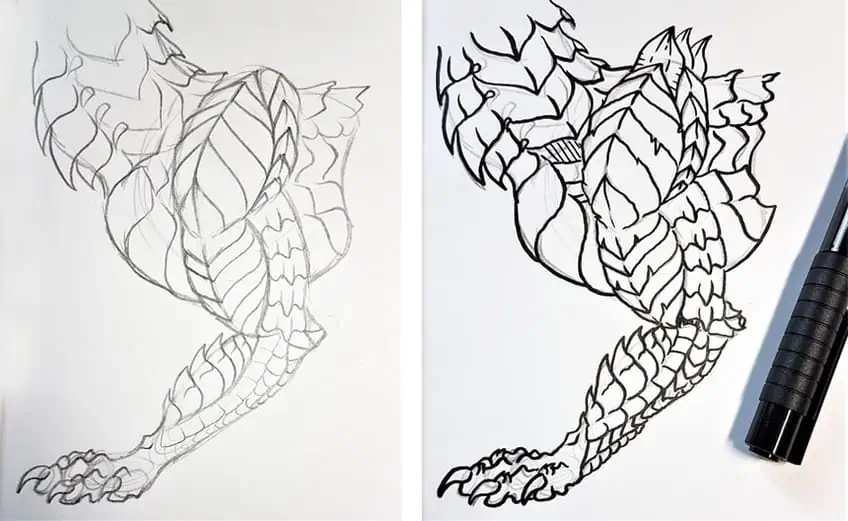
- What you should always pay attention to when learning how to draw dragons that are heavily scaled is the structure and the course of this. That’s why I always start by determining the proportions of the reptile first. To do this, I first draw the main muscles of the limb with circles and border them so that the individual muscles can be identified exactly. To make learning how to draw a dragon easy, identifying and outlining these parts helps a lot.
- Then I determine where the largest or the strongest dragon scales should be. These act – especially in frontal combat – as armor, and are accordingly often directed forward.
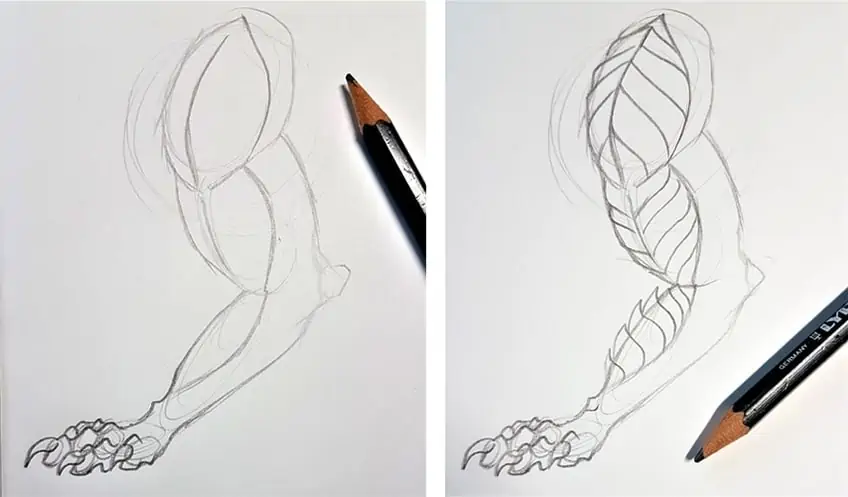
- Once I have marked these areas, I insert a parallel and regular scale pattern.
- Then I fill the remaining surface of the skin with another, smaller-scale pattern, which is more detailed in its structure and therefore more flexible than the one in front.
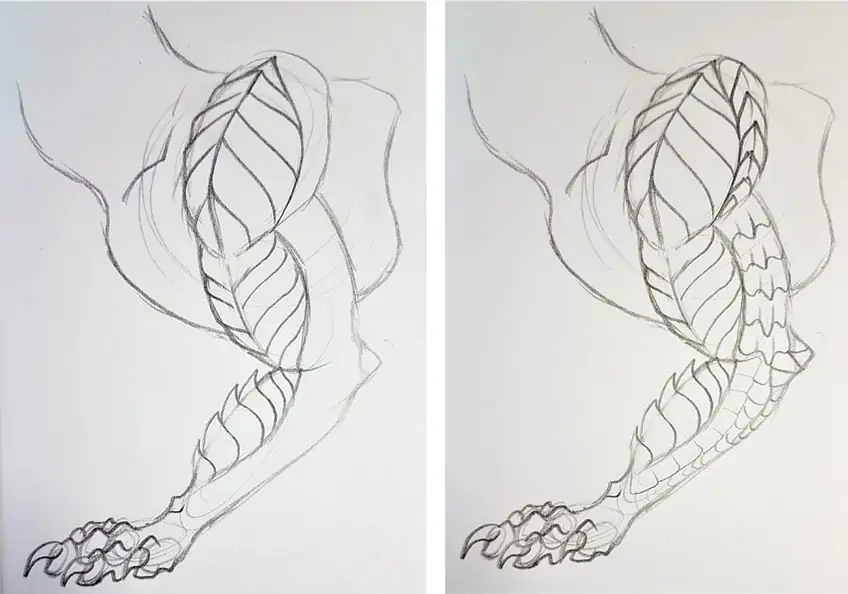
- I proceed exactly the same way later with the torso of the dragon, where the strongest scales are on his back and belly and on his neck.

- Then I line the scales with a flexible marker and erase the pencil lines.
- Finally, I add a few shades
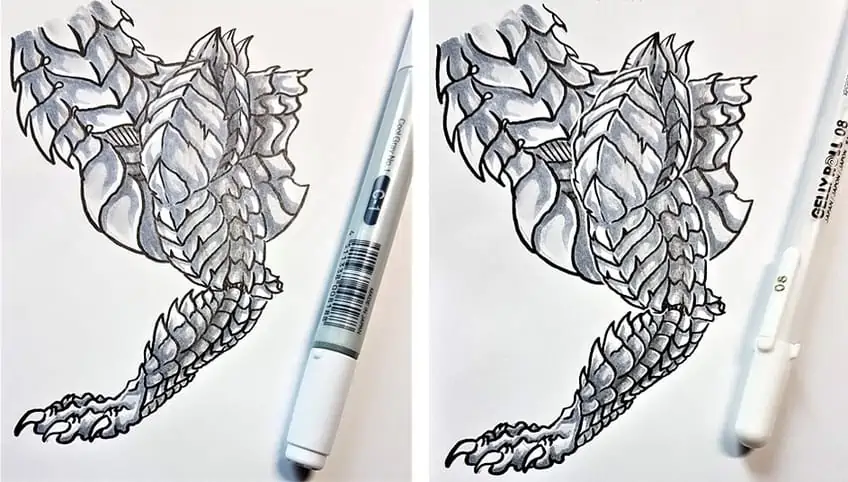
Learning how to draw dragons is an enjoyable and creative process. The easy dragon drawing guide above should have helped and inspired you to start creating your own imaginative dragon artwork. We hope you have lots of fun when coming up with a dragon to draw!

Lisa Hustedt
Lisa Hustedt comes from Lower Saxony and has actually been drawing since she could hold a pencil. Over the years, especially her school years, Lisa increasingly developed an affinity for dragon painting. Dragons in general she always found fascinating and thus dragons became her favorite motif over time. So she has almost always loved drawing dragons. Lisa taught herself to draw in addition to the normal art classes at school, which is why she also decided to do her Abitur, which she successfully completed in 2018, with an art focus.
Currently, Lisa is a trainee editor at a local newspaper, which is why she only gets to paint in the late evening hours and can only occasionally accept commissioned work. Lisa prefers to draw with some music in the background, when the day's work is done and she can just switch off, then it's like pure relaxation and she is always especially happy when others like her pictures and Lisa can maybe inspire them a bit with my dragon drawings. Lisa has the hope that she will never have to stop drawing and maybe one day she will be able to earn her daily bread as an animator or character designer. It may be a long way until then, but as they say, even long journeys begin with a first step.
https://www.instagram.com/kronoluna
https://www.artstation.com/kronoluna
Learn more about Israel Benloulou and about us.


