
Resin Coasters – Step by Step Tutorial on Making Resin Coasters
Resin is a brilliant medium for making all kinds of crafts and projects. It is accessible, fairly easy to work with, and can create many beautiful designs. Resin coasters are a great project for anyone wanting to make something that is both practical and creative. You can make resin coasters in all kinds of colors, shapes, and designs. Interested in finding out more on how to make resin coasters? Check out our complete guide below.
What are Resin Coasters?
As you can guess from the name, resin coasters are made using a resin that has been poured and set in a mold. The mold can be any type of coaster shape that you like. These are used to protect wood surfaces from marks and stains made by mugs and glasses. Resin coasters need to be made using the correct resin for a practical solution, but they can also have various decorative elements to them.
Materials Needed for Making a Resin Coaster
DIY resin coasters can be made at home without too many materials. If you dont want to get each item individually, you can also buy a resin kit which will have just about everything you need for creating resin coasters. Below is a list of all the materials required for making DIY resin coasters:
- Sometimes people like to embed certain items inside the resin coaster. This could be an object like a flower or coin, sand, glitter, or anything you want to set in the resin
- Color dyes or pigments
- Resin coaster molds
- Some kind of mold release agent
- Resin mixing cups
- Stirring sticks for mixing the resin
- Safety goggles and nitrile gloves
- A resin drying/curing mat
- A blowtorch or hairdryer
- Toothpicks
- Cleaning up cloths
- A cover for the coasters while they cure. An empty box works well
- Sometimes people add a sheet of cork or self-stick rubber pads to the bottom of the coaster
- And of course, an appropriate casting resin
Best Resin for Coasters
If you are making resin coasters, there are loads of different resin options to choose from. We have chosen the best product picks available for achieving perfect results.
Overall Best: PRO MARINE SUPPLIES Art Resin
This resin by Pro Marine supplies is the perfect choice for arts and crafts projects thanks to its excellent durability and clarity. This is a specially formulated art resin to provide a clear and glossy finish. The resin offers a great protective coat too which is a good thing to have when making coasters.

- Self-leveling and high gloss UV resistant formula
- Produces a tough, water-resistant coating
- Specially designed for use with wood finishes
This art resin has a non-toxic formulation. You also don’t have to worry about dangerous fumes when using this resin. This makes it easy to work with the resin in all kinds of environments. For easy use, the resin is self-leveling and can be mixed in a simple 1:1 ratio. For coaster making, this product is fantastic thanks to its good level of heat resistance and UV protection. This means that it won’t yellow over time, and will maintain its glossy shine
Pros
- The resin is heat resistant and offers UV protection
- Dries to a clear and glossy finish
- You get a lot of resin to cover a large area
- Specially formulated for arts and crafts projects
- Adding color and pigments is easy
Cons
- Removing air bubbles can be difficult
Best Heat-Resistant Resin: STONE COAT Countertop Epoxy
When making epoxy coasters, an important factor to consider is the heat-resistance of the resin. Especially if the coasters will be used with hot mugs, they will require a certain level of heat tolerance for better durability. This is why Stone Coat resin is such a great choice for making coasters. In fact, this resin has been specifically designed for countertops and tables – making it a perfect choice for coaster surfaces.

- A durable woodworking/countertop epoxy resin
- Scratch-resistant and UV resistant
- Provides a clear and shiny finish
Because of this formulation, this resin is completely food safe and offers good heat resistance. The resin is eco-safe, VOC free, and easy to work with. Once cured, this resin is also very durable and scratch-resistant. There is also UV protection for a longer-lasting shiny finish. For use on resin coasters, this product ticks all the right boxes: it is heat resistant, durable, scratch-resistant, and suitable for heavy use.
Pros
- Highly durable and scratch-resistant
- Offers a good level of heat resistance
- Food safe and non-toxic formula
- Dries to a clear and shiny finish
- Easy to mix and work with
Cons
- Quite an expensive resin
What Resin Mold to Use
When making DIY resin coasters, you can let your creativity run wild. Coasters can be made in a wide variety of shapes and designs that can suit your space and vision. Below is a list of some different types of resin coaster molds available.
- Regular round or square resin coaster molds
- Rectangular shaped molds
- Heart-shaped molds
- Oval shaped molds
- Hexagonal molds in large or small sizes
- An octagonal coaster mold
- Flower-shaped coaster molds
- Oddly shaped geode molds
- You can make resin coasters with a rim or flat without one
- You can get resin molds that are used to create a type of river or ocean effect in the coaster
- Some resin coasters can be molded as a puzzle with four pieces. This can be in any shape and will require separate molds for each piece
- Some resin molds have a special surface to give an effect to the finish. Matte or surfaces are available for making different types of resin coasters when cured
When finding a resin coaster mold, you can use items found in the house – such as shallow containers. If using molds like this, they will most likely have to be cut when taking the cured resin out. The other option is to use silicone molds. These are flexible and can be used time and time again. They are also easier to work with and provide better results as they are perfectly suited for the job of resin mold casting.
Over time, silicone resin molds can start to deteriorate. This will cause the resin to stick to the mold – resulting in the mold getting damaged or torn.
How to Make Coasters With Resin
No matter what style of epoxy coasters you decide to make, resin is an enjoyable medium to work with. Follow our step by step tutorial on how to make resin coasters below.
Preparing Everything
When making resin coasters, being fully prepared is the essential first step. Know how the resin works, what needs to be done, and lay out all of the materials you will need for the project. For safety reasons, try to work in a space that is well ventilated, and have your protective gear (mask, goggles) ready.
Resin can be very difficult to clean up, so cover any surrounding areas with plastic sheeting if you don’t want to mess on them. Make sure that the mold is ready by spraying a layer of release agent over it. The best temperature for working with resin is around 74 degrees Fahrenheit, so try to work in a warmer area if possible.
Getting the Resin Ready
Resin comes in two parts that need to be mixed together in order to get a product that you can work with. A useful trick is to place the unopened resin into a container full of warm water and leave it to stand for a while, This will help to reduce the chance of bubbles forming. However, this will also reduce the working time you have with the resin before it cures.
When mixing resin, make sure to do it with regards to the size of the mold you are using, and consider if you are embedding an item into the resin. This will help you to determine how much you need to mix. Generally, you will need to mix the resin in a half and half ratio to reach the right amount of resin you will need in the end.
Measure out the resin quantities into disposable cups, and pour these into a bigger cup. Then mix this together thoroughly – ensuring that all resin and hardener is completely combined with none left at the bottom or on the sides. Continue to mix everything together until you have a clear mixture.
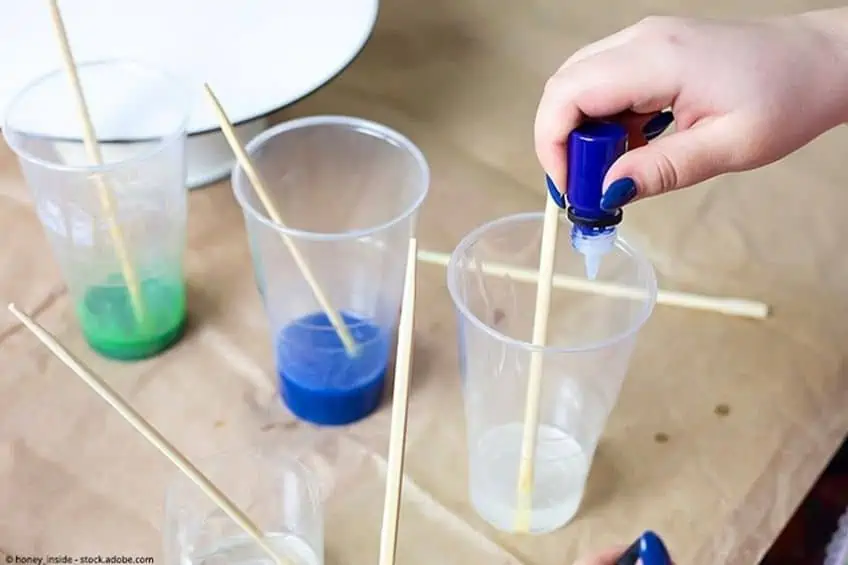
Adding Color
Adding color to resin introduces another element, and it can change the chemical properties of the resin. For this reason, it is best to use a color brand that is specially designed for the resin you are working with. Otherwise, the color can affect the resins curing time, consistency, or it might result in the color drying to a slightly different shade.
When the resin and hardener have been properly mixed together, you can add in the color. This will need to be thoroughly mixed together. The color you add can come in the form of pigment powders, specially formulated color dye for resin, or alcohol inks. Whichever coloring product you choose, never add more than a 6% ratio of it compared to your resin.
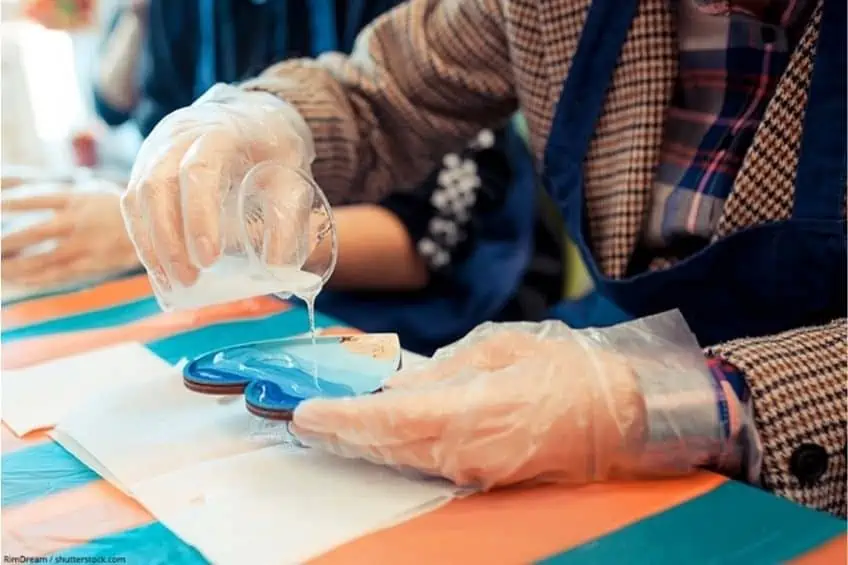
Pouring the Resin
When the resin is all mixed and colored, it is ready to pour into the resin coaster molds. Generally, a coaster will be about ⅓ of an inch. Aways pour the resin into a mold that has had a release agent added. Pour until you have reached about ⅛ of an inch from the top of the mold in order to avoid overflowing.
Two Layer Pouring
Pouring resin coasters can also be done in double layers. Start by pouring the first thin layer as we have outlined above. You can now add the items to embed if you are doing this. Make sure that there are no air bubbles, and leave the resin to cure – usually, this will take about four hours. Then you can pour on your second layer. This layer can be a different color for a unique effect. Each coaster will use about 88 to 100 ml of epoxy resin.
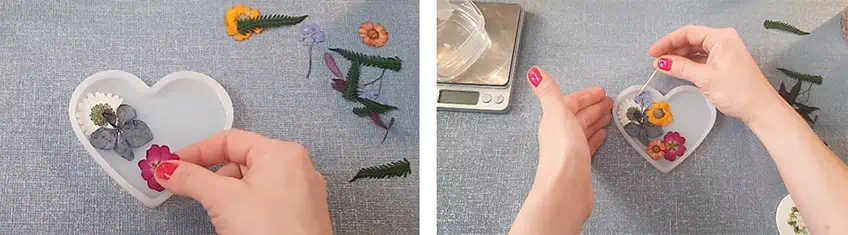
Embedding Objects
Pick out the type of object that you will embed and have it ready to set into the resin. Small, flat items are always a good idea. Take the silicone mold, and decide which side will be the top of the resin coaster. The side that is facing up towards you is probably best to use as the top of the coaster to avoid embedding the item upside down. However, you will have to do this if you are making a rimmed coaster, or if the item floats.
Let’s imagine the top side of the mold is the top of our resin coaster. Start by pouring some resin into the mold, then pour a portion of resin into a separate cup. Place the object that you will be embedding into this separate cup of resin and coat it thoroughly. This is done to try to stop bubbles. One coated, place the object into the resin in the mold and pour another layer of resin on top.
Avoid moving the items around when they are in the resin because this can cause bubbles to form. Sometimes the object will start to float, in which case you can press it back down using a stick.

Removing Air Bubbles From the Resin
Any air bubbles that form can be taken out by using a toothpick or a blowtorch. If using a torch, you can gently wave the heat over the resin to get rid of bubbles. Otherwise, simply pop the bubble by using a toothpick.
Curing the Resin Coasters
Once everything has been poured and prepared, it is time to leave the rein to cure. For best results, try to leave the resin alone for 48 hours until completely cured. This can vary depending on the resin product used – some take 24 hours, some take 72. Covering the resin coasters while curing is recommended in order to avoid any dirt or dust particles settling into the resin. This can be done with a box.
Take The Coasters Out the Mold
Don’t try to remove the resin from the mold if there is still some flexibility in the resin. This could lead to a distorted resin coaster. Make sure that the item is hard and fully cured before handling it. When using a silicone mold, it is pretty easy to just pop the resin item out as the molds are flexible. Using a release agent is important to help the product from coming out easily.
Alternative Mold Release Agents
When making DIY resin coasters, you can use some household items to help release the resin from the mold. Non-stick baking spray works really well. This spray is very fine and non-toxic, so it shouldn’t affect the resin at all while curing. You can also use a layer of vegetable oil if applied thinly. If the mold is not detailed, petroleum jelly can be used. Another option for basic, undetailed molds is talcum powder.
Polishing Resin Coasters
When the cured resin is removed from a silicone mold, it will usually have a smooth and glossy surface. To make sure that the surface is perfect, you can sand it down. Use fine-grit sandpaper for this, and wet the sandpaper when using it. However, you can sometimes skip this step and go straight to polishing the resin. Polish is an easy way to get an outstanding shiny finish on the resin surface
If the casting comes out a bit dull or scratched, then wet sanding is needed. This is easy to do by hand on small coasters. Sanding the item wet will help not to cause any dust particles to go everywhere. You can either wet the sandpaper or the resin surface. When you have finished sanding the item, the coaster should have even surfaces and should be smooth and level. Dry and clean the coaster before polishing. Make sure to use the right choice of polish and cloth to get the best results for your resin coaster.
For a nice finishing touch, you could add a layer of cork or rubber bumpers to the bottom of the coaster.
Making Resin Coasters for Hot Drinks
Knowing how to make coasters that can withstand a higher temperature is important, as the coasters will often be used for hot mugs. Regular epoxy resin does not have a great level of heat resistance, and can only hold up to temperatures up to 300 degrees Fahrenheit for a very short time before the resin warps or damages. In order to make coasters suitable for hot mugs, you will need to use a special heat resistant resin.
Temperature resistance differs between brands and manufacturers, but you can get products that will stand up to 600 degrees Fahrenheit. There are a number of different heat resistant resin options available for safe use in the house.
Resin Coaster Ideas
Coasters don’t have to be boring, standard objects. You can make all kinds of different types of resin coasters, using various materials and embedding different items. You can combine materials with resin – such as metal or glitter, to create a unique effect. Try not to use things like fresh flowers or leaves, as they contain moisture and can cause browning in the resin. Rather use dried flowers. Some inspiration for creating resin coasters and embedding items can include:
- Coins
- Bottlecaps
- Shells
- Different types of paper
- Beads and buttons
- Tiles/mosaic pieces
- Sand or stone
- Clockwork pieces
Creative Resin Coaster Ideas
You can take the resin coasters a step further by incorporating unique designs and materials. There are all kinds of glitters, paints, and colors that can be used to create unique effects. Combined with different resin coaster molds and shapes, you can make some very special creations.
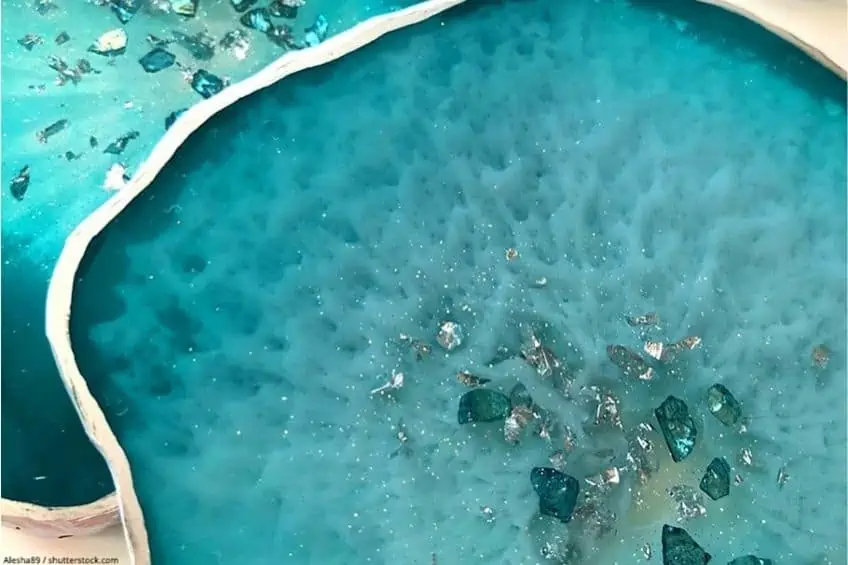
- Ocean and beach coaster: You can make coasters with the effect of the sea and the beach. Use blue pigments to create a clear blue ocean color, then set this alongside beach sand mixed into the resin.
- Galaxy coasters: With the right combination of colors and glitter, resin coasters can be made to achieve a galaxy effect.
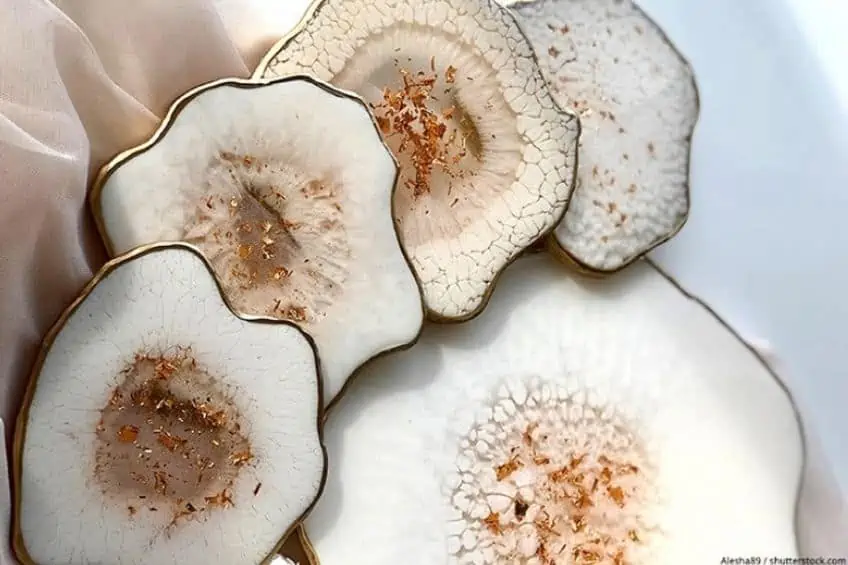
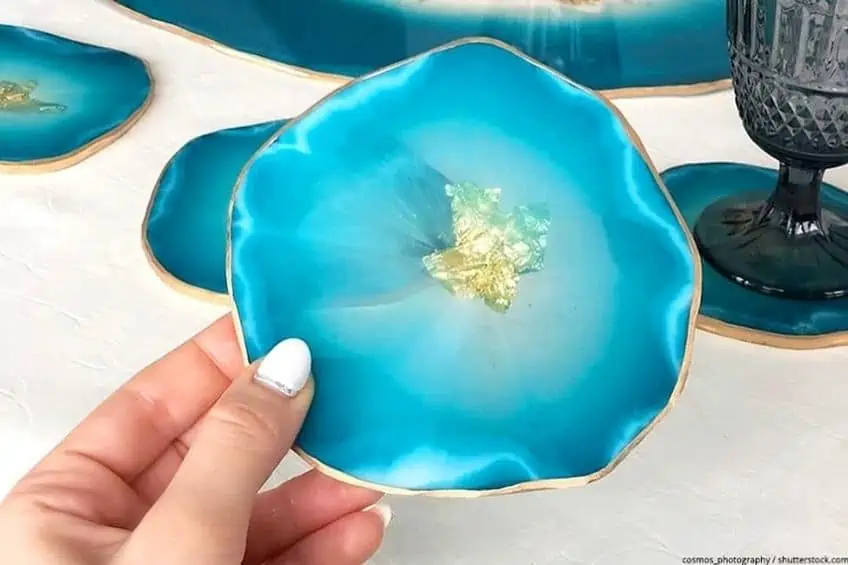
- Geode resin coasters: You can make resin coasters that look like geode crystals in all kinds of colors and shapes. Adding glitter works really well with these. You can even buy geode molds especially for this purpose. To take this even further, you can cast resin coasters in puzzle geode molds that piece together into a bigger circular design.
- Coasters with foil and resin: Adding pieces of foil into the resin mixture can produce an interesting textured look. This can be combined with various colors and pigments.
- Natural items in the coasters: You can combine various found natural items into the coaster. Things like wood and rock can be used to create amazing effects alongside the resin.
- Alcohol ink and petri dish coasters: Alcohol inks work really well with resin to create special colors and patterns within the coaster. White alcohol inks are heavier and can create deeper layers of color within the resin coaster.
- Wooden based coasters: You can take already made wooden coasters with a rim, and pour the resin onto them. There are various colors and effects that you can use to create something special.
- River coasters: Just like an epoxy river table, you can also make a river coaster with resin. This can be done by using special coaster molds for the purpose, or by casting live edge wood. Use color pigments and dyes to create the blue river effect.

Frequently Asked Questions
How Much Resin do You Need for a Coaster?
Resin coasters are pretty thin and small items, so not much resin is needed. Of course this depends on your specific coaster design and size, but generally you will need about 3 oz of resin for each coaster.
What Resin is Best for Coasters?
Epoxy resin is generally used for coasters thanks to its durability and clarity. Try to use a resin that is heat resistant and UV protected to avoid yellowing.
Can You Seal Resin Coasters?
Resin coasters are durable and generally scratch-resistant – meaning that sealing them is not always necessary. However, you might want to seal them in some cases. This can be done by using a gloss sealer spray.
What Types of Resin Coasters can You Make?
When making resin coasters, you can let your creativity run wild. There are all sorts of shapes and designs you can make, such as river or ocean coasters, You can also embed a wide range of items into the resin.
When making resin coasters, you can let your imagination run wild and produce all kinds of creations. Knowing how to make resin coasters is a fun and rewarding task that will leave you with useful items that you can be proud of.


