Oil Painting Techniques – A Look at the Basic Oil Painting Styles
You might be an amazingly talented artist who works with acrylic paints, but learning to work with oil paint and all of the different oil painting techniques might seem like a daunting task, especially because there are so many oil painting styles – where do you begin? Oil paint is a very different medium to most paints, and as the phrase goes, practice makes perfect. This article will highlight the tricks to this trade, from what supplies you need for oil painting to the most popular techniques for beginners.
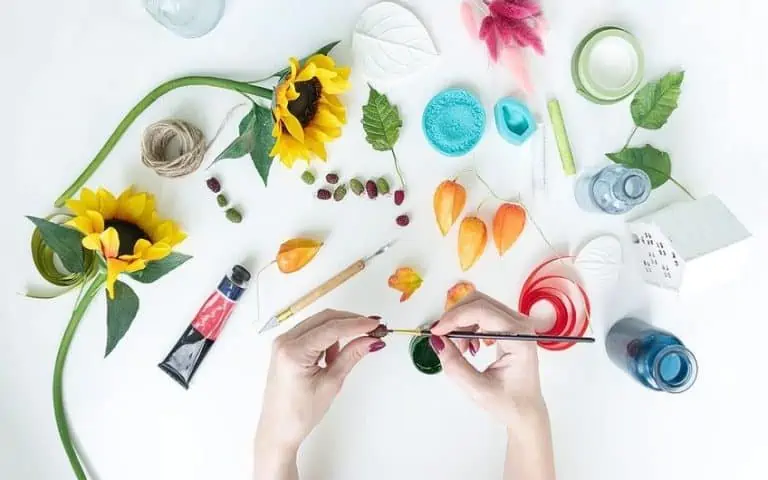
What You Need for Oil Painting
This paint has been extremely popular throughout history, having been used by some of the most famous artists. The shine of the colors and the buttery texture of the oil paint are truly mesmerizing. Before you begin, there are a few tools and materials that you need – it would be a hindrance if you left one item out. To find out exactly what you will need to start oil painting, keep reading. A handy tip is to have a completely separate set of tools for your other paints, as oil painting can be messy and tricky – they do not like to mingle with other paints like latex or acrylic.

Paint Sets and Canvases
If you are looking for the right paint set as a newbie to the oil painting art world, you will quickly learn that it is better to spend your money on a quality set of paints and save by using an average canvas. Linen canvases are fairly expensive so, in terms of what canvas is the best and most affordable for those starting with oil painting, a canvas made of birch wood or masonite is sufficient for beginners.
Paint Brushes
Most tools and materials will explicitly state what mediums they are designed to work best with on their labels. When looking for paintbrushes designed for oil paints, you should be able to see so from the packaging. The type of brushes can vary in size and shape to allow you to achieve differently styled brush strokes.
Flat brushes will help you cover larger areas and get thicker lines, whereas a skinny and pointed brush is better for adding finer detail.
Paint Palette
There is no right or wrong palette. Most people prefer to use a melamine palette, which is a flat, smooth surface made out of manufactured wood, shaped to be either round or square. Other palettes include boards with a finger hold as well as those that are curved in shape – it s up to you and your preference.

Palette Knife
To transfer colors from the bottle or tube, some artists like to use a palette knife. This tool will also assist in the mixing of colors to achieve a perfectly smooth hue. Not only that, but a palette knife can also help you achieve certain dramatic oil paint textures that your normal paintbrush would not.
Brush Cleaners
Oil paint can be quite tricky to wash off your brushes when you are finished – merely rinsing with water is not enough. A solvent like mineral spirits or turpentine will do the trick. Caution must be noted, however, as these substances can make you feel lightheaded if you do not have sufficient airflow.
Tips and Tricks for Using Your Painting Tools
Simply knowing what tools you might need for oil painting only gets you halfway – there is still the matter of knowing what to do with them. Below, we have listed a few oil painting techniques for you to use and practice with your oil painting tools.

Perfect the Position of Your Brush
If you are trying to achieve some intricate line work with your oil painting and you feel like you are struggling, try to use the brush at a different angle to the one you were struggling with. You can twist and turn the brush to use every side of the bristles – you are not limited to one side.
You could even start with the flat side of a flat-end brush and, in the same motion, twist it to end on the pointed side of the brush.
Change Up the Pressure You Apply
The heaviness of the strokes you use will give a different look from one to the other. There is great importance in understanding when to use a heavy-handed stroke to barely applying any pressure at all. Too much pressure can cause lumps in the paint or the over-blending of the colors
Use Your Thumb to Blend
Sometimes, getting organic can make all the difference – perhaps your paintbrush is too bristly to accurately blend in your colors. Your fingers, particularly your thumb, are a helpful blending tool. Lots of people use their thumbs to blend their makeup, so why not for their oil painting artwork?
Paintbrush Etiquette
You might have thought that holding your paintbrush is just like holding a pen. Many people may think that this is the most basic thing, overlooking the different ways one can choose to hold their paintbrush. If you are a beginner, take note: The higher up the end of the paintbrush you hold, the more accuracy you will achieve once you are practiced in that method of paintbrush holding. It might feel a bit strange at first, but your artwork will appreciate it in the end because your strokes will look more fluid and less forced.

Avoid Over-Mixing
Start with just a little bit of one color when mixing it with another. You can always add more if needed, but adding the color incrementally helps you to avoid the creation of dull and lifeless colors as a result of over-mixing. If you are designing a color, make sure that it is properly blended on your palette before you apply the paint to the canvas. If you rush through the blending process, too eager to paint, you might find inconsistencies in the color you are working with. This can ruin your effect, and we do not want that!
Be Generous With Your Paint
This is not a time to be shy or frugal. If you are on a tight budget, you can work with smaller canvases to use less paint at a time. Dip your paintbrush into the paint often so that you are not rubbing dry bristles over your canvas, as this can cause scratchy effects. If you find it helps, you can also thin out your paint by mixing it with a suitable medium in order to give it a smoother texture. This all depends on what oil painting style you are wanting to achieve.
Maintain the Purity of Your Colors
Every time you are finished with one color, it is essential to wash that brush properly before you dip it into a different color. Some might suggest using a different brush for each painting, but you might not have the luxury of owning that many brushes. If you choose to skip this step, your oil paints will lose their color vibrancy, tainted by the color you were previously working with.

Practice Mixing With Two Colors
Getting excited about color blending is not something to be ashamed of – we all love a bit of experimenting! If you are new to painting and mixing colors to create your perfect hue, the concept of less is more is very fitting. Start with only mixing two different colors as opposed to four. This will help to maintain the richness of your oil paints.
There is nothing to be embarrassed about if you are struggling with color mixing, as all artists have had to learn which colors work best together – it is a process for us all!
Basic Oil Painting Techniques
There are several basic oil painting techniques for everyone to enjoy. The beauty of learning these basic techniques is how you adapt them to fit into your own artistic style. Let us go through the top 10 basic oil painting techniques available so that you can start practicing.

Underpainting
Underpainting can be seen as the foundation of your background. It can be a helpful and comforting first step for any newbies to whom a big empty canvas can be intimidating. Underpainting is done by estimating where the bigger objects are going to be in your painting and sketching them out. You then block in different hues for the highlights and shadows, usually in a monochrome style. This gives a good place to start with when you start the actual subject painting and adding in all the colors.
Blocking In
Blocking in helps to build a foundation layout or plan for your actual painting. Typically following the underpainting technique, blocking in refers to the addition of the next layer by roughly adding the various base hues of your artwork. You do not need to worry about refined detailing in this step, as this will be added later.
Blocking in is best achieved with thinned-out oil paints, which will have a much thinner and smoother consistency and can spread further than the normal oil paints.
When blocking in, beginners may find that a larger, flat-bristled brush will help them get the desired result. Start by using colors that are not as vibrant – more neutral colors are better as they will not be too difficult to paint over or neutralize later on.
Blending
Blending is a popular oil painting technique for those just starting with oil painting. What Is meant by blending is that you are mixing two different colors on the canvas (or palette) so that they gracefully fade into each other, creating an ombre effect. This is used when the transition between the colors is not to be an abrupt line. Blending is only possible with wet paint, but that is the great thing about working with oil paints – they take a long time to dry so you have more time to keep blending.

Scumbling
If more texture is what you desire, you must try out the scumbling technique for oil painting. This is where you ignore the comment we made early about avoiding a dry brush on your canvas because it makes a scratchy effect. The scumbling technique is all about using a dry bush and only dipping it into the oil paint a fraction of the time. When you use this technique, you will notice gaps between the strokes on the canvas, which means you did it right.
Glazing
This one might be of particular interest to you if you are a beginner at oil painting. Glazing is a popular choice of technique due to the beautiful effect it gives your artwork. To achieve this technique, you simply paint a thin layer of translucent paint to your original matte layer, enhancing the vibrancy of the paint’s color underneath. Glazed sections will also be left with a beautiful, glossy sheen.
If you are keen on creating artwork that has depth, glazing is particularly useful.
The shiny or polished-looking areas will appear to be more in the foreground whereas the more opaque, unglazed sections will appear to be in the background. To execute glazing accurately, it is best to start with a monochrome underpainting, building up the layers of the different colors and glazings. Remember that each oil painting layer needs to be thicker than the previous one so that your artwork does not crack.
Alla Prima
We have spoken about the wet-on-wet oil painting technique in so many of our other tutorials, but the formal and technical name for this technique is alla prima. Essentially, instead of allowing each layer of paint to dry before applying the next, this technique requires you to continue painting the next layer while the paint is still wet – applying wet paint to wet paint.
Traditionally, one is required to wait before moving on to the next layer, and with oil paints, this could mean that a painting will take a long time to complete. If you use the alla prima technique, you might be able to finish within a day or even one sitting. Examples of artworks that work best for this technique include landscapes or generally very impressionistic artwork styles.

Grisaille
This is a French term for an oil painting technique – the word grisaille is derived from the French word for grey, which is gris. The purpose of this technique is to use monochromatic colors, simply using black, greys, and white. The darker colors represent the shadows and the lighter colors represent the highlights. When starting with the grisaille technique, make use of duller greys. This is for a similar reason as with blocking in – the brighter colors will be harder to neutralize in the end.
Chiaroscuro
Where grisaille is a French term, chiaroscuro is an Italian word that is directly translated to “light-dark”. This ambiguous translation exists to give reference to the spaces in-between light and dark – the shadows and highlights – and how there is often a considerable difference between them. More often than not, they are highly contrasted. If you are trying to create depth within your artwork, this is the perfect approach.
Impasto
We have mentioned before that any painting styles and techniques will become perfect only with regular practice. This will become more apparent with the impasto technique. This technique is a great way for beginners to learn how to add depth to their artwork. If your brush strokes are visible when you are finished, just know that you are on the right track and that this look will make more sense when you are done.
Vincent van Gogh was a big fan of this technique, which can be seen in his flamboyant use of color and brushstrokes visible from across the room.
To achieve this oil painting style, a larger paintbrush is best, as this will allow you to achieve those big and bulky brushstrokes that are still visible in the end. One amazing benefit is that this oil painting technique can make certain areas more vibrant and noticeable because you get to mix the colors directly on the canvas.

Oiling Out
We advise that you abide by the no-rush rule, as this technique can be quite hard to master and you might end up feeling disheartened if you struggle to get it right. Essentially, oiling out implies the enhancement of the vibrancy of the colors you have worked with.
Because oil paints are often made with pigments that are natural, they tend to need different lengths of time to dry. When one color dries before another on your finished artwork, the oils might drop below the pigment of the paint, making them seem dull. To prevent this, lightly wipe some oil over the dulled area.
There is no point in rushing through your learning experience with oil paints. Start with practicing all of the previously mentioned techniques first and get those perfected. You can then move onto the slightly more complicated methods later on. With time and practice, you will start to notice an increase in your skill, and the oil painting style will not feel as foreign as it did in the past.
Frequently Asked Questions
Is Oil Painting More Difficult Than Acrylic Painting?
Oil painting is very different from acrylic painting in that the consistency of the paint is a lot more buttery and it leaves a more textured appearance. The blending ability of each paint has some differences, along with most of the techniques. But, with a bit of practice, you will learn how different oil paints work with the different techniques in no time.
What Is the Purpose of Underpainting?
The underpainting technique is the first step in your oil-paint artwork, setting the primary foundation of your background and the major subject choice of your painting. You start with a single color painted over the whole canvas and then blocking in some light highlights and shadows where necessary.
Can I Use My Fingers to Blend Colors?
Yes! Using your fingers and thumbs to blend the colors might give you a different kind of effect than using your paintbrush. Along with your thumb, some alternative blending techniques are using a palette knife, a sponge, a cloth, or a dry paintbrush.
What Does Maintaining the Purity of Colors Mean?
Maintaining the purity of your colors refers to keeping your colors separate, thus keeping their original color vibrant. This is done by making sure that you never dip a dirty paintbrush that was previously used for blue oil paint, for instance, into your red oil paint.