Epoxy Cement – What is the Best Concrete Crack Repair Epoxy?
Made up of two elements, hardener and, resin, epoxy is an organic polymer. Cement epoxy simply combines coarse aggregate with sand to the standard epoxy mix. An epoxy approach creates a waterproof barrier that can stop deterioration from happening to all kinds of surfaces. If your concrete surface is cracked, chipped or damaged, then using cement epoxy may be the ideal solution.
Epoxy Cement vs Epoxy Mortar
In both epoxy cement and epoxy mortar, epoxy is present. The epoxy offers water-resistant properties and makes the product durable. Both epoxy cement and epoxy mortar provide similar elements:
- Smooths out surfaces
- Repair and bonding of tiles, steel plating, and more
- Provides water-resistant properties
- Stops corrosion from occurring
- Offers reinforcement repairs
The main difference between the two is that epoxy mortar is a sand-like filler, while epoxy cement is a more powder-like filler. Another substance you can get is an epoxy putty, which while being a filler, can be used as a putty-like, space-filling adhesive and an over-all thicker application. Remember that epoxy putty is not the same as epoxy cement or epoxy mortar

Guide to Epoxy Cement Repairs
Cement repairs vary depending on the extent of the damage, and what use or task the cement is utilized for. We have outlined three of the most popular approaches to take when repairing different concrete surfaces. These are sidewalk repairs, concrete crack repairs, and how to repair your cement floor driveway.
Repairing a Sidewalk Using Epoxy Cement Floor
If a sidewalk has a crack that isn’t just a thin line, it will require some fixing. You will first have to use a hammer and cold chisel to enlarge the crack. This particular process is called undercutting (basically don’t make the crack wider at the top, rather widen it at the bottom). When you have undercut accordingly, using a wire brush and a hose, remove any residue before you continue.
Next, you will have to apply acrylic resin adhesive and allow it to dry. Following you then apply a concrete patch, which has been pre-mixed to the undercut area. Using a trowel, smooth out the mixture you have applied while the cement is still wet. Cover the area with a plastic sheet and allow it to dry for 5 days.
Concrete Crack Repair Epoxy
If you have a hairline crack in your epoxy cement floor, to repair the crack you will need to begin by mixing cement and water to create a paste. Roughly 4 hours before you begin the repairs, moisten the crack using water, after 4 hours, the crack should have dried and it is now ready for you to apply the cement paste. Using a trowel, ensure you cover the whole crack with the paste. Alternatively, you can use a concrete repair epoxy (two-part epoxy adhesive paste).
To ensure the paste fills the crack, use a bit of force when applying it. Once the crack is filled, use the trowel and even out the surface, before allowing it to dry for at least 2 hours. For the next five days cover the cracked area with a plastic sheet. Ensure that once a day you lift the plastic sheet and sprinkle on a little water over the repaired area. You can take the plastic sheeting away after five days.
Repairing Your Epoxy Cement Floor Driveway
Using the same steps as when you repair a sidewalk, but as a driveway experiences greater weight than a sidewalk you will need to ensure the repair is stronger. You can use a combination of gravel, sand, and cement.
Just like when you repair a sidewalk, begin by undercutting the damaged area and then applying the adhesive cement repair. Follow the same steps mentioned above when repairing a sidewalk. By ensuring the area is covered for five days before you begin using it/driving on it again. If you wish to ensure a more durable epoxy cement floor you can also add epoxy.
Urethane Cement vs Epoxy Cement
When it comes to a floor coating, you can choose between epoxy cement and urethane cement. A lot of the time, you can use either, as each has their benefits.
Urethane Cement
A combination of normal cement and polymer urethane make up urethane cement floor coating. When combined the substances become solid, forming a heat and water-resistant, smooth coating.
A floor made from urethane cement is completely seamless and therefore no bacteria or chemicals can penetrate any cracks or seams. This makes urethane ideal for industrial environments, as it is completely unaffected by chemicals.
Epoxy Cement
You can also coat concrete floors using concrete repair epoxy that is made up of a hardener and a resin. This system can be applied safely and instantaneously, ensuring the floor is water-resistant and durable. Using epoxy cement you can completely transform your concrete floor.
What is great is that epoxy can be bought in an assortment of colors, and you can incorporate logos into your design. Epoxy can be used in all kinds of areas, including:
- Industrial Environments
- Epoxy garage floors
- Warehouses
- Epoxy Concrete floors
- Hospitals
Can Both be Used?
It helps to add epoxy as cement and urethane do not bond well. Adding epoxy adds to the coating process. Start by applying your epoxy as a base coat and then following with a topcoat of urethane. This will ensure your floors will last much longer than the original bare concrete floors. Following this process will provide scratch resistance and durability, so using both will ensure the best floor coating. You will have created floors that are protected from chemicals, moisture, and heat while ensuring durability and amazing strength.
Water-based polyurethane floor finish requires many coats to be applied to the wooden surface, or flooring and this means it can be quite expensive. We highly recommend you consult a professional before tackling your floor coating, as a mixture might not work for all projects.

Introduction to Concrete Crack Repair Using Epoxy
You can tackle fixing a crack in the concrete in several different ways. We think using concrete crack repair epoxy is the best way to go. It is important to first identify the length and width of the cracks. Different factors can cause cracks in concrete, such as external movements, shrinkage, the result of heat, or the concrete being placed under excessive stress. Using a simple epoxy injection, applied directly into the cracked area you will be able to fix the issue with ease.
Remember that every crack will be different, and how you repair it is linked to each specific scenario. What follows is a comprehensive guide to how to repair concrete cracks, how to apply the epoxy, and how to handle the repairs oneself.
Best Concrete Crack Repair Epoxy
There is a wide assortment of concrete repair epoxy available. It is important to select the correct product for your specific project. You will require an epoxy that is weather-resistant, easy to use, provides the correct amount of flexibility, while also being strong. We have chosen some of the best products below:
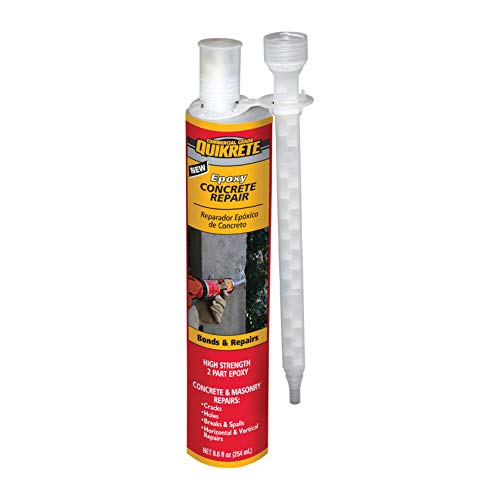
Best Value: QUIKRETE Epoxy Concrete Repair
This product is a strong epoxy filler, ideal for concrete, that is durable and effective. A two-part epoxy, ensures a super-strong bond forms ensuring any damage or cracks in concrete are repaired.
This particular product can be used in hard-to-reach places and on vertical cracks. It doesn’t drip or make any mess a sit is quite thick inconsistency. Once it has completely dried you will have a durable seal that is very solid. The epoxy is ideal for an assortment of concrete finishes and can be used both outdoors and indoors.
- A multi-purpose product suitable for holes and cracks
- A high-strength two-part epoxy product
- Suitable for a wide range of concrete and masonry repairs
PROS
CONS
- It can be challenging when mixing the epoxy
- It can be difficult to apply due to its thick consistency
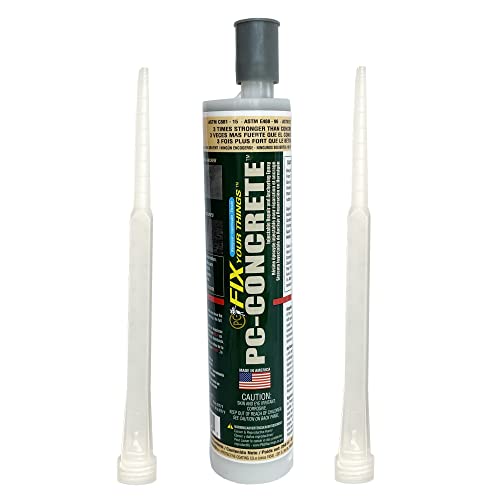
Overall Best: PC PRODUCTS PC-Concrete Epoxy Adhesive
PC Products has created a two-part epoxy paste adhesive that has been formulated specifically to fill cracks found in concrete. It can also be used to anchor dowels, bolts into concrete, and threaded rods. The paste resists moisture and can be utilized in vertical applications, it is a high-tack paste.
What is great is the paste can be used outdoors and indoors. As it is very durable, it can withstand fluctuating and high temperatures. This gives it great weather-resistant properties. The product has a PSI rating of 6790, meaning as an adhesive it is seriously strong! When dried it is grey concrete colored and is considered easy to work with, while also drying relatively quickly.
- A two-part epoxy adhesive paste for concrete repair
- A high-tack paste for moisture resistance
- Suitable for both indoor and outdoor concrete applications
PROS
CONS
- Quite expensive
Concrete Crack Repair Epoxy Applications
A repair solution should be used on any visible cracks in concrete. Some cracks can run through both ends of the surface of the concrete and will have to be fixed immediately. Apply the epoxy filler to both ends of the crack. You might need to make your epoxy thinner so it can flow into the crack with ease.
Try to ensure the epoxy filler is placed as close to the crack as you possibly can. You can try injecting the concrete filler. What is most important is to not just fix the crack, but to address the actual issue that is causing the crack in the first place. Otherwise, you may continue to find cracks forming, even once you have applied the epoxy filler.
Repairing a crack in the concrete may not always be the right strategy. Sometimes there is a large amount of water in the crack that can’t be removed, or the crack is too big. If you have a very large crack you should consult an engineer before attempting to tackle it. They may suggest additional chipping away of concrete or overall demolition is required before you begin filling the crack in. Every crack is different and should be assessed and handled in the best way for that particular situation.

How to Apply Concrete Repair Epoxy
Despite every crack being different, there are some basic steps and guidelines you will need to follow when applying concrete filler.
Preparing the Concrete for an Epoxy Filler
To start with you need to efficiently prepare the cracked surface, beginning with cleaning the surface of the crack. Ensure you clean at least half an inch on either side of the crack. To clean you can use either a wire brush or a high-pressure water cleaner, make sure you do this thoroughly. Otherwise, the filler will not adhere sufficiently.
Once you have cleaned the crack, allow the concrete to dry completely before continuing (try not to use any mechanical tools in the cleaning process as they can create debris and dust which will collect in the crack). You will be required to widen the crack, ideally, in a ‘V’ shape, this will ensure a resistant finish when you have completed applying the epoxy filler.
Adding the Ports in
If you use ports to inject the concrete crack repair epoxy, you will take away the need for drilling. You will require at least two ports, spaced out to ensure the epoxy can be injected into the relevant areas (the ports should be roughly eight inches apart, in the crack).
Start by installing the ports and then seal up the top portion of the cracks. You can cover the top portion using a putty knife. Allow the paste to dry sufficiently, ensuring it is secure enough to withstand the injection process. Keep in mind that depending on your circumstances, fluctuating temperatures may affect the adhesion strength and seal of the epoxy.
Epoxy Filler for Concrete – Application Through Injection
Begin by injecting the concrete crack repair epoxy into the port which is the lowest. Continue injecting until the epoxy no longer flows. Or when you note it starts to come out of the following port. If you are tackling a horizontal crack, begin with the widest part of the crack. When the epoxy stops flowing you can remove the port and move on to the next one.
Just repeat the process on the following port, and continue to do so, until the crack has been filled in. when applying the epoxy, use consistent, steady pressure to ensure none of the holes are filled unevenly. When you have filled all the ports, ensure they are all removed accordingly and top up the cracks using a putty knife with a bit more epoxy.

Useful Tips for Repairing Cracks
Every crack in concrete is unique and requires its solution, certain damage may require particular care. What follows is however some more common issues and how to address them:
- You can’t use epoxy injections on all cracks, especially not wide cracks, always double-check that the crack is suitable for repairs with epoxy before you purchase an epoxy repair kit
- When injecting epoxy, begin by injecting it at its lowest pressure point and then gently increasing the pressure as you progress
- If you are dealing with a narrow crack, you can begin by adding caulk on the sides of the crack, this will make the adhesion and filling more efficient and will decrease the epoxy waste
- If it is a wide crack, fill it slowly, taking your time to inject the epoxy, ensure that the crack is being filled by the epoxy
- If you find your top seal has a small leak, you can simply use some crayon to fix it
- The amount of injection pressure required is dependent on the size of the crack, the larger the rack, the more injection pressure required
- Use a chisel or scraper to remove the top seal of your epoxy
- Watch out for epoxy backflow, this can be a result of the crack not being continuous, or debris blocking the flow of epoxy
- Ensure the epoxy has completely cured and set before removing all the ports (this can take up to 48 hours)
Concrete Epoxy Repair – Tricks and Tips
It isn’t difficult to use concrete crack repair epoxy, but you do need the necessary skills and knowledge. What follows are a few tips and tricks to help you along:
It is Essential to Prepare the Surface
Preparing the surface is paramount to ensure the success of your epoxy crack filler. Clean the surface of any dirt and dust. Ensure you don’t leave any residue behind. You can clean the surface using aggressive measures or gently, just be careful that the structure of the concrete is not impacted.
You may leave a layer of dust, should you use an abrasive option to clean the surface. You can clean any dust off using a pressure sprayer, using a shot blast is the ideal method for prepping your protective coating. The shot blast will open the pores of the concrete, clean off the surface and lightly roughen up the surface. Ensure that any oils, curing compounds, surface contaminants, or release agents have been completely removed using an abrasive method. Try pressure washing as a method to clean the concrete, ensure that your pressure cleaner is at least 5000 PSI.
Work Safely
You need to ensure you are taking sufficient safety measures when you are working with abrasive cleaning methods, concrete and epoxy. Often there are harmful chemicals involved when you are working with epoxy concrete fillers. It is imperative to wear the necessary protective gear, such as a face mask, goggles, and gloves. Try your best to work in a well-ventilated area – we also suggest wearing long pants, and long sleeves.

Cleaning Up
When you have finished, ensure you clean up any epoxy from your workspace and your tools. You can use either acetone or a product specifically made for cleanup, such as MEK. You can even try cleaning up with dishwashing soap and water. Concentrated soap or liquid detergent is safer and a lot cheaper than other solvents (and less harmful to your skin).
Hammering Concrete
You will need to determine if filling the crack in the concrete is the correct method before you begin fixing it. We suggest using a sounding hammer to determine the concrete which will need repairs.
Using Heat
The temperature will impact how long it takes for your epoxy to cure. The rate of reaction changes at roughly 2 intervals for every 18 degrees Fahrenheit change. Don’t worry though, you can always speed up the curing time by adding a heat supply, such as a heat lamp.
You could also use a baseboard heater, warming blanket, a heat gun, or even pre-heating the epoxy before you start using it. Whichever heating tool you use, do not allow the temperature to exceed 300 degrees Fahrenheit. Thicker areas of epoxy will cure quicker because epoxy releases its own heat when curing. Summer temperatures can decrease the lifespan of your epoxy, so we suggest cooling down each part before using, to extend its life.
How To Thin Out Your Epoxy
To thin out your epoxy, you can heat up the two components before combining them. Alternatively, you can add a lightbulb to the injection pump to keep the epoxy in the reservoir warm, and you can store your epoxy in a heated room. Remember that once mixed temperature change can impact the curing time of epoxy.
Shrinking Polymers
Polymers tend to shrink when the two epoxy parts are combined and the epoxy is cured. The newly formed polymers are much smaller than the components which have not been combined. It is important to note this so that you are aware that shrinkage may potentially occur before you start applying your epoxy to the crack. It is also important to know how thick the consistency of the epoxy is before putting internal stress on the concrete. You can do multiple lift installations, using exotherm resins or low modulus, or using aggregate filled epoxy systems.
Moving Polymers
Epoxy polymers can also potentially expand when they cure. Concrete repair polymers tend to have a higher rate of expansion than concrete. How much the epoxy expands or contracts are linked to the product used, and who it was manufactured by are important considerations. This is particularly true when working with a large crack.
Understanding the Width of the Crack
Before attempting an injection repair, you need to understand the depth and width of the crack. You can determine this using a portable crack scope or a plastic crack card. You will need to do this to calculate the amount of epoxy you will require. You often end up wasting more on a small job, as you require more material to flush out the gun than you need to fill up the crack, consider this before you begin a job.
Keeping the Epoxy
You may find yourself with some left-over epoxy once you have finished (remember that it can only be considered leftovers if the two parts haven’t been combined, as it won’t cure until combined). You can store leftovers for a long time and use them when needed (store in an airtight container). If it is a water-sensitive substance it might not store as long, i.e., polyurethane.
Getting the Right Appearance
You may be trying to achieve a specific concrete aesthetic that you want to maintain. You can use a technique called sacking to ensure the smooth surface of your concrete is maintained after you have applied the sealant. Sacking is when you take a small sack of fine powder (which is the same color as the concrete surface) you gently hit the sack over the surface, dispersing color. Alternatively, you can use a brush to paint over a fine cement-based slurry.
Cold Weather Conditions
Occasionally concrete cracks will contain frozen water, which is not ideal. Cold weather also means epoxy will take significantly longer to cure, meaning you will need to do the injections slowly, and you will have to leave the seal on longer for it to cure. If you trap any invisible dew underneath the epoxy you can cause serious damage, so ensure a coating has the correct dew point when working in cold weather.
Between 40- and 35-degrees Fahrenheit the epoxy will become dormant, and it will only start curing again when the temperature increases. Thanks to this you do not have to worry about applying any epoxy before the temperature dropping at night. If you do however require the curing process to continue, you will need to apply a source of heat.
As a substance, concrete crack repair epoxy is very useful for fixing any concrete surface problems. It is pretty easy to use on your own and will provide long-lasting results. Our guide should have covered all aspects of concrete crack repair epoxy, which product to use, and how to apply it. Good luck!
Frequently Asked Questions
Is Epoxy as Strong as Concrete?
Epoxy is actually around two to three times stronger than concrete. This makes it an ideal solution for concrete crack repairs.
Will Epoxy Fill Cracks in Concrete?
Yes, epoxy is an excellent option for repairing cracks and holes in concrete. Follow our guide above for the best epoxy cement products for this.
What is the Tensile Strength of Epoxy?
Epoxy has a tensile strength of 7,846 PSI. This makes cement epoxy an incredibly strong and durable solution for concrete repair.
Applying epoxy cement is a helpful and easy solution for all kinds of concrete and masonry surfaces. We hope that our guide above on epoxy cement has equipped you with everything you needed to know to make your DIY project a success!


