Spray Paint Art – A Tutorial on How to Use Spray Paint
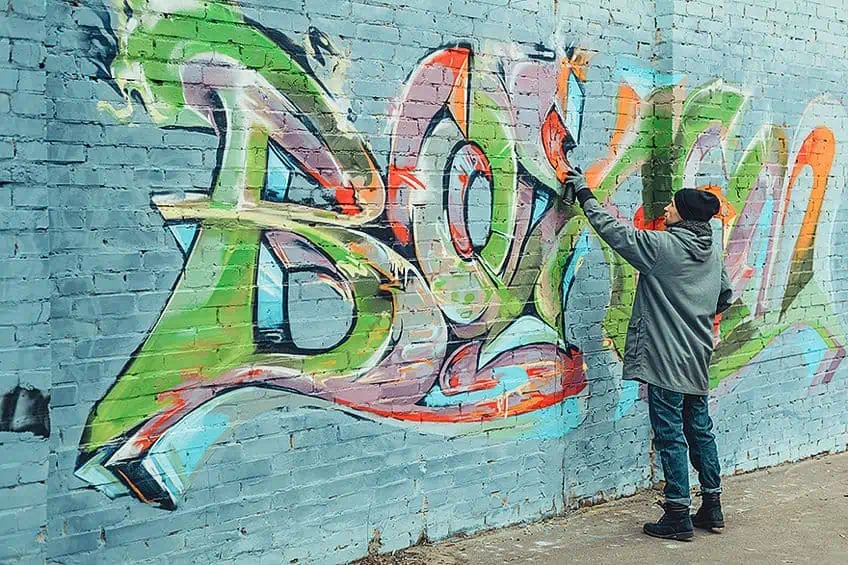
Spray paint art such as graffiti and street art is a distinguishing feature in large cities and towns. These eye-catching murals delight, inspire, and challenge the viewers who are exposed to these artworks by way of simply going about their daily routines. It is almost impossible not to be moved by some of these pieces, and some people are even inspired to create similar art of their own. If you are one of these people, this article will help get you started on some spray painting basics.
What Is Spray Paint Art?
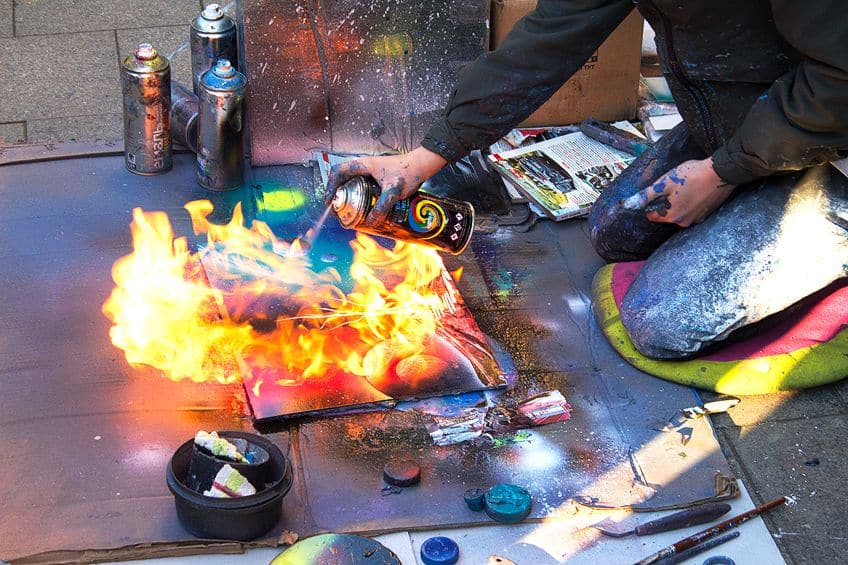
Spray paint art uses the unconventional medium of aerosol cans to apply paint to a wide range of non-porous surfaces, including poster board, wood, metal ceramics, glass, and plastic. Popular painting surfaces include buildings, trains, and other public structures – special permission is required, however, to create spray paint artwork on such surfaces. It is therefore encouraging to note that this art form is not bound to street art and includes all portable surfaces.
The subject matter of spray paint art includes scenes of planets and galaxies, landscapes, nature, cityscapes, portraits, and even abstract pieces. Commemorative, political, and protest pieces are also common, especially in street art.
There are no rules to spray paint art other than using spray paint as the primary medium. Many different techniques are employed to create interesting effects that would ordinarily take longer when using traditional methods and mediums. Some of these techniques will be detailed below. No training is needed to make spray paint art, as it is an art form mastered with practice and patience.

A History of Spray Paint Art
Spray painting developed in the 1940s as a more effective way of painting radiators. Later, the use of spray paint to create graffiti became common during the 1960s. Spray painting became prolific when a young boy known as Cornbread started spraying his name across walls in Philadelphia. This movement spread throughout the United States and into Europe. By the 1980s, spray painting as an art form became recognized as a legitimate modern craft.
Accordingly, spray painting as an art form is said to have originated during the 1980s in Mexico City with the works of an artist by the name of Ruben “Sadot” Fernandez. He characteristically created his artworks in front of audiences on the street. After some time, he started using spray paint as his primary medium, for which he became most well known.
It is from this founder that spray paint art derives its other name, “Sadotgrafia”, although it is also known as “Aerosolgrafia”.
What You Will Need for Spray Paint Art
There are several supplies that you will need to create your spray paint art. Some items are essential, while others are dependent on the type and scale of your artwork and the type of surface on which you are painting. In summary, here is a quick list:
- Spray paint
- Newspaper and magazine pages
- Stencils
- Craft knife and cardboard
- Weights
- Your chosen canvas or surface
- Paint thinners
- Drop cloth
- Painter’s tape
- Ventilation
- Mask or respirator
- Gloves
- Old clothes or overalls
- Goggles
Spray Paint
This may be obvious, but there is a wide range of paint types and brands from which to choose. A brief guide to help with your decision will follow shortly. In terms of colors, the expense of buying a full range of colors right at the start of your creative adventure may be off-putting. It is best to buy colors that you know you will use frequently or in your first few projects. Black and white are always good to have for shading and tinting – the rest of the colors are your choice.

Newspaper and Magazine Pages
Old newspaper and magazine pages can be used, along with plastic bags, foil, and a palette knife to create all sorts of textures on your canvas. A guide on how to achieve some of these textures will be detailed below.
Stencils
These can be in any form, shape, or size, depending on the image or scene you want to create. You can purchase ready-made stencils in the shape of animals and other figures, or you can create your own by drawing and cutting out your desired shapes from cardboard. Round tubs or container lids are perfect for creating planet and galaxy scenes.
Craft Knife and Cardboard
Cutting stencils can open up a whole new world of creative concepts. While scissors are handy, a box cutter or a good craft knife is best, particularly when cutting a stencil with curves, tricky corners, and edges.
Weights
Some stencils can be a bit flimsy, and you may want to keep your lines precise and sharp. Weights are always helpful to keep your stencils in place and flush against the canvas. Stones from the garden or lead weights from your dad’s fishing box will do the trick.
Your Chosen Canvas or Surface
Aside from a building, wall, train, or other public structure, this can be in the form of a traditional canvas or a poster board in whatever size you prefer. Most spray paint is compatible with a wide range of materials, so you have quite a few options.

Paint Thinners
Unless you are an uptight perfectionist, you will probably get paint where you do not want it. It is always good to have paint thinners and a rag or scrubbing brush on hand to get rid of unwanted paint stains in your work area.
Drop Cloth
Again, the chore of scrubbing and cleaning up after a paint session can be off-putting. So it is best to put down a drop cloth (secured with tape) at the base of a large canvas or wall, or newspaper over your work table.
Painter’s Tape
Painter’s tape or masking tape is needed to secure your drop cloth or to cover your work table with newspaper. It also comes in handy for keeping stencils in place on verticle surfaces or for holding your poster board in place while working.
Ventilation
A crazy paint fume-induced coughing fit is most inconvenient at the best of times, and is certainly not conducive to keeping those creative juices flowing! Ventilation is therefore essential to prevent this. An outdoor area is ideal, but if you are working on a small piece and cannot work outside due to weather conditions or problems with access, then ensure that your workspace has sufficient airflow, opening all windows and doors. You can also use a fan to help drive fumes out of the room.
Mask or Respirator
Protecting your lungs from those harmful spray paint chemicals is essential. The type of mask required also depends on the amount of time you spend painting and the ventilation. A standard N96 dust mask might be suitable outdoors or if your project is small. However, a dust mask will not be sufficient if your workspace is not outdoors, has inadequate ventilation, or if you will be spending long hours on your project. In these circumstances, a respirator will be far more effective in providing you with the protection you need.

Gloves
Spray paint can cause skin irritation, so it is best to use disposable or other protective gloves, especially if you have sensitive skin. Another reason for wearing gloves is that some techniques require using your fingers. Having gloves on will eliminate the chore of trying to get rid of dried paint from under your fingernails!
Nitrile disposable gloves are ideal hand protection for spray painting as they have good puncture and solvent resistance. They are also suitable for people who are allergic to latex gloves.
Old Clothes or Overalls
You do not want to get down and dirty with spray paint while wearing that nice new top or your favorite jeans! So put on something old that you do not mind getting stained or ruined – think “hobo” – after all, it is street art! Long pants and long sleeves are best.
Goggles
Protection of your eyes is also important, especially if you are not working outdoors or in a well-ventilated area. Some respirators come fitted with a goggle part, so a product like this may well be worth considering.
Recommended Spray Paints
There are a few factors to consider when choosing your spray paint, and these include your paint surface, location (outdoor or indoor), budget, and personal preference.

Instructions on How to Use Spray Paint
If you are new to spray paint art, it is not advisable to head out onto the street with your new cans and throw yourself into creating a life-size mural in a public place. Besides getting into trouble, you may get overwhelmed or land up in the hall of fame of “nailed-it” memes!
So start small and build your skills and confidence in increments. You will soon have a good foundation from which you can move on to larger projects. This tutorial is a good starting point. You will learn to create a planet and space scene while familiarizing yourself with this fun new medium.

Step 1: Gather Your Supplies
- Posterboard (cut to the size you are comfortable with)
- Spray paint (black and white plus any other colors of your choice)
- A well-ventilated workspace, covered with newspaper
- Protective wear (old clothes, gloves, mask, and goggles)
- Extra newspaper and magazine pages
- Artist’s tape or masking tape
- Circular objects, such as an old frisbee, plastic container lids, or tubs
- A rag and paint thinners for cleaning up
Step 2: Prepare Your Materials
Look at a few ideas for space scenes online and find something simple that appeals to you. Draw a quick, preliminary sketch or two on a smaller piece of paper. This exercise will help you to envision what it is you want to achieve with your artwork. Once your workspace is covered, take your poster board, cut it to your preferred size and secure it down (glossy side up) with some tape. Get all your protective gear on and give all your cans a good shake.
Step 3: Create Your Planets
Set your round objects in place on your poster board. Roughly spray around each object with black paint, creating a guide for the size of your planets. Next, start filling in the planets with colors of your choice. You do not have to spray precisely within the guides you have created.
Once you have filled in your colors and while the paint is still wet, take a piece of newspaper and crumple it up and then uncrumple it slightly, but do not smooth it out too much. Lay the paper on top of your planet and lightly run your fingers over it. As you lift the material, it will lift some of the paint, creating an interesting texture.
If you are not happy with the effect, add more spray paint and try again. Repeat this process for your other planets.
Shading helps to make your planet look round. You can achieve this by lightly spraying a curved patch of black at the bottom of your planet and doing the same at the top with white. You will also repeat this on your other planets, so be sure to maintain some consistency in the direction from which the primary light source in your planet scene is coming.

Step 4: Create Your Background
Return your circular objects to your canvas by placing them over your planets to protect them while you work on the space scene around them. Here, you also have a few options. For instance, you could try a simple effect by covering the whole background in black.
Another option is to start at one side or corner of your canvas with black (again, this depends on and should be consistent with where you have planned your light source to be in your scene). You can then move across to the other side or corner, adding navy or similarly dark colors, finally fading into lighter colors. This technique will create the effect of light as it moves through space.
At this point, you can either leave your circular objects in place on the canvas or remove them. It just depends on the kind of effect you want to create in terms of the detail of your space scene, which is the final and more flexible step in this process.
Step 5: Add Details
This step is an opportunity to play and experiment with different techniques and creative ideas that you have in mind. Of course, stars are a must. There are a few different ways to incorporate this feature into your space scene.
One way is to spray a generous amount of white or silver paint onto a small piece of magazine paper. While holding the paper upside down over your canvas, tap lightly on it, creating star clusters. Another way is to spray your forefinger and flick the paint onto the canvas using your thumb. Repeat the process wherever you want stars to appear in your space scene.
Another fun technique can be used to create the effect of a comet or shooting star. Place your white or silver paint can on the canvas upside down, hold it lightly in place with one hand, and give it a quick tap with the other hand. This method can create a lovely little burst of light, adding movement and energy to your artwork.
With patience, practice, and imagination, the possibilities for creating with this artform are endless. There may be some parameters around the “canvases” on which you may paint, but do not let that discourage you. Exploration is the key to developing your art and creating the perfect canvas and backdrop for your art. And, most of all, have fun!
Spray Paint Art Techniques
Many different techniques have evolved for creating different textures and effects with spray paint. The possibilities are endless and are only limited to your creativity and willingness to experiment and take risks. Here are a few techniques to get you started.
Make It Glow
To create a “glowing” effect, place a circular tub or bowl over any planet in your space-themed spray paint art. Fill in the area around the planet with black paint or a dark color palette of your choice. Finally, take your white paint and lightly spray in the immediate space around (and almost up against) the circular object. This technique is easy to master and will add a striking dimension to your artwork.
Texture-Creating Materials
Other materials you can use to create texture include glossy magazine pages, plastic bags, sponges – anything that works to achieve your desired appearance. The sky is the limit here! Set yourself free to play and discover.
Building and Layering Your Colours
When creating your planet with different colors and textures, remember that starting with a dark shade and then building it up to a light color will result in a dark-colored object. Layering your colors in reverse will then result in a lighter-colored planet. This concept is helpful to keep in mind when working with color layers and textures on any subject matter.
Mixing Your Mediums
It is also fun to mix your mediums. For example, together with your spray paints, you can use some acrylic paint and a palette knife on a canvas to create an interesting abstract landscape piece for your home. Here is a simple technique to follow:
- Cover the entire canvas with an acrylic basecoat.
- Spray the top part of the canvas with an abstract horizontal band of colors for the sky.
- With your palette knife, add acrylic paint in vertical and horizontal motions across the spray-painted color band.
- Add another band of spray paint around the middle part of the canvas, starting where you would like the treeline to begin.
- Repeat the same motions with the acrylic paint and a palette knife to create the effect of tree trunks and branches.
- Continue this process, working your way down the canvas until you have achieved the picture you have in your mind.

Tips and Tricks
- Hold an object or stencil slightly above the surface of your canvas in order to create softer edges.
- Press the nozzle after you start moving the can back and forth in order to create a soft mist effect.
- Practice a few textures on a spare piece of paper before settling on one for your artwork.
- Spray thinner layers of paint in order to avoid cracks.
- Spray away from direct sunlight to avoid bumps or a rough finish.
- Shake your can upside down for a minute before spraying in order to maintain a smooth finish.
- Always do preliminary or mock pieces on a small scale before starting big projects, as this will help you to achieve exactly what you have in mind.
- When first starting, practice with cheaper spray paint and then progress to higher quality products once you are comfortable and your technique has improved.
- Do not be afraid to experiment. In art, there is always freedom to explore and discover.
Frequently Asked Questions
Can I Use Spray Paint on Traditional Canvas?
Yes, you can use spray paint on traditional canvas. But make sure that it has a coat of acrylic- or oil-based primer. If not, grab a tub of gesso and give your fresh canvas one coat before getting started with your artwork. A primed canvas will ensure that your paint sticks to its surface and that the colors retain their vibrancy.
Is Spray Painting Illegal?
In short, spray painting on property that is not your own is illegal if you do not obtain permission. If you have permission, it is legal.
What Is Meant By the Different Sheens?
Quite simply, flat and matte refer to non-shiny, opaque finishes. Satin sheen paint produces an eggshell-type finish, and gloss creates a shiny finish. Lacquer refers to the sheen with the highest gloss finish.
Can I Throw My Empty Cans in the Rubbish Bin?
No! Spray paint cans are considered to be toxic waste and are harmful to the environment. It is best to locate a recycling plant or service in your area and dispose of your empty cans responsibly.