
Best Glue for Shoes – Selecting the Best Shoe Repair Glue
Shoes. Few things stick with you from the moment you are born to the day you die, literally every step of the way. A new pair of shoes can leave you feeling like a new person, the smell of those fresh soles, those crisp laces and straps, and a tread that has never seen the face of a sidewalk. As a society, we regard shoes as culturally significant – pumps, sneakers, heels, runners, platforms, wingtips, and even sandals have had a great historical impact, influencing and iconizing entire generations and social movements. So, what happens when they break?
Types of Glue for Your Shoes
When your favorite pair of kicks have been through the wringer it can be difficult to let them go. Fortunately, we have a few options you can try before writing the eulogy, namely three types of glue that will help repair those torn soles and keep your life companions around for a bit longer. Let us have a look!
Superglue
One of the more budget-friendly options available is good old superglue. That’s right, the caked-up tube sitting at the bottom of your kitchen cupboard can be used to repair your old shoes and give them a new lease on life. It does this by forming a bond and reacting with moisture (water available in the air or on the surface of materials) in order to create a strong adhesive bond between the two surfaces.
While superglue is not going to fix a chair to the ceiling, it works pretty well on most materials. This, coupled with the fact that it has a ridiculously fast cure and dry time, makes it one of the most convenient adhesives to have around. It might not be the best glue for shoes but it is definitely a contender compared to other adhesives in its price range.

Urethane
Looking for something a bit more rouged than superglue? Well, urethane is about as robust an adhesive that you can get, being able to withstand adverse weather conditions and temperature extremes, and creating a molecular bond with the surface it is attached to, making superglue seem like scotch tape in comparison. Urethane does come at a bit of a price hike compared to superglue, although you get what you pay for at the end of the day in both quality and quantity.
While not the best glue for shoes on the market, urethane’s price range and versatility make it a must-mention when talking about shoe repair. Besides its durability, the strength of the bond it creates is impressive, being able to repair even the most ruined pair of shoes. In fact, it is no stretch to say that even if your sole has broken off entirely, urethane has your back.
It also flexes with the surfaces it is adhered to and can be used on suede, vinyl, neoprene, and canvas, which makes it perfect for leather hiking boots or even motorcycle boots.
Choosing the Right Shoe Glue for You
Picking the right shoe glue can be a frustrating job, especially if you don’t know what you need. Thus, we are going to arm you with all of the knowledge you need to pick the right glue for your shoes. Below are some factors to consider when picking out which adhesive is best for your shoes, depending on the type of shoe you are trying to repair and how time-sensitive your repair is.

What Type of Material Are You Working With?
Knowing what type of shoe you own – including the type of material both the sole and upper parts are made of – plays a big part in choosing the appropriate shoe glue for you. Once you know what materials you are working with, you can go ahead and choose a glue that best suits those materials to ensure the best possible bond between the two surfaces.
Drying Times of Glue
As we mentioned earlier, how time-sensitive your repair is will play a huge part in choosing which glue you end buying. Superglue works perfectly with minor shoe repairs like a loose eyelet or a torn sole because it dries pretty quickly. However, if you no longer have a sole attached to your shoe, you might want to get something a bit more powerful like a urethane adhesive, which takes considerably longer to dry and harden but will prove to be better in the long run.
Glue Versatility
Buying glue for your shoe can seem a bit silly, especially if you are not that attached, but this might pay off in the long run. If you are willing to spend a bit more, you will find glues available that are super versatile and not only work on a variety of shoes but on other surfaces and materials as well! Always check which materials a glue works on before buying it – the more versatile the better, especially since most of us have different shoes for different occasions. Some of the best glue for shoe soles often aren’t intended for this use!
Waterproof Glues and Epoxies
Considering that most of our phones are waterproof, it would be disappointing if our glues were not. Whether you are on a hiking trip and your sole tears away or you’re driving a motorcycle in the rain, insulation from water is an important characteristic in shoe glue. Waterproof glues are a bit more expensive and take longer to dry, but dry feet and attached soles are what you need.
It is best to look at it as a lifetime investment of your time and money.
Glue Color
Glue color can be important for matching it to the shoe you will be repairing. Unfortunately, most glue and epoxies only come in clear and black, but the good news is that some glues can be mixed with dyes and additives to make them the color most suited to your shoe. Glue dyes are normally sold with stronger epoxies, but they can still be mixed with non-reactive adhesives to get your desired color if you take the time to find them.
The Best Glue for Shoes
Choosing which glue you should use can be tricky, especially when you don’t know what you should be looking for. Below, we found some of the best glue for shoe soles money can buy and ranked them for you to help you decide which one suits your shoes and pockets. So, without any further ado, let’s have a look.
Best Overall: SHOE GOO Shoe Repair Adhesive
We decided to hit the ground running with Shoe Goo. One of the most versatile and effective adhesives on the market today, Shoe Goo provides you with a waterproof adhesive seal and can be used on a variety of materials such as vinyl, leather, canvas, and rubber. It is not the cheapest epoxy on this list, and with a cure time of 24 hours it not exactly useful in a pinch, but it is quite strong and dries clear, so you don’t have to worry about color matching.
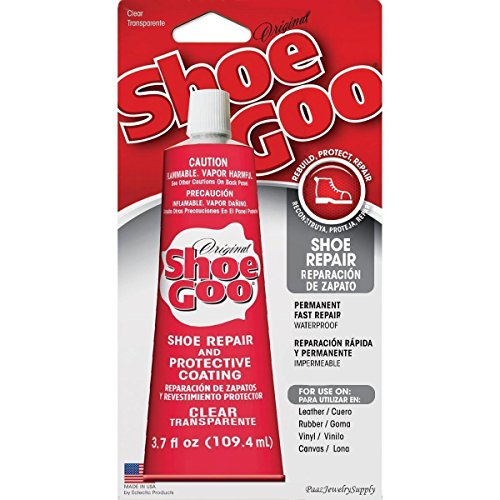
- Permanently protects/repairs all types of footwear
- Permanent, fast-drying, and waterproof
- For use on leather, rubber, vinyl, and canvas
PROS
- Flexible
- Clear
- Strong bond
- UV-resistant
- Waterproof
CONS
- Expensive
- Long cure time
- Tricky to work with
Best Strength: LOCTITE Ultra Gel Control Super Glue
If you are looking for something a bit tougher than ordinary glue, then you have come to the right place. Loctite Ultra features a stunning formula that makes its adhesive virtually indestructible in everyday life, making the cured adhesive itself as well as its bonded surfaces impervious to torsion, friction, heat, water, and impact, making it the perfect adhesive for your outdoor shoes. Loctite is rubber toughened, clear drying, and can be used on rubber, metal, wood, plastic, metal, and even ceramics. We find it is a particularly good repair glue for leather shoes.

- Instant adhesive resists impact, vibration, and temperature extremes
- Comes in a patented, side-squeeze design for maximum control
- Rubber-toughened glue dries clear and sets without clamping
PROS
- Tough and versatile
- Dries clear
- Strong adhesion
- Does not wear away easily
- Fast curing time
CONS
- Small volume
- Difficult to apply
- Does not dry as quickly as other “superglues”
Crowd Favourite: GORILLA Clear Grip Contact Adhesive
Did you know that Gorillas can lift nearly 23 times their body weight? If so, it is probably no surprise to you that Gorilla’s Clear Grip glue is one of the strongest and most popular all-around adhesives on the market today. Whether you want to secure your spice rack, repair your favorite coffee mug, or reattach the sole of your shoe, Gorilla Clear Grip has you covered, bonding to leather, plastic, canvas, ceramic, rubber, and even concrete. Still not satisfied? It also works pretty much immediately and only needs around 24 hours to cure, depending on the amount you use. On top of all that, it is also waterproof!

- Bonds metal, glass, fabric, wood, leather, paper, plastic, and more
- Has a fast grab, holding in just seconds, with a permanent bond
- Crystal-clear and 100% waterproof for indoor/outdoor use
PROS
- Waterproof
- Strong
- Versatile
- Bonds on contact
- Clear setting
- Reasonably priced
CONS
- Still takes a while to cure
- Fumes can be irritating
- Difficult to dissolve bond if needed
Basic Guide on How to Glue Shoes
Below is a straightforward tutorial on how to use the products we discussed above, but you should always read the manufacturer’s instructions to avoid doing anything that would interfere with the bonding process of the product you are using. First off, don’t just apply the adhesive – make sure that you have cleaned the part of the shoe you will be applying the glue to first. Then, you can apply your adhesive of choice and join the parts you have selected together.

In some instances, you might need to apply adhesive to both parts you are trying to join, in which case you should consult either the box or the pamphlet included with your chosen adhesive. Some adhesives need a bit of pressure to be applied while they are curing and others might not, so it pays off to know the product you are working with. In this case, it could be useful to keep some rubber bands around or other locking mechanisms. Depending on how creative you want to get, you can even use an object like a decently weighted book to apply the necessary pressure to the shoe.
Remember that this is not the glue you remember using back in kindergarten; it is toxic and can create discomfort if it comes into contact with your skin or is inhaled, so always work with caution and preferably in a well-ventilated area.
How to Use Shoe Repair Glue
Before we discovered motorized transport or even bicycles, shoes were one of the best ways to get around comfortably while reducing fatigue and injury over long journeys. This being said, they can take quite the beating by being in contact with the various surfaces you walk on every day, protecting you from nasty thorns and slippery floors. We like to think that you should show your shoes the same love they show you, so here is how you can keep your kicks in working order using a shoe sole adhesive. Some damage you might encounter can include the following:
- Missing studs
- Frayed shoelaces
- Worn soles
- Broken heels
- Cracked and worn straps
- Various holes and tears
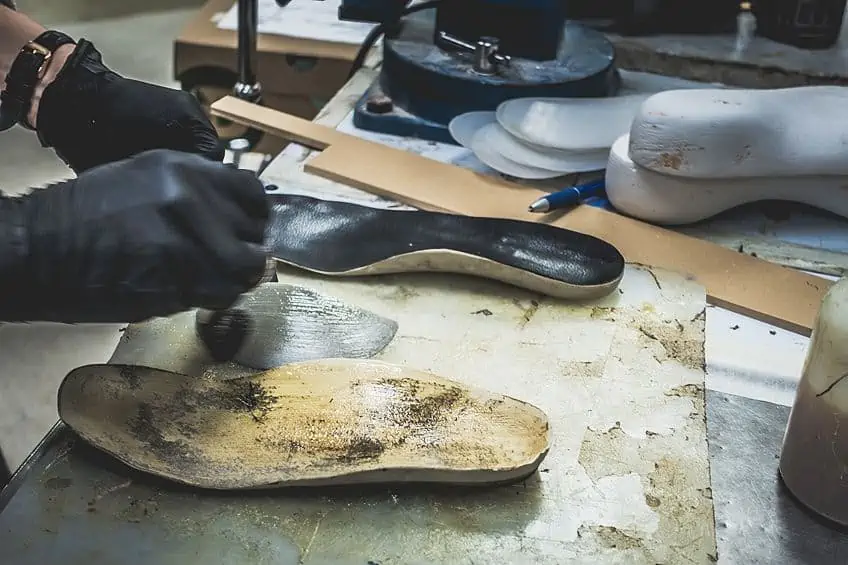
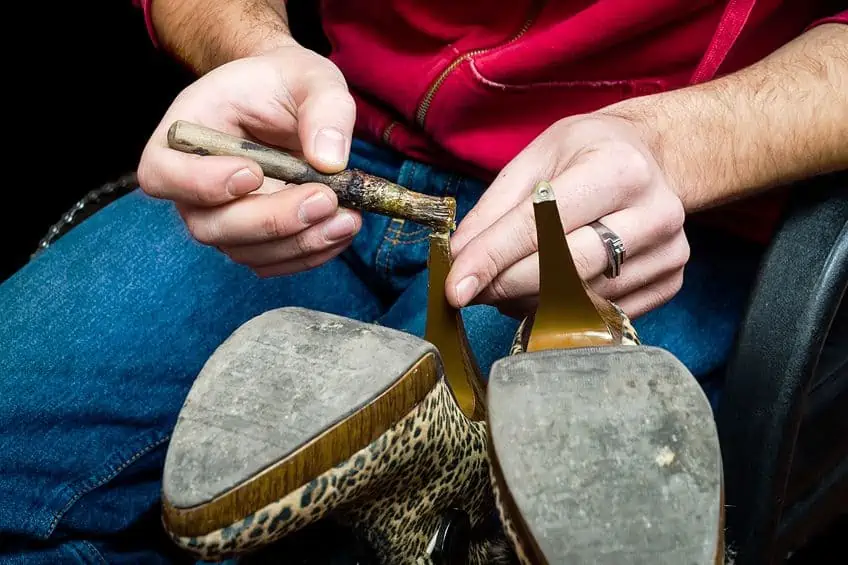
Repairing the Sole of Your Shoe
It is important to keep in mind that a shoe sole adhesive is meant for basic repairs on a small scale, but this doesn’t mean that larger repairs are not possible. If you have time, are willing to put in the elbow grease, and have the right attitude, you can repair anything within reason. Here are a few steps you can follow to bring the soles of your worn-out shoes back from the dead.
Step 1
Try to remove the sole from your shoe completely. If it is not completely removed from your shoe, you should do your best to coax it loose with a scraper, or you can try applying some heat in the form of a heat gun to melt the remaining glue. This might be more challenging if you have a stitched sole, but try to be as patient and as thorough as possible.
Step 2
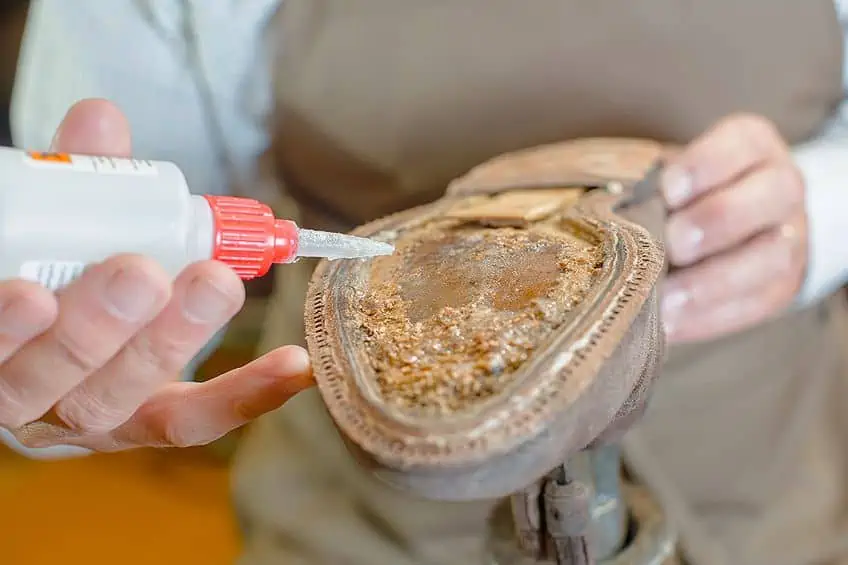
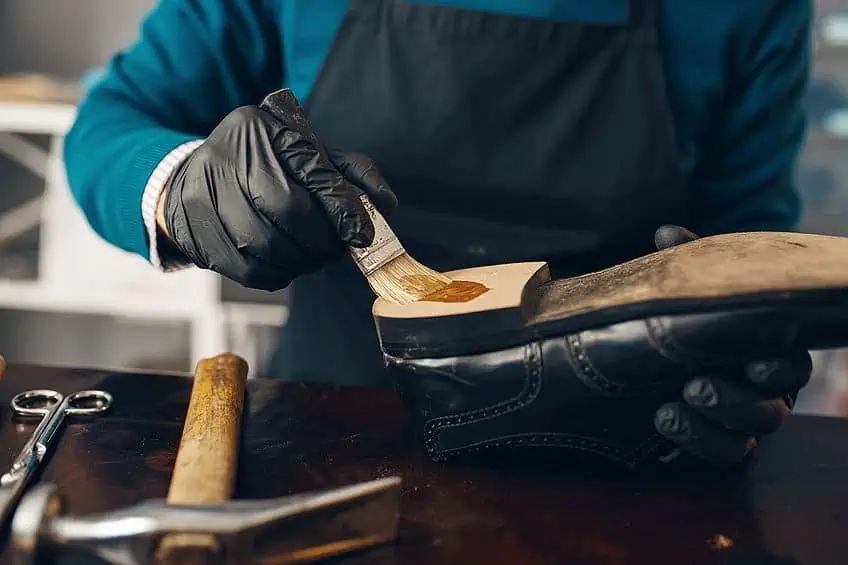
This step is one of the most important in shoe repair. Essentially, you need to prepare the surface for the shoe repair glue you have chosen. You will need to make sure that the surface is nice and rough – you can try wiping the surface down with a cloth first and then using some sanding paper to catalyze the material for the adhesive. When sanding, ensure that you get the entire surface area covered and ready to receive the adhesive. Both the surface that the adhesive is being applied to and the other surface should be prepared.
Using 120-grit sandpaper will bring about the best results when working with most shoes.
Step 3
It is finally time to apply the shoe repair glue! Make sure that you have applied it evenly to the area you have sanded. Remember, knowing the product you’re working with can mean the difference between getting it right the first time and having to try again. Once your adhesive has been applied using steady, even pressure, you can leave it for 24 hours to cure. Check what the manufacturer recommends for curing environments, although it is typically a cool, dry place.
Step 4
As we covered previously, you can use some rubber bands to ensure that the pressure is maintained during the curing process. You can get creative if you don’t have rubber bands available – we have found that some heavy books or even some tightly bound wool can do the trick. Another good trick is to use newspaper to retain the shape of your shoe during the curing process.
Frayed Shoelaces
Frayed shoelaces have been plaguing most of us since our playground days and have not gotten any easier to live with ever since Velcro went out of style in the ’90s. When the aglet at the tip of your shoelace falls or breaks off, it can make it difficult to tie your laces. If you aren’t already privy to the age-old lighter method, you can simply burn the tip of your shoelace to make it instantly go from being frayed to rock solid.

If, however, you feel like this is a bit tasteless, you can also opt for the glue method. Essentially, you will take some tape and tie it around the end of your shoelace. Once you have done this, simply apply some fast-drying superglue to the area you have taped and allow it to seep into the covered area. Give it some time to dry and then remove the tape. You will find that the aglet portion of your lace has now retained the shape of the tape that once held it, replacing your missing or broken aglet.
Quick Repair for High Heel Shoes
Whether you are having a good day or already having a bad one, a broken heel is never helpful in either case. Happening unexpectedly and breaking the sacred trust between foot and shoe, the breaking of the heel can not only put your backside on the sidewalk, but can cause some serious harm to your ankles and self-confidence.
Fortunately, there is a relatively easy fix. If the heel is partially still attached, feel free to remove it completely from the bottom of the shoe. Once removed, clean the surface of the broken-off heel as best you can. Once it is clean, sand both surfaces down with some 120-grit sandpaper and apply your glue. We find that Gorilla glue for shoe repair works well for this application. Now, depending on the adhesive you are using (always check the manufacturer’s guide), you might need to apply some pressure while the adhesive cures and hardens.
As we covered previously, you can use some rubber bands or any available objects to ensure that your heel does not move during the curing process. Be mindful not to damage your heels!
Repairing Holes
There are few things in this world worse than feeling a wet sock, on your wet foot, in a wet shoe. Shoes take a beating on a daily basis, especially if they are your favorite pair, so some holes are to be expected. However, a hole in your shoe isn’t the end of the world and we have a few tips on how to fix them.
Step 1
You know the drill by now. Clean the surface you will be working with; in this case, we recommend some rubbing alcohol around the area where the hole has formed in the sole of your shoe. Makes sure that it is clear of any sand or miscellaneous gunk around the area where the hole is situated.
Step 2
Now is the time to prepare your surface for the adhesive. Go at it with some 120-grit sanding paper and make sure that the area around the hole where the adhesive will be concentrated is nice and rough. This texture gives the adhesive something extra to stick to during the initial bonding process.
Step 3
Time to fill those holes up! Fill the hole and the area around it with your adhesive – Gorilla glue for shoe repair is good at this sort of thing because it can take a lot of punishment and is waterproof. You should have what looks like a blob of adhesive in and around your hole at this point, which you can smooth out with a tablespoon or a block of ice if you have some.
Step 4
Simply let the adhesive cure and harden for about 24 hours, undisturbed. Make sure that you sand down any extra adhesive or it might feel like walking with a stone in your shoe. Once this is done, your shoe should be good to go!
Helpful Tips for Repairing Shoes
It is common knowledge that working with substances like shoe repair glue for leather shoes and even crafting epoxies can get a bit tricky and may leave your hands and clothing in a sticky mess. Here are a few helpful tips for dealing with the glues we covered previously.
- Always work in a well-ventilated area to protect yourself from any fumes.
- Remember that adhesives do not stick to ice, so this can be a good way of cleaning up excess glue or removing unwanted spots.
- Ensure that your workpiece (shoe) is cleaned before applying any epoxy or adhesive.
- Sanding down the surface you are working with helps the substance bond to the material.
- Make sure that you know what you are working with and follow the manufacturer’s guidelines.
- Do not leave your adhesives exposed to the atmosphere or it will reduce the pot life. Ensure that you close them once done and store them in a cool, dry place.
Frequently Asked Questions
What Is the Best Glue for Leather Shoes?
Most adhesives on the market today are pretty versatile and can be used on a variety of products like leather, ceramic, plastic, wood, and even glass. Typically, the best product for leather will be an adhesive that is specifically designed for that material, so if you are looking to repair a leather jacket as opposed to a leather shoe, it is best to purchase a specialty product.
Does Shoe Glue Take Long to Dry?
The answer to this question is fairly subjective. There are glues that have ridiculously long cure times, but they typically create a stronger bond than quick-dry glues. On the other hand, there are quick-drying glues available like the ones we covered previously, and although they stick quickly, almost any adhesive in this class will take 24 hours to cure completely.
Is Superglue the Best Option for Shoe Repairs?
Well, like everything, it depends on the application. If the damage is minimal and you will not be applying any excessive forces to the affected area, then superglue might be just what you need. However, if your shoe is needed for more rouged applications, we suggest a more robust adhesive.
Are Superglues Similar to Shoe Glue?
Some shoe glues come in a two-part reactive adhesive form that creates a much stronger bond with any surface compared to most (if not all) superglues. This does not mean that superglue is entirely useless, it simply means that it is not suited for all applications and is best to use in instances where a quick fix is required.


