Learn Calligraphy – Step by Step Calligraphy Guide
Writing characters have been an integral part of human life for almost 8000 years. They were invented and used to record thoughts and experiences. In the past, it was a privilege to be able to put beautiful writing on paper. It was often only men who worked as scribes and who were allowed to record events in artistic writing. With the advent of technology, handwritten records have lost their importance in our everyday lives. Digital communication and the printed word took over. Nevertheless, life without the written word is hardly conceivable. Personal messages or occasions still require handwritten texts. The importance of handwriting is illustrated by the fact that a contract is not valid without a handwritten signature. So, writing is still an important skill to learn. Lets explore how to learn calligraphy, and the benefits of this great hobby.
What is Calligraphy?
The word calligraphy (other spellings are calligraphy or calligraphy) comes from Greek and is composed of the words “kalos” = beautiful and “graphein” = to write. It would be correctly translated as “the art of beautiful writing”. Calligraphy is by no means just beautiful handwriting, rather calligraphy is a form of expression, an aesthetic art, and also a meditative process. You may ask how to learn calligraphy? Well, like any type of art practice is best.

The History of Calligraphy
The art of beautiful writing and the possibility to give a work special expressiveness and additional dignity can be found in almost all cultures. Thus, over time, Western, Hebrew, Japanese, Chinese, and Arabic calligraphy developed.
The purposes and rules of the different types of calligraphy are very different. Hebrew calligraphy relates almost exclusively to the creation of biblical texts according to exact models. Chinese, Arabic, and Japanese calligraphy, on the other hand, are more objects of art than pieces of writing. Some are not even created to be really read but serve as mere decoration.
For many centuries, Western calligraphy had as its only goal the transmission of literary texts. For this reason, legibility was always in the foreground here. It was not until the Renaissance and Baroque that calligraphy became established as an art form. Many calligraphers of that time worked in monasteries and produced outstanding works.
With the invention of printing by Johannes von Guttenberg, however, calligraphy lost its prestige. The printed word took hold and displaced recording by means of calligraphy from the ranks of scholars. Nevertheless, many people today practice calligraphy as a relaxing hobby. In practice, modern calligraphy is still used on certificates, entries in golden books, or on posters. Even today, calligraphy impresses the viewer.
Traditional vs. Modern Calligraphy
Traditionally, calligraphy was practiced by monks. These had made it their business to design books in beautiful handwriting. Surely they also already discovered the meditative aspect of learning calligraphy and made use of it.
The traditional calligraphy used in monasteries followed fixed rules and had the goal of achieving a uniform and almost perfect appearance of the writing. A number of rules had to be observed. For example, letters have a certain shape and orientation that could not be changed.
Modern calligraphy, on the other hand, is more about the expression of feelings, which follows it’s own aesthetic and in the end produces an individual style.

Why Learn Calligraphy
It may sound easy at first to learn to write beautiful fonts, but when learning calligraphy the trick is in the details. You can only achieve truly uniform lettering through the perfect interplay of tools, posture, ink, and paper. Like learning to play a musical instrument, calligraphy is a complex process. Learning requires patience, but can also distract you from everyday life and lead to deep relaxation.
Pros
- It has a positive effect also on everyday handwriting
- The required tools of the trade are not very costly
- It can be started at any time, previous knowledge is not required
- The practice of calligraphy has a calming effect
- Produces beautiful results
Cons
- Very time consuming
- It takes a lot of practice to achieve really good results
- Calligraphy is not for the impatient
Differences Between Hand-Lettering and Calligraphy
The terms hand-lettering and calligraphy are often used interchangeably. Certainly, the two art forms have some similarities. Nevertheless, they should not be used synonymously, as there are also clear differences. This is important to understand when learning to write calligraphy.
First and foremost, both forms of lettering design focus on the handwritten word and its particular aesthetic presentation. Hand-lettering and calligraphy thus add a personal touch to any writing. They also follow some common basic rules.
The big difference is that hand-lettering is not the typeface, but each individual letter as an art object. This must be individually decorated and designed. Handlettering thus offers a much wider scope of design than calligraphy.
The writing utensils used also differ. In hand-lettering, an ink pen is used that is equipped with either a flexible brush tip or a firm wedge tip. While in calligraphy the writing instrument of first choice is still the pen with a metal nib.
So while calligraphy is the “art of beautiful writing”, hand lettering in its true sense, refers to the art of beautiful “letter painting”.
Equipment Needed for Learning to Write Calligraphy
To start the hobby of calligraphy you need a few selected utensils. A writing instrument, high-quality paper, and good ink are the main tools of a calligrapher. To enjoy calligraphy for a long time, you should pay attention to quality. Otherwise, you may be disappointed with the results and give up the hobby too easily.
Since calligraphy depends on the perfect interaction of writing instruments, paper, and ink, it is important to decide which scripts you want to learn before buying a calligraphy set. Each script requires a different nib and possibly a different ink.
Over time, if you have fun and enjoy calligraphy, you will also learn different fonts and acquire a wider variety of nibs and inks. Apart from the pen, nib, and ink, you only need cleaning agents. To properly clean your writing instrument, you will need a lint-free cloth, a water bottle, and rubbing alcohol.

The Writing Instrument
In order to achieve an even typeface in calligraphy, the writing instrument must glide easily over the paper. This can only be achieved with a nib. For this reason, even modern calligraphers in most cases resort to the nib holder with attachable nib, which has been known from time immemorial.
Of course, there are now also alternatives such as the calligraphy fountain pen, the calligraphy brush or the calligraphy fiber pen. These writing instruments certainly have their justification for certain purposes and are also used by calligraphy professionals. However, they cannot convey the real calligraphy writing experience.
Under no circumstances should a commercial fountain pen with a cartridge be used for calligraphy. With such a pen, you can write beautiful handwriting on paper, but not a calligraphic work of art.
The Calligraphy Pen
The nib holder is, so to speak, the handle for the nib to be attached. It can be made of wood, metal, plastic, or glass. No matter which material you choose, the nib holder should always fit comfortably in your hand.
Besides the material, you can also choose between two different shapes. Firstly, there is the oblique pen holder, i.e. the slanted pen holder. It was originally designed for right-handers only but is now also available for left-handers. On the other hand, there is a straight nib holder.
For each shape and material, you will find different price ranges. Starting with a pen holder for around €$4 up to $400 expensive designer pieces. When buying this item, you should worry more about the feeling than the price.
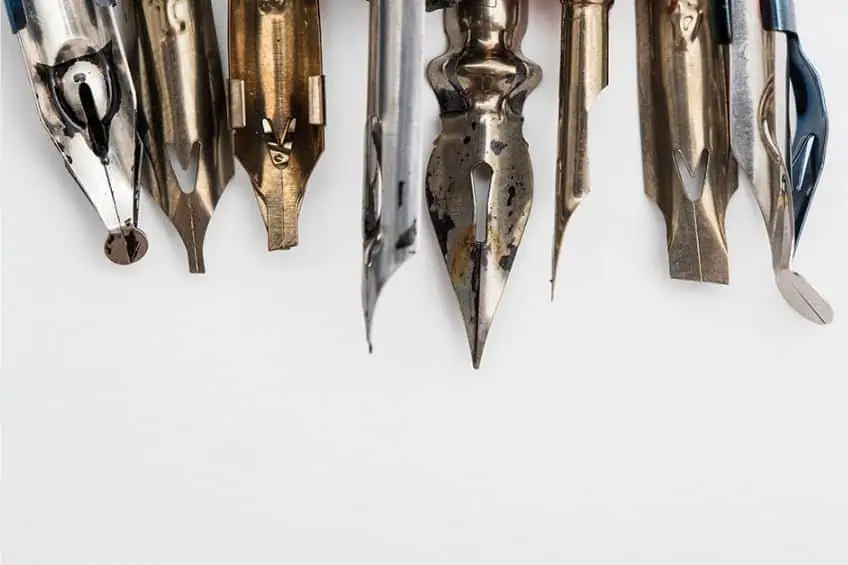
The Nib
Nibs for calligraphy are always made of metal and are offered in an infinite number of designs. For each calligraphy font there is also a particularly suitable form of the nib. Nibs that were used for very old scripts are sometimes no longer produced and are only available as antique collector’s items.
You can also purchase nibs in all price ranges. The only important thing about any nib is that it glides effortlessly over the paper and does not scratch or stick. Cheap products often have their weaknesses here. Therefore, it should be noted here again that for the hobby of calligraphy really little hand tools are necessary, but this should be of very good quality.
No matter which model you choose in the end, you do not have to pay attention to the compatibility with the nib holder. Modern nibs are standardized and therefore fit in every nib holder. Nib holders have a small clip, also called a globe, into which the nib is inserted with a little resistance. The nib should fit tightly and not wobble. We would like to briefly introduce you to the most common nib options below:
Pointed Nib
A pointed nib is best suited for beginners. It is a kind of all-round nib with which different line thicknesses can be created by varying the pressure. It is suitable for fonts that live precisely through these lines of varying thickness, such as copperplate.
The pointed nib is available in different categories extra-fine, fine, medium, and broad. The finer the tip, the thinner the line that can be drawn.
Pointed nibs also differ in their elasticity. The more elastic the spring is and the more pressure is applied to it, the thicker the lines can become. The disadvantage is that as the elasticity of the nib increases, the ability to control it decreases. Beginners should therefore tend to use firmer pointed nibs.
Pointed nibs take ink by dipping them into the inkwell, preferably at least halfway, where the small hole in the nib can be seen. To start with, it is best to buy a set of different springs. This way you can try out which nib is best suited for your needs.
Tension Springs/Ribbon Nibs
Ribbon nibs are also called broad nibs or round nibs. These nibs are also used with a nib holder, of course. Their tip is very broad, so it is also suitable for all broad, Gothic and broken calligraphy, such as Gothic texture.
Ribbon nibs produce a thin line when guided sideways and a thick one when guided downwards. Broad nibs can only be pulled; if they are pushed, no ink flows.
Ribbon nibs are filled with ink on the side with a brush. In general, band tension springs are beveled on the right and are therefore also suitable for right-handers. However, left-beveled band tension springs are also available that are suitable for left-handers.
Poster Nibs
Poster nibs are similar to the broad nib. However, they are a bit wider. In addition, ink also flows here when pushed. Poster nibs are used for very large, powerful type forms.
Cord Tension Springs/String Nibs
String nibs are also known as ornamental or plate nibs. They have an even nib stroke, only edging the nib changes the thickness of the line drawn. These nibs are excellent for cursive writing.
Double Bar Nib
As the name suggests, this nib draws two parallel lines with one stroke. Mostly these are differently strongly pronounced. This type of nib is no longer manufactured. The nowadays still available double stroke nibs are mostly antique pieces.
Drawing Pen Nibs
Drawing nibs are very fine and are hardly suitable for writing, as they get stuck in the paper too quickly

Fine Writing Fountain Pen With Ink
The ink reservoir of the calligraphy pen offers the advantage that you can write for a very long time without having to refill ink. The reservoir can be in the form of a disposable cartridge or a reusable piston that can be filled with the appropriate ink. Many higher-end models have such a piston, other manufacturers offer converters to replace the disposable cartridge.
No matter which system the fountain pen is equipped with, the ink inside must be able to flow well and therefore be quite thin. And therein lies the disadvantage of the fountain pen. Thin-bodied ink is not lightfast and fades quickly when exposed to light.
Calligraphy pens are equipped with a non-changeable metal nib. However, you can buy several fountain pens, each with different width nibs.
Brush Pen
The brush pen or calligraphy brush is mainly used for special Asian calligraphy. In the meantime, however, it is also used in modern calligraphy for certain fonts and for hand-lettering.
The brush tip responds to pressure with lines of varying thickness, imitating drawing with an elastic nib. Since the plastic tip is very robust, a brush pen is also suitable for younger users and beginners who find a nib too delicate.
Calligraphy Fiber Pen With Wedge Tip
The fiber pen or ink pencil with a wedge tip is well suited for beginners to make their first experiences with calligraphy. They create the typical image of calligraphic lettering with thin and wide lines. However, this is not done by applying different amounts of pressure, but by using the wide side or the corner by manually rotating the pen.
The pressure with which you work should always be constant with an ink pencil with a wedge tip. Calligraphy fiber pens come in different widths.
The Ink
The calligraphy pen is dipped into an inkwell. This should not contain conventional blue ink as used for the school fountain pen. This dries much too unevenly, is very thin, not lightfast, and is water soluble. The color would not appear evenly intense everywhere with this ink and would ruin the typeface.
Instead, a very good black drawing ink is used. This contains high-quality color pigments that are lightfast. The added binder makes the ink more viscous. In addition, ink is eraser-resistant, which is very useful when letters have been drawn in pencil. Drawing ink is also available under the names India or Sumi Ink or also as Chinese ink.
The Paper
Perfect calligraphy requires a high-quality background. Therefore, use very good paper to create your artwork. Calligraphy paper has a particularly smooth surface, so the drawing ink cannot “bleed”. You can use layout paper, drawing cardboard, or watercolor paper effectively for calligraphy.
Copy paper is not suitable at all due to the rough surface on which the nib would stick. Especially in the beginning, the paper should be slightly transparent which facilitates the use of practice sheets. You place these sheets, on which horizontal and diagonal guide lines are drawn, under your writing paper. These guide lines make it easier for you, especially at the beginning, to find the correct proportions between large and small letters and the correct slope of the writing.
Calligraphy Techniques
If starting out with calligraphy, there are a number of techniques and tricks to follow. Below are some pointers for getting calligraphy right.

The Correct Hand Position
It is very important to practice the correct posture of the writing instrument from the beginning. Only with the correct posture will the letters turn out well. Once acquired incorrectly, posture errors are difficult to correct.
Brushpen Posture
The brush pen is held like a normal pen. To use the width of the brush tip, it makes sense to hold it a little flatter. This allows you to get optimal results from the pen.
Pointed Feathers Hand Position
Nib holders with a pointed nib are positioned between the thumb and index finger, with the middle finger serving as support from below. The little finger and the ring finger serve as a support on the blade. In this way, you can achieve an even pressure that you can control perfectly.
Hand Position for the Belt Tension Spring
Traditionally, a ribbon nib is held between the thumb and middle finger. The ring finger stabilizes the nib holder from above. The little finger is the spacer to the writing paper.
Holding Calligraphy Fountain Pens Correctly
Calligraphy fountain pens are held like normal fountain pens. Many models have recessed grips that support proper finger placement.
Calligraphy for Beginners – Step by Step
Interested in getting started with calligraphy? Following the right steps is important to getting this artform done properly. Below is a basic tutorial to follow on how to do calligraphy for beginners.

Prepare the Workplace
When learning how to do calligraphy, preparation is the first step. For right-handers, all the necessary writing utensils and also the inkwell should be placed within easy reach on the right-hand side of the workstation. If you are left-handed, position everything on the left side. A slightly inclined work surface or drawing board may be advisable for many. A clipboard with several sheets of paper should be used as a base.
For calligraphy, you need a lot of room for your arm. The curves in this form of writing do not come from the wrist alone. So make sure you have room to move. To prevent back problems and cramps in the hand-arm-shoulder area, ensure an upright comfortable sitting position.
Prepare the Spring
A new nib has an oil coating, which protects it from rust. However, this oil also prevents ink from adhering to the nib. Therefore, before the first use, it is necessary to wash the nib thoroughly with soap or rubbing alcohol. Alternatively, it can be put in a potato for a quarter of an hour and then rinsed. After drying properly, it will be ready for use.
First Exercises With the Calligraphy Writing Tool
Before you take the pen in your hand, warm up your fingers. Writing is not as good with cold fingers. The basic exercises for any calligraphy beginner should consist of simple strokes and swings. The pen is always held at a 45° angle to the page.
First, you should learn to pull downstrokes (from top to bottom) with a little more pressure and upstrokes (from bottom to top) with almost no pressure. Once you have mastered this exercise, you can move on to the first wave movements. With the wave exercises, you learn to vary the pressure in a flowing movement to achieve an even image.
Once you have familiarized yourself with the basic techniques, you can start writing your first letters. For this purpose, you can find a variety of letter templates, writing samples, and practice sheets on the Internet. Be patient at this point! Practice each letter as you did in school and write it many times until it seems perfect enough. Only when all the letters really come easily to you should you dare to take the next step.
Connecting the letters is one of the greatest challenges of modern calligraphy. Here it is important to pay attention to smooth transitions and regular spacing. This must also be practiced over and over again until you have developed a good feeling for it.
To practice the letters and lettering, it is worthwhile to use practice sheets. These have guide lines drawn on them to help you find the correct proportions and the correct slant of the letters.
Calligraphy ABC – The Alphabet
To learn calligraphy fonts you need templates. These are reproduced exactly until the template and copy match perfectly. For this purpose, it is important not only to study the strokes and line weights exactly but also to pay attention to the order of the strokes. There are two ways to learn the letters of the calligraphy alphabet:
- Tracing: This method is the best way to prevent mistakes from creeping in. By tracing the letters directly from a template, you will notice any deviations immediately. The letters of the alphabet should be traced until you have internalized the movements.
- Copying: Books, documents, or signs on which the desired script can be seen serve as templates. If you want to teach yourself the calligraphy alphabet by means of construction, you must now study the individual letters very carefully and reconstruct them in every detail. This requires some work and mistakes creep in easily.

Calligraphy Templates
Calligraphy templates are available for every level of practice. Whether simple swing exercises, single letters, or complete lettering. The templates are placed under the slightly transparent writing paper. You can prevent the template from slipping by sticking it to your desk with adhesive tape.
In addition to these writing templates, exercise sheets are also very often used. A grid of different lines is printed on these. These auxiliary lines ensure that your letters have the correct proportions so that the typeface looks even. The grid of an exercise sheet consists of several horizontal lines.
The baseline is where all your letters sit on. The line directly above the baseline (x-line) is where all the lowercase letters end. The top line is the endpoint for all uppercase letters. Between the top line and the x-line is another k-line. At the same distance, but below the baseline, you see the p-line denoted. The p and k lines are the endpoints for the upper and lower case letters, such as lowercase t,l or p,q,y. The slanted lines drawn in the grid will give you orientation for the correct angle of inclination of your letters.

Calligraphy Fonts
There are different fonts for calligraphy. For example, the Gothic texture, Copperplate, Fraktur and the Kurrent font. In each font, the letters have their own unique appearance and different materials are needed to write the fonts correctly.
In the beginning, you should commit to one font that you want to learn. Once you have mastered this font, you can move on to others.
Copperplate
This font has a lot of filigree curlicues. Therefore, a very precise stroke, which is subject to strict rules, is necessary. Thick strokes and thin upstrokes combine to create an elegant typeface. A pointed nib is used to bring this typeface onto the paper. Since the typeface in Copperplate is disturbed by even the smallest errors, this font is not suitable for beginners.
Gothic Texture and Fracture
These two scripts are often associated with the typical calligraphy scripts of the Middle Ages. A lot of pen strokes are needed to draw the fine decorations, especially of the large letters.
Tips and Tricks for Starting Calligraphy
- Do not press too hard with the spring, it could get stuck and cause blobs
- A spread should always be written without pressure
- Clumping ink may need to be slightly diluted, be sure to use a pipette to do this
- Irregularities in the typeface can also come from clumpy ink on the nib, clean the nib in between uses with clear water and a lint-free cloth
- Spreads and smears should be parallel to each other
- Top and bottom lengths should be even
- All letters should sit on the baseline
- Make sure there is even spacing between the letters
- You can achieve nice effects with certain style elements, but too many different styling effects disturb the harmony of the typeface
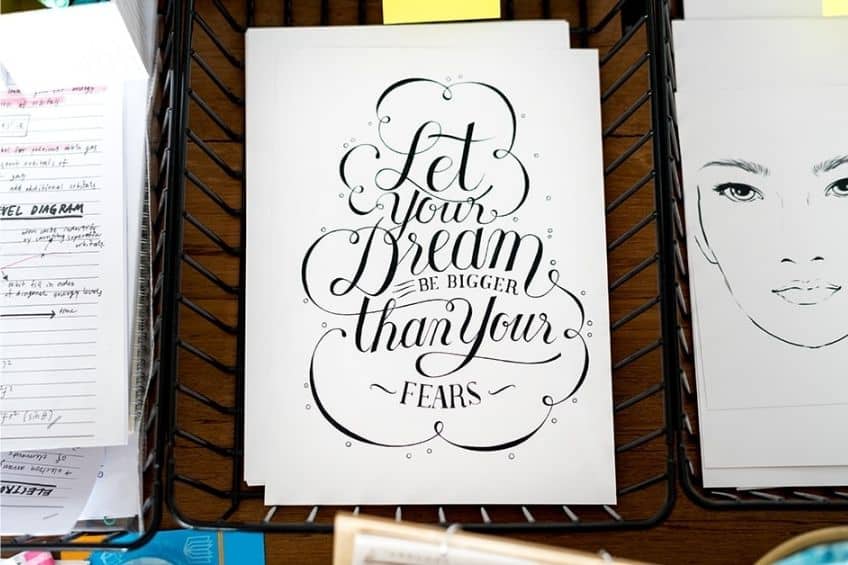
Creative Ideas for Calligraphy
Of course, the goal of every calligraphy enthusiast is to create entire sayings, poems, quotes, certificates or invitation cards with the beautiful handwriting they have learned. Beyond that, however, there are many small ideas where calligraphy can be incorporated. For example, how about adding calligraphy to gift tags, name tags, small greeting messages, or simple labels.
The recipient, the reader, and the calligrapher themself will certainly take great pleasure in finding this beautiful art in the little things of everyday life.
Frequently Asked Questions
How Do You Learn Calligraphy?
To learn calligraphy you do not need any special knowledge. Basically, anyone who enjoys beautiful writing can start with this hobby. Admittedly, you should bring a little patience, because to achieve a really beautiful typeface you need to practice a lot. You can learn calligraphy alone at home or in groups with a calligraphy teacher.
Learning Through a Course
Meanwhile, calligraphy has become a popular hobby. So it is not surprising that workshops and courses on this topic are popping up. So if you want to learn the craft in a group with an experienced calligrapher, you will certainly find a suitable offer in your area.
If there is really no possibility to participate in a course in your area, you will certainly find something online. Here, too, there are a variety of online courses on the subject of calligraphy. The advantage of online courses is that you can watch the lessons several times. In addition, there is often an additional and longer-term exchange of participants in forums or social media groups. Just remember that even a professional calligraphy course will not replace independent practice!
Teaching Yourself
If you want to teach yourself calligraphy by self-study, you certainly need more discipline and patience, but you can manage this very well with good reading and relevant videos. For the self-taught among you, we would like to share a few tips for self-study:
- To keep the material and time investment manageable, first decide on a font you want to learn
- Find out which nib is suitable for your chosen typeface and purchase the appropriate material.
- Books are great and helpful, but you can see the details better in videos
- Use practice sheets! These are available for the various stages of proficiency, from stroke and swing exercises to alphabets, to practice sheets with guide lines, there is a suitable tool for every level of practice on offer.
- Draw letters and lettering with a soft pencil. Erasing after the ink has dried is no problem. Drawing ink is resistant to erasing.
- Whether the lettering of the gift tag or the writing of the greeting card: Use every opportunity that everyday life offers you to practice!
How Do You Clean Calligraphy Utensils?
Ink is waterproof after drying, so you should rinse the nib with clean water immediately after use. Dry the nib very well afterward to prevent it from rusting. Avoid holding the nib and nib holder under the faucet, water can get into the globe of the nib holder and cause rust.
The nib holder itself should also be cleaned of ink residue with a damp cloth and dried well. Wooden models in particular do not like moisture in the long term. The inkwell should only be stored in a tightly closed state to prevent it from drying out.
We hope that our article has whetted your appetite for the hobby of calligraphy. This is a really fun artform that can provide many practical uses to impress people and make you proud of your writing.


