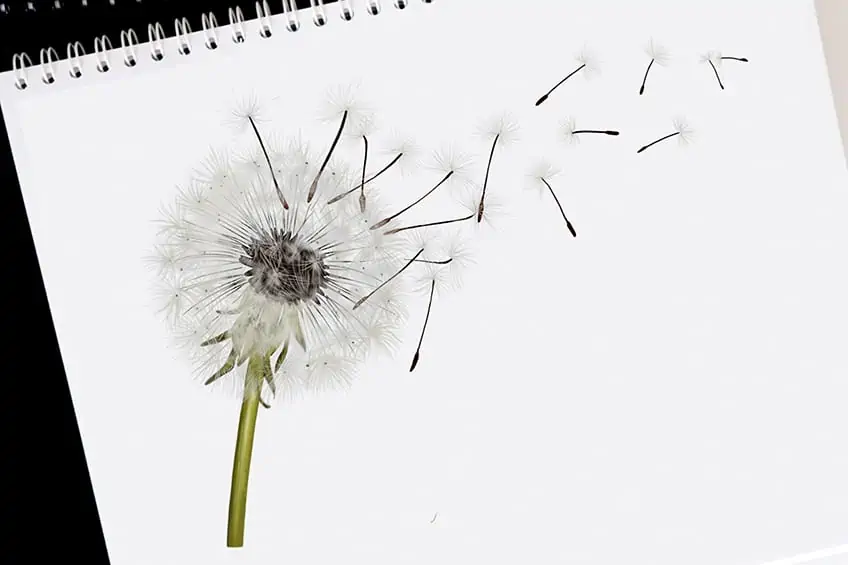
How to Draw a Dandelion – Sketch a Dandelion With Flying Seeds
Dandelions are fascinating plants, some say they are weeds, and some say they are good to make a wish! In this tutorial, we will explore the method for how to make a realistic dandelion drawing in 15 easy steps. We will look at the shape of the flower and how to use color and shading to create and bring out the details of a dandelion. Join us and let’s learn how to draw a dandelion.
How to Draw a Dandelion: A Step-by-Step Tutorial for All Ages
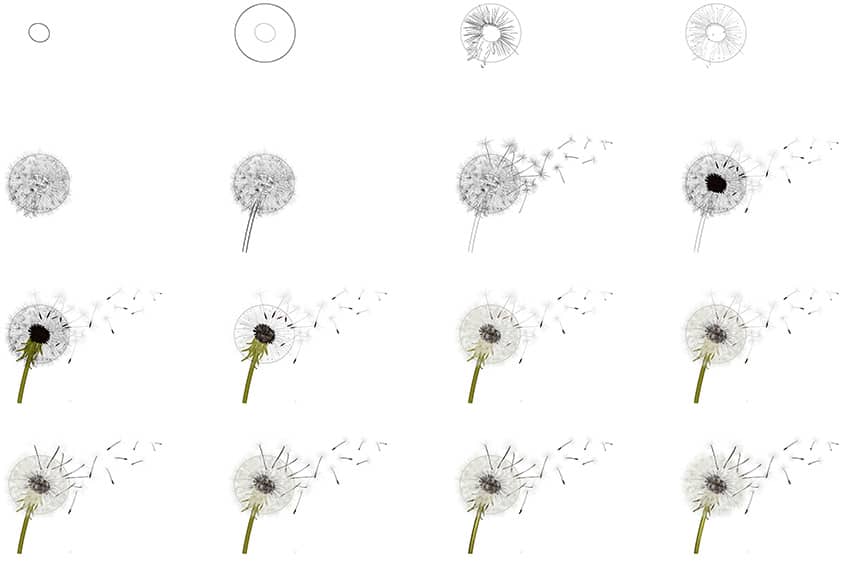
With any type of drawing, we must first lay down the foundation to build on or develop. The same principle is used for this drawing. The dandelion is particularly tricky to draw due to its soft and fluffy shape. We must begin by placing our shapes in the correct proportions when we build realistic dandelion flower heads. Give yourself ample space on your page or canvas for the entire drawing. Please see the outline of the whole dandelion drawing steps below.
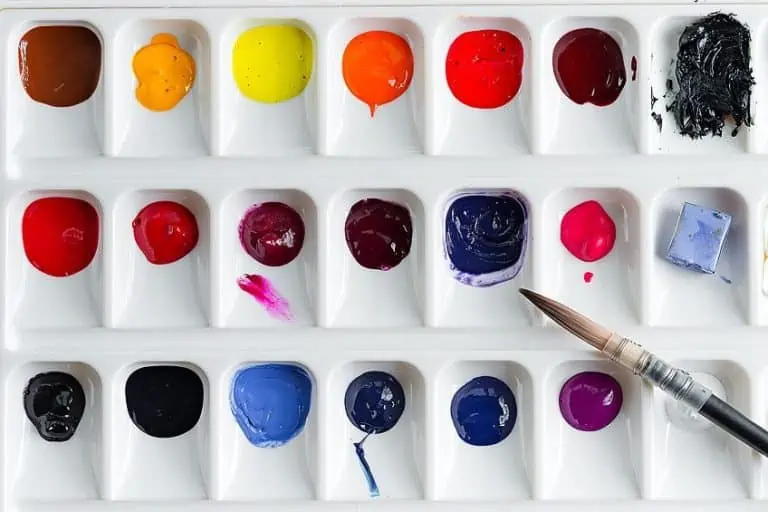
Dandelions are white in appearance, but we will add color to the dandelion drawing. For the coloring phase, you can use any medium you want. The tutorial is created for a painting medium, but if you would like to use coloring pencils or a digital drawing tablet, then you can choose to alter the steps to suit you. Gather your tools and let’s begin.
Step 1: How to Draw a Dandelion Flower Head
We begin the dandelion drawing by laying down the foundation shape of the seed pod. Be sure to use a soft pencil because we will erase the lines after we establish the flower’s shape. Find the middle area of your page, and draw a small oval shape. Make it lean slightly to the right, we want to create movement as if the dandelion is moving in the wind. If you are using a digital drawing tablet, then be sure to separate the layer for this foundation step.

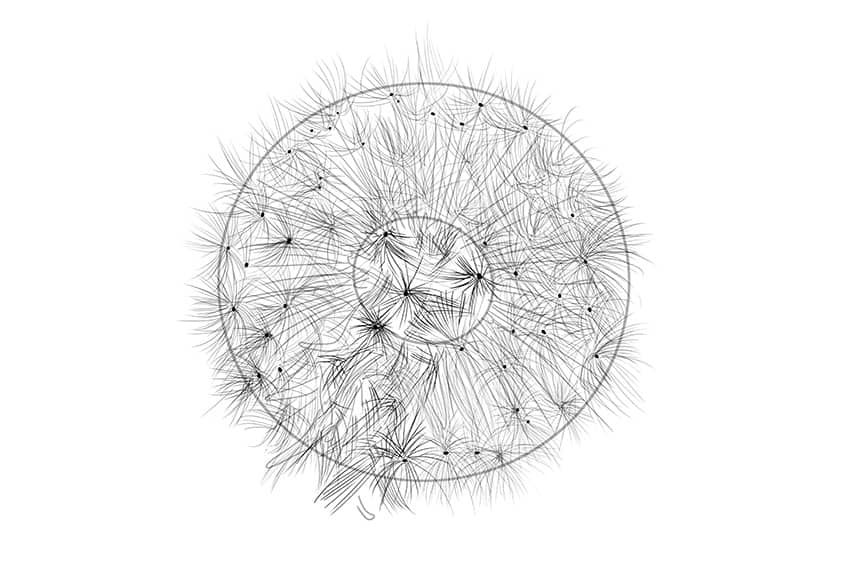
Step 2: How to Draw a Dandelion Seed Head Outline
In step one we created the main seed head and this is the center of the Dandelion. Now we will outline the dandelion seeds which are known as flyers. Add a large second circle around your oval foundation shape. Draw this very lightly, as this is purely a guide on how to draw the seeds and how far they extend, and will be erased at the end of the drawing process. See the picture below.

Step 3: How to Draw the Seed Lines of the Dandelion
The next step is to plan and add the seeds to our dandelion drawing. We have established the oval-shaped seed pod and the outlined larger circle. We can start drawing the seeds from the center pod. Draw several lines that spread outwards using your larger circle as a gentle border. Try not to draw to the actual line because we must add more seeds at a later step. To complete this phase, please add a couple of leaf-shaped lines at the bottom left-hand edge of the circle, this will be where we add the stem at a later stage. See the example below.

Step 4: How to Draw Dandelion Seeds
Next, we will focus on the details of the Dandelion seed head. Begin this phase by adding small dots above the seed lines, and add dots sporadically around the larger circle. The dots must be clearly noticeable.

Step 5: How to Draw the Details of a Dandelion
This step will require patience and will take a little time. The more meticulous you are in this step, the better the end result. Draw gentle curvy lines from every dot you created in step Four. Focus on not going too much over the larger circle, make it look natural and with movement. Every line you draw should be curved and inwards, take it easy. For extra guidance please see the image below.
Step 6: How to Draw the Dandelion’s Stem
Well done for completing the beginning stages of your dandelion sketch flower head. In the next part we will focus on is the dandelion stem. To create depth with your sketch, draw your stem lines over the outer part of your large foundation circle. Draw the two stem lines with a curve as you draw the lines downwards away from the flower head to the left of your page or canvas.
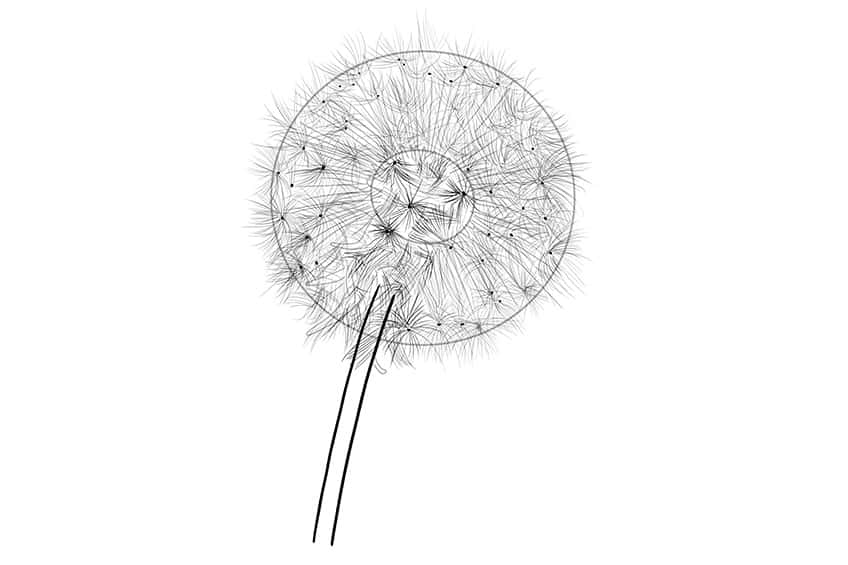
Step 7: How to Draw the Flying Seeds of a Dandelion
In the earlier steps of our how-to-draw-a-dandelion tutorial, we explained that we need to create movement in our dandelion sketch. To do this we will now draw flying seeds as if they were being blown off of the dandelion head. Start this by drawing a few individual seed hairlines. Draw small oval seeds and continue the line upwards and complete with little hairline umbrella style tops. Do a few around the dandelion flower head and then a few smaller ones moving away from the flower itself. This will mimic a wind effect, remember to keep it light and fluffy in your pencil or brush stroke.

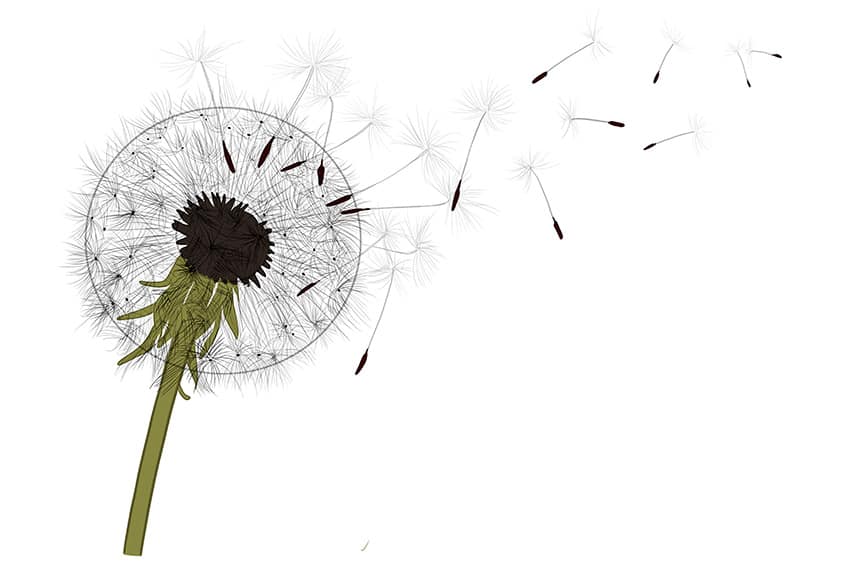
Step 8: How to Color the Seeds of the Dandelion
In this next step, we will add color to the seeds and center the seed pod. We will take a darker brown paint or colored pencil. For the painters following this tutorial, we suggest using a small blending paintbrush for the center seed pod. Use a small paintbrush for the seeds of the “flyer seeds”. Make sure to use the same color.

Step 9: How to Add a Base Color to the Stem of Your Dandelion Drawing
You will need an olive shade of green paint or colored pencil for this phase. If you are using paint please select a small blending brush for this step. Fill in the stem of the dandelion sketch by adding an olive-green color. In step three you added “leaf-shaped” lines at the base of your stem lines. This is part of the dandelion base and should also be olive green. See the image below for extra guidance.
Step 10: How to Trace the Seeds With Color in Your Dandelion Drawing
Next, you will take a sharp paintbrush or pencil crayon with white paint. Take care while you add white to the top of the seed hairlines.

Step 11: How to Enhance Your Dandelion Drawing’s Seeds With Color
With this step, we want to make the seeds stand out from one other by using a cream color paint or color pencil to create depth under the white color used in step 10. We used the white color to define the end ‘seed’ hairline and now you will use the cream color and trace the lines of the seeds. Use a fine paintbrush to trace every dandelion seed and fill in the space between the lines.

Step 12: How to Darken the Center Lines of Your Dandelion Drawing
At this stage, your dandelion should be taking shape and it mainly consists of fluffy hairline seed heads. Now you will create more definitive lines on the seeds as you trace over each seed and you will do this using a darker shade.

Step 13: How to Darken the Floating Seeds of Your Dandelion Drawing
In this step, we will focus on the flying seeds. Use a sharp paintbrush with black paint or a colored pencil and trace the whole body of each flying seed.
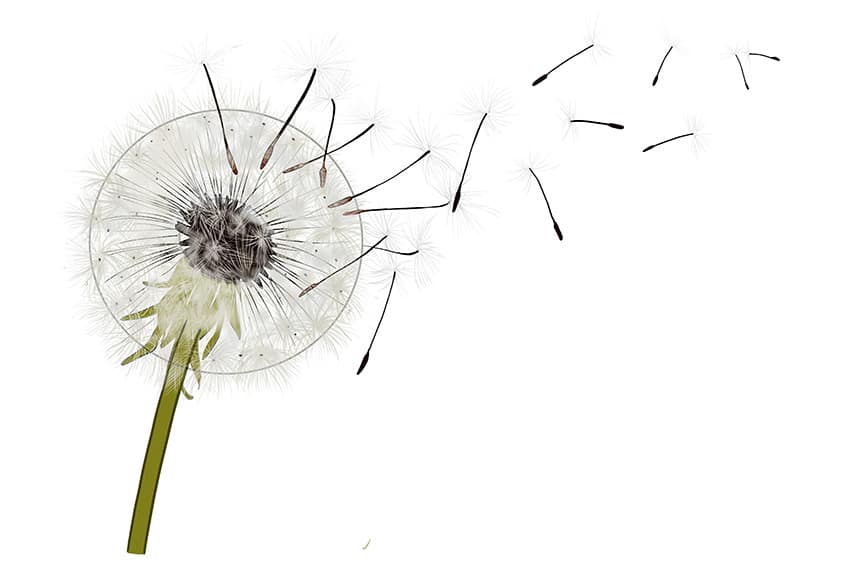
Step 14: How to Enhance the Hairline on the Flying Seeds of Your Dandelion Drawing
We are almost finished with our dandelion sketch. In this semi-final stage, you will take cream paint or colored pencil to outline the fine hairlines on the ends of the floating seeds.

Step 15: How to Finish Your Realistic Dandelion Drawing
It is time for the final touches. The dandelion stem needs some attention, let’s add shading and texture. To complete this part, you will need to take a blending paintbrush or color pencil and add some yellow and then white paint to highlight the center of the stem. To end off your realistic dandelion drawing you must erase the large foundation circle from step two. That is the border of your seed head. Tidy the erased line by adding a few brush strokes or lines around the dandelion’s seed hairlines.

Congratulations! You have completed your own lovely realistic dandelion drawing. It’s simple once you follow our easy steps to learning how to draw a dandelion tutorial to create a soft and realistic dandelion sketch.
Frequently Asked Questions
How Do You Make a Realistic Dandelion Drawing?
Making a realistic dandelion drawing can seem daunting because it looks like a soft and delicate flower. It is light and airy, so it can be challenging to get the shading and colors correct when using a white surface. In this dandelion drawing tutorial, you will manage to create a very realistic dandelion sketch in a few simple steps.
What Is the Most Difficult Part of Creating a Dandelion Sketch?
The most difficult part of drawing a dandelion is making the white flower tips on a white surface. This can be done with shading and the use of creams and light greys. You can use a darker paper to practice this technique.

Learn more about Israel Benloulou and about us.