
How to Draw a Book – Create Your Own Picture of an Open Book
Books play a huge role in our lives and are loved by everyone! From fictional storybooks to history books and classroom textbooks, books are everywhere! One thing most of us can agree on is that curling up with a good book is the best way to end the day. Have you ever wanted to learn how to draw a book? Does book drawing scare you and seem like an impossible task? Fear not, for in our how-to-draw-a-book tutorial today, we will teach you everything you need to know about easy book drawing in just 18 easy steps! Now, get your art supplies ready, find a space to set up your materials, and let us begin!
Our Easy Book Drawing Step-by-Step Guide
While you may think book drawing is difficult, it is actually a simple object to sketch. Our easy book drawing guide is suitable for both the more experienced artist and the novice beginner. In this picture, we show you what to expect from this tutorial on how to draw a book step by step. As you can see, we will teach you how to create construction lines and even how to color, shade, and highlight your drawing of a book.

We encourage you to use the medium of your choice as this “how to draw a book” tutorial is easy to adapt. We show our book drawing instructions for those who choose paint as their medium. Feel free to use a drawing tablet, acrylic paint, pencils, pastels, or any medium you like!
Step 1: Sketching the Base of Your Easy Book Drawing
Decide where on your canvas or page the very center of your book drawing will be. Once this has been determined, you can begin drawing a large and angled rectangle using a pencil. As you can see, this will be the base of your book drawing.

Step 2: Sketching a Dividing Line on Your Drawing of a Book
All you need to do in this step of our easy book-drawing tutorial is to draw a line through the center of the rectangle. This will later become your book’s spine.

Step 3: Adding Shape to the Outer-Edge Pages of Your Book Drawing
You will now add more detail to create the book’s outer edging. Simply outline the sides of the book along the outskirts of the rectangle and add nooks in the corners of the rectangle. You can also emphasize the book’s spine by creating an indent.

Step 4: Shaping the Upper Curve of the Book’s Pages
You will now create the open page shape. On the top line of your rectangle, you will create an “M” type shape. The center of the “M” will meet the book’s spine. As the image details, each end of the “M” shape will sweep and extend towards the book’s outer edges.

Step 5: Outlining the Lower Pages of Your Book Drawing
You can now outline the top page layers of your book drawing and complete the lower section. Begin by following the edges of the upper curve and extending down with two straight lines. These should be just within the book’s base rectangle. As you reach the bottom of your rectangle you should draw these lines to meet the spine of the book. You will also need to create a small hump shape near the spine of your book.

Step 6: Creating the Top Pages of Your Easy Book Drawing
You can now outline the spread-open upper pages of your book drawing. Again, simply draw a line on both short sides of the rectangle, starting at either end of your “M” shape. Try to follow the image example we have drawn so that your book has a proper height perspective. To complete your step, you will draw another “M” shape, this time on the lower end of the book.

Step 7: Adding Detailed Layering to Your Book Drawing
Beginning with the page layers, you can now add more detail to your easy book drawing. You will now draw some lines to represent the pages of your book. Make sure to use a fine and sharp pencil so that your pages appear thin and realistic.

Step 8: Sketching Your Book Drawing’s Final Outline
You can now outline your book drawing. Start by sketching the book’s four corners and adding some curves for detail. You can then complete the outer cover of your book by adding a couple of small lines to divide within the lower line of the spine of your book. Once complete, you can erase any construction lines that are still showing.

Step 9: Applying the Base Color to Your Book Drawing’s Cover
The first layer of color to be added will be your book’s cover color. We have chosen brown, but you can use any color you wish. Select a small paintbrush and evenly apply a layer of paint around the pages and along the edges.

Step 10: Adding the Base Color to Your Book’s Pages
We have decided to color our book’s pages a very light cream color. Using a regular paintbrush, evenly apply this color to your book’s pages.
Step 11: Applying Color to the Book’s Metal-Edge Details
In our example image you will notice that our book has metal edging. Therefore, for this part, you can use a regular paintbrush along with some light gray paint to create the same effect.

Step 12: Adding Shading to Your Book’s Cover
You can now start to create a more third-dimensional effect on your drawing of a book. Starting with your book’s cover, take a bit of black paint and a small blending paintbrush. Simply add a light layer of paint around your book drawings’ inner edge. You want to be sure that the color of the cover is still visible.

Step 13: Contouring the Book’s Pages
We will now contour the pages on our drawing of a book. Select a dark cream paint and a small blending paintbrush. The right side of the spine of your book or center line is where you should place your focus, as well as on the upper-page edging and outer edges of the pages.

Step 14: Applying More Shading to Your Book Drawing’s Pages
Now you can apply a darker shadow to your easy book drawings pages by using a softer blending brush and a tiny amount of black paint. You can darken the page corners and the shading along the spine.

Step 15: Applying Highlights to Your Book’s Cover
You will now add highlights to your book drawing to help make it look even more realistic. Take a small blending paintbrush and a light shade of caramel paint for this step. You can add highlights to all of the page edgings.

Step 16: Adding Shading to the Corner Details of Your Easy Book Drawing
You will now create more shading on the corner details of your easy book drawing. This will help make your book seem even more realistic. Take a small amount of black paint along with a small blending paintbrush and simply create more shadow on the corner’s outer edges. Remember to build the color up gradually – less is more when using dark colors.

Step 17: Completing Your Book Drawing
To create a seamless finish on our drawing of a book, you can remove outlines by tracing over the existing lines with a corresponding paint color.

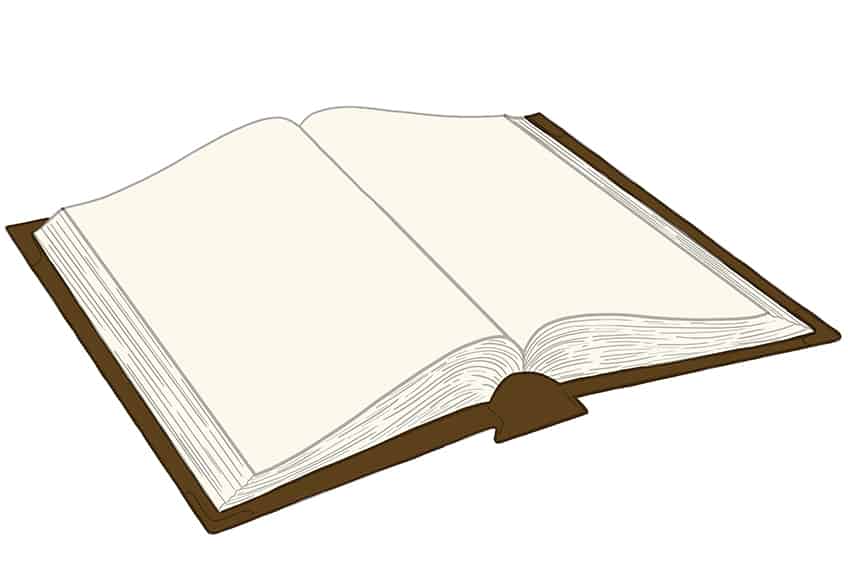
Step 18: Applying Shadow Around Your Drawing of a Book
For the final step, you can pick up a soft blending paintbrush and a bit of black paint to create a shadow on your book drawing.

Our guide on how to draw a book step by step has finally come to an end! We hope you are satisfied with your drawing of a book and hope that you will keep practicing your book drawing skills! Remember, you can color your book any color you wish. Perhaps drawing an entire bookshelf is the next skill to master?
Frequently Asked Questions
Is It Easy to Learn How to Draw a Book?
How to draw a book is very easy when you have a drawing tutorial like this one to teach you in 18 easy steps. Our easy book drawing guide will show you how to sketch your book’s basic shape, and pages and then add realism by adding shading and highlights.
Can I Use Any Colors for My Book Drawing?
Yes, you can use any color you want for your book, especially the cover of the book. We do suggest using the same color we suggest for your book’s pages because it is the most life-like color for this part of your book drawing.

Learn more about Israel Benloulou and about us.


